SMX Programming Manual for the SMX Module - OEM Automatic AB
SMX Programming Manual for the SMX Module - OEM Automatic AB
SMX Programming Manual for the SMX Module - OEM Automatic AB

Create successful ePaper yourself
Turn your PDF publications into a flip-book with our unique Google optimized e-Paper software.
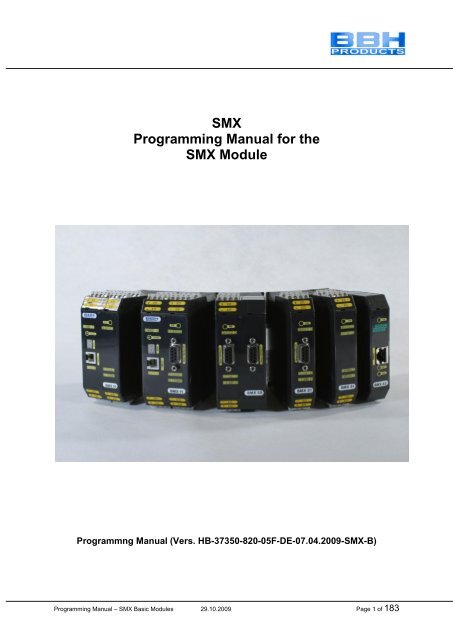
<strong>SMX</strong><br />
<strong>Programming</strong> <strong>Manual</strong> <strong>for</strong> <strong>the</strong><br />
<strong>SMX</strong> <strong>Module</strong><br />
Programmng <strong>Manual</strong> (Vers. HB-37350-820-05F-DE-07.04.2009-<strong>SMX</strong>-B)<br />
<strong>Programming</strong> <strong>Manual</strong> – <strong>SMX</strong> Basic <strong>Module</strong>s 29.10.2009 Page 1 of 183
Table of Contents<br />
Contents<br />
TERMS ....................................................................................................................... 7<br />
PLC .................................................................................................................................................................... 7<br />
SafePLC ............................................................................................................................................................. 7<br />
<strong>SMX</strong> ................................................................................................................................................................... 7<br />
Function block (functional module) ................................................................................................................... 7<br />
Function block diagram (function block diagram (FBD) language ) .................................................................... 7<br />
InPort / OutPort .................................................................................................................................................. 7<br />
Linkage ............................................................................................................................................................... 7<br />
Connector ........................................................................................................................................................... 7<br />
Attribute ............................................................................................................................................................. 7<br />
Routes ................................................................................................................................................................. 7<br />
Signal list ............................................................................................................................................................ 7<br />
Signal cell ........................................................................................................................................................... 7<br />
PLC input signal list ........................................................................................................................................... 8<br />
PLC output signal list ......................................................................................................................................... 8<br />
Instruction list (IL) ............................................................................................................................................. 8<br />
Compilation ........................................................................................................................................................ 8<br />
Function block group ......................................................................................................................................... 8<br />
Function block types .......................................................................................................................................... 8<br />
Message window ................................................................................................................................................ 8<br />
Info display ......................................................................................................................................................... 8<br />
Configuration ..................................................................................................................................................... 8<br />
MOUSE AND KEYBOARD COMMANDS .................................................................. 9<br />
Mouse dependent actions ................................................................................................................................... 9<br />
Keyboard commands .........................................................................................................................................10<br />
BRIEF DESCRIPTION OF PROCEDURE .................................................................11<br />
General note ......................................................................................................................................................11<br />
"Push & Pop" when inserting function blocks ..................................................................................................11<br />
LOGIC DIAGRAM .....................................................................................................14<br />
TERMINAL DIAGRAM ..............................................................................................14<br />
LOGIC DIAGRAM .....................................................................................................16<br />
PREPARING THE WIRING .......................................................................................18<br />
MESSAGE WINDOW ................................................................................................19<br />
PROGRAM CREATION ............................................................................................20<br />
<strong>Programming</strong> <strong>Manual</strong> – <strong>SMX</strong> Basic <strong>Module</strong>s 29.10.2009 Page 2 of 183
TRANSFERRING THE PROGRAM ON THE <strong>SMX</strong> MODULE ...................................21<br />
Connection settings ..............................................................................................................................................21<br />
Connection dialog .................................................................................................................................................22<br />
Validation dialog ..................................................................................................................................................23<br />
DIAGNOSTIC FUNCTIONS ......................................................................................24<br />
Procedure <strong>for</strong> logic diagram diagnose ...............................................................................................................26<br />
The Scope Monitor ...............................................................................................................................................28<br />
Procedure when measuring with <strong>the</strong> scope........................................................................................................29<br />
Preparing <strong>the</strong> measurement ...............................................................................................................................30<br />
"Start" measurement ..........................................................................................................................................30<br />
"Stopping" a measurement and viewing data ....................................................................................................30<br />
Measuring schemes ...........................................................................................................................................30<br />
DIAGRAM MANAGEMENT ......................................................................................33<br />
Diagram access ..................................................................................................................................................33<br />
Program in<strong>for</strong>mation .........................................................................................................................................34<br />
CONFIGURATION REPORT ....................................................................................35<br />
PROGRAM DEVELOPMENT AIDS ..........................................................................38<br />
Info display ...........................................................................................................................................................38<br />
Signal tracking .....................................................................................................................................................38<br />
Copying attributes into <strong>the</strong> message window.....................................................................................................38<br />
Quick selection .....................................................................................................................................................39<br />
PREDEFINED FUNCTION BLOCKS ........................................................................40<br />
Sensor interface .................................................................................................................................................40<br />
Digital inPorts ...................................................................................................................................................40<br />
<strong>SMX</strong> outPorts ....................................................................................................................................................41<br />
ADDING INPORT BLOCKS ......................................................................................42<br />
Starting behaviour .............................................................................................................................................43<br />
Start test .............................................................................................................................................................44<br />
START-UP TEST ......................................................................................................47<br />
START AND RESET ELEMENT ...............................................................................48<br />
ANALOG INTERFACE .............................................................................................52<br />
Analog inPort Ain1 / Ain2 ................................................................................................................................52<br />
INSERTING OUTPORT ELEMENTS ........................................................................55<br />
<strong>Programming</strong> <strong>Manual</strong> – <strong>SMX</strong> Basic <strong>Module</strong>s 29.10.2009 Page 3 of 183
Relais outPort ....................................................................................................................................................55<br />
Semi-conductor outPort .....................................................................................................................................56<br />
HiLo Outport .....................................................................................................................................................57<br />
EMU Function ...................................................................................................................................................58<br />
THE LOGIC MODULES ............................................................................................59<br />
Logic AND ............................................................................................................................................................59<br />
Logic OR ...............................................................................................................................................................59<br />
Logic EXKLUSIV OR .........................................................................................................................................60<br />
Logic NOT ............................................................................................................................................................60<br />
RS Flip Flop ..........................................................................................................................................................61<br />
Timer .....................................................................................................................................................................62<br />
Permanently logic "1" module ............................................................................................................................63<br />
Result of <strong>the</strong> EMU module ..................................................................................................................................63<br />
CONNECTING POINT INPORT ................................................................................64<br />
CONNECTING POINT OUTPORT ............................................................................65<br />
SIGNAL CHANNEL ..................................................................................................66<br />
Logic data ..........................................................................................................................................................66<br />
Process data .......................................................................................................................................................68<br />
FUNCTION GROUPS ...............................................................................................69<br />
Creating a function group frame ........................................................................................................................69<br />
Inserting a group module ...................................................................................................................................69<br />
Opening <strong>the</strong> group editor ...................................................................................................................................69<br />
Setting <strong>the</strong> group management ..........................................................................................................................70<br />
Changing <strong>the</strong> size of a group frame ...................................................................................................................72<br />
Showing and hiding functional modules ...........................................................................................................72<br />
Creating <strong>the</strong> group interface ...............................................................................................................................73<br />
Setting <strong>the</strong> usage................................................................................................................................................73<br />
Restrictions ........................................................................................................................................................74<br />
Procedure <strong>for</strong> Creating a Function Group ........................................................................................................75<br />
1. Step: Adding interface modules ...............................................................................................................75<br />
2. Step: Adding functional modules to <strong>the</strong> group ........................................................................................75<br />
3. Step: Set up connection............................................................................................................................76<br />
4. Step: Connect group interface ..................................................................................................................76<br />
5. Step: Set connection restrictions ..............................................................................................................76<br />
Testing function groups .....................................................................................................................................76<br />
Disabling a function group ................................................................................................................................76<br />
Exporting a function group .................................................................................................................................76<br />
<strong>Programming</strong> <strong>Manual</strong> – <strong>SMX</strong> Basic <strong>Module</strong>s 29.10.2009 Page 4 of 183
Importing a function group .................................................................................................................................77<br />
THE SAFETY FUNCTIONS ......................................................................................78<br />
POSITION AND SPEED SENSORS .........................................................................79<br />
Parameterization of <strong>the</strong> measuring section ........................................................................................................80<br />
Sensor 1 or Sensor 2 ..........................................................................................................................................82<br />
Encoder type ......................................................................................................................................................82<br />
None ........................................................................................................................................................82<br />
Incremental ..............................................................................................................................................82<br />
SIN / COS ................................................................................................................................................82<br />
Absolute ...................................................................................................................................................83<br />
Data <strong>for</strong>mat ..............................................................................................................................................83<br />
SSI binary ................................................................................................................................................83<br />
SSI-GrayCode ..........................................................................................................................................83<br />
SSI-WCS .................................................................................................................................................83<br />
Proxi Switch 1Z .......................................................................................................................................83<br />
Proxi Switch 2Z 90°.................................................................................................................................83<br />
Direction of rotation ..........................................................................................................................................83<br />
Resolution .........................................................................................................................................................83<br />
Sensor info field ................................................................................................................................................84<br />
Determination of <strong>the</strong> Resolution with Regard to Different Characterized Measuring Lengths: ..................86<br />
Rotational measuring length ..............................................................................................................................86<br />
Input example 1 .................................................................................................................................................87<br />
Linear measuring length ....................................................................................................................................89<br />
Input example 2 .................................................................................................................................................90<br />
The Sensor Info Field shows <strong>the</strong> following result entries: ................................................................................93<br />
SAFETY MODULES .................................................................................................94<br />
SEL (Safe Emergency Limit) ..............................................................................................................................95<br />
Input example 1 .................................................................................................................................................98<br />
SLP = (Safe Limited Position) ...........................................................................................................................100<br />
SCA (Safe Cam) .................................................................................................................................................103<br />
Input example: .................................................................................................................................................106<br />
SSX (Safe Stop 1/ Safe Stop 2) ..........................................................................................................................107<br />
Input example: .................................................................................................................................................111<br />
SLI (Safe Limited Increment) ...........................................................................................................................112<br />
Activation example: ........................................................................................................................................114<br />
Input example: .................................................................................................................................................114<br />
SDI (Safe Direction Indication) .........................................................................................................................115<br />
Activation example: ........................................................................................................................................116<br />
Input example: .................................................................................................................................................116<br />
SLS (Safe Limited Speed) ..................................................................................................................................117<br />
Input examples: ...............................................................................................................................................121<br />
SOS (Safe Operating Stop) ................................................................................................................................123<br />
Input example 1 ...............................................................................................................................................125<br />
<strong>Programming</strong> <strong>Manual</strong> – <strong>SMX</strong> Basic <strong>Module</strong>s 29.10.2009 Page 5 of 183
Input example 2 ...............................................................................................................................................125<br />
SAC (Safe Analog Control) ...............................................................................................................................126<br />
PDM (Position Deviation Muting) ....................................................................................................................128<br />
ECS (Encoder Supervisor) ................................................................................................................................131<br />
I/O MODULE EXTENSION <strong>SMX</strong>31 .........................................................................133<br />
Equipment selection ...........................................................................................................................................133<br />
Management of additional inPorts/outPorts ....................................................................................................133<br />
Selection of inPorts and outPorts ....................................................................................................................133<br />
Identification of inPorts: ..................................................................................................................................134<br />
Identification of outPorts: ................................................................................................................................134<br />
Input of Logic Address <strong>for</strong> Communication ....................................................................................................134<br />
APPENDIX PROCESS IMAGE ...............................................................................136<br />
Introduction ........................................................................................................................................................136<br />
Description of Function Elements .....................................................................................................................137<br />
PLC – Commands ...........................................................................................................................................137<br />
Designation of safety functions .......................................................................................................................138<br />
Input variables in logic diagram ......................................................................................................................139<br />
PLC Processing ..................................................................................................................................................142<br />
PLC - Syntax ...................................................................................................................................................142<br />
PLC – Commands ...........................................................................................................................................143<br />
PLC – Elements (I/O) ......................................................................................................................................144<br />
PLC - Output variables ....................................................................................................................................145<br />
PLC - Processing elements ..............................................................................................................................147<br />
PLC - Processing list .......................................................................................................................................147<br />
Assignment of resources .................................................................................................................................148<br />
APPENDIX ENCODER COMBINATIONS ..............................................................149<br />
FAULT TYPES <strong>SMX</strong> ...............................................................................................150<br />
DISPLAY OF FAULT TYPES ..................................................................................151<br />
<strong>SMX</strong>.. without expansion modules ...................................................................................................................151<br />
<strong>SMX</strong>.. with expansion modules .........................................................................................................................151<br />
ALARM LIST <strong>SMX</strong> ..................................................................................................152<br />
FATAL ERROR LIST <strong>SMX</strong> .....................................................................................172<br />
<strong>Programming</strong> <strong>Manual</strong> – <strong>SMX</strong> Basic <strong>Module</strong>s 29.10.2009 Page 6 of 183
Terms<br />
PLC<br />
Programmable Logic Controller, equals <strong>the</strong> German designation <strong>for</strong><br />
Speicherprogrammierte Steuerung (SPS). The term PLC is exclusively used within<br />
<strong>the</strong> <strong>SMX</strong> system.<br />
SafePLC<br />
Program editor <strong>for</strong> <strong>the</strong> graphical preparation of sequencing programs using <strong>the</strong><br />
functional block method, as well as <strong>the</strong> parameterization of sensor, actuators and<br />
o<strong>the</strong>r technological functions used.<br />
<strong>SMX</strong><br />
Modular safety control with integrated technological functions. The behaviour of <strong>the</strong><br />
<strong>SMX</strong> system is defined by a user configuration and <strong>the</strong> associated logic operations.<br />
Function block (functional module)<br />
<strong>Module</strong> in a PLC-control that influences <strong>the</strong> program sequence of a PLC-program<br />
ei<strong>the</strong>r physically or logically. A physical (hardware) function block is e.g. a push<br />
button or an output on <strong>the</strong> <strong>SMX</strong> module. However, <strong>the</strong> logic operation (such as AND<br />
or OR) of input and output signals within a PLC is also referred to as a function block.<br />
Function block diagram (function block diagram (FBD) language )<br />
Graphically oriented, function block based, descriptive "programming language" acc.<br />
to IEC 1131, serving <strong>the</strong> purpose of visualizing logic operations of inPorts and<br />
outPorts on function blocks of a PLC control. The logic diagram shows <strong>the</strong> functional<br />
modules and <strong>the</strong>ir logic operations in a graphical <strong>for</strong>m. (engl. Function Block Diagram<br />
FBD)<br />
InPort / OutPort<br />
Location on a function block which can be used <strong>for</strong> linkage to o<strong>the</strong>r function blocks.<br />
Linkage<br />
a named connection between<br />
a.) a function block outPort and a function block inPort.<br />
b.) a PLC inPort and a function block inPort.<br />
c.) a function block outPort and <strong>the</strong> PLC outPort.<br />
Connector<br />
Connecting point between <strong>the</strong> beginning and <strong>the</strong> end of a linkage with an inPort and<br />
an outPort of a function block<br />
Attribute<br />
Non-graphical feature of a function block. An attribute consists of a designator and a<br />
value.<br />
Routes<br />
Horizontal and vertical alignment of linkages in a logic diagram, so that intersections<br />
with function blocks are avoided and linkages with identical connector are merged at<br />
an early stage (related to distance to <strong>the</strong> target function block).<br />
Signal list<br />
Signal lines into and out of <strong>the</strong> PLC, represented in a table.<br />
Signal cell<br />
Selectable area within <strong>the</strong> signal list, which can be provided with a comment.<br />
<strong>Programming</strong> <strong>Manual</strong> – <strong>SMX</strong> Basic <strong>Module</strong>s 29.10.2009 Page 7 of 183
PLC input signal list<br />
Signal lines entering into <strong>the</strong> PLC, represented in <strong>for</strong>m of a table. In SafePLC <strong>the</strong><br />
PLC inPorts can be designated by <strong>the</strong> user. They have an unambiguous number and<br />
must be assigned to <strong>the</strong> inPorts of a function block.<br />
PLC output signal list<br />
Signal lines leaving <strong>the</strong> PLC, represented in <strong>for</strong>m of a table. In SafePLC <strong>the</strong>se<br />
outPorts can be designated by <strong>the</strong> user and, just like <strong>the</strong> inPorts, have an<br />
unambiguous identification number.<br />
Instruction list (IL)<br />
Assembler-like programming language that can be loaded into a central <strong>SMX</strong><br />
module. The duty of SafePLC is <strong>the</strong> generation of an instruction list based on defined<br />
function blocks, as well as <strong>the</strong>ir attributes and linkages.<br />
Compilation<br />
Compilation and verification of <strong>the</strong> function plan created in SafePLC and <strong>the</strong><br />
associated parameters.<br />
Function block group<br />
Classification of function blocks according to <strong>the</strong>ir positioning ability in <strong>the</strong> logic<br />
diagram (inPort, outPort, logic).<br />
Function block types<br />
More detailed identification of function blocks within a group. (e.g. "Emergency Stop")<br />
Message window<br />
Output window with several lines, embedded in a Windows Toolbar element. This<br />
display window is used <strong>for</strong> <strong>the</strong> output of errors, warnings and in<strong>for</strong>mation from <strong>the</strong><br />
program to <strong>the</strong> user. The message window can be switched on and off.<br />
Info display<br />
Delayed display of in<strong>for</strong>mation about a function block, following <strong>the</strong> Windows Tool Tip<br />
mechanism. The mouse pointer must be dragged across an object to display this<br />
in<strong>for</strong>mation.<br />
Configuration<br />
Configuration is <strong>the</strong> generic term <strong>for</strong> a monitoring program and <strong>the</strong> associated<br />
parameter <strong>for</strong> permissible deviations or minimum and maximum values. In this<br />
context it is important to note that a monitoring program always comes with fur<strong>the</strong>r<br />
data, <strong>the</strong> program can refer to.<br />
<strong>Programming</strong> <strong>Manual</strong> – <strong>SMX</strong> Basic <strong>Module</strong>s 29.10.2009 Page 8 of 183
Mouse and keyboard commands<br />
Mouse dependent actions<br />
Left mouse button on a function block Selected representation<br />
(highlight), whereby previous selections become invalid.<br />
Note: If <strong>the</strong> CTRL key is pressed while "Setting Markers", <strong>the</strong> associated<br />
"Marker OutPort" blocks will also be selected.<br />
Shift + Left mouse button on function block: Multiple selection (adding<br />
to an existing selection).<br />
Ctrl + Left mouse button on selected function block: Deselection of<br />
block (removal from selection).<br />
Delete key: Deletes <strong>the</strong> elements of an existing selection incl. connections!<br />
Double-clicking on function block: Editing of settings.<br />
Right mouse button on a function block: Display of context menu <strong>for</strong><br />
function block.<br />
Right mouse button in drawing area: Display of context menu <strong>for</strong><br />
drawing area.<br />
Left mouse button on connector: Highlights <strong>the</strong> existing linkage(s).<br />
Ctrl + movement of mouse pointer over an object: Display of<br />
in<strong>for</strong>mation data, even if <strong>the</strong> display has been disabled via <strong>the</strong> menu.<br />
Turning <strong>the</strong> scroll wheel on <strong>the</strong> mouse: Dynamic zooming of <strong>the</strong> logic<br />
diagram.<br />
Moving <strong>the</strong> mouse with <strong>the</strong> scroll wheel depressed: Moving <strong>the</strong> logic<br />
diagram.<br />
<strong>Programming</strong> <strong>Manual</strong> – <strong>SMX</strong> Basic <strong>Module</strong>s 29.10.2009 Page 9 of 183
Keyboard commands<br />
Ctrl + Q: Start zoom-in command<br />
Ctrl + W: Start zoom-out command<br />
Ctrl + A: Zoom all command<br />
Ctrl + I: Switch automatic info display on/off<br />
Ctrl + O: Open file<br />
Ctrl + S: Save file<br />
Ctrl + M: Switch message window on/off<br />
Ctrl + N: New file<br />
Esc: Deselection of marked elements<br />
Erase: Erases selected objects<br />
Ctrl+arrow left: Logic diagram LineScroll left<br />
Ctrl+arrow right: Logic diagram LineScroll right<br />
Ctrl+arrow up: Logic diagram LineScroll up<br />
Ctrl+arrow down: Logic diagram LineScroll down<br />
<strong>Programming</strong> <strong>Manual</strong> – <strong>SMX</strong> Basic <strong>Module</strong>s 29.10.2009 Page 10 of 183
Brief Description of Procedure<br />
The program SafePLC is a graphically oriented editor <strong>for</strong> <strong>the</strong> creation of a PLC-based<br />
monitoring program <strong>for</strong> an <strong>SMX</strong>-system.<br />
General note<br />
The program requires write and read rights of <strong>the</strong> user logged in to <strong>the</strong> PC that is<br />
used <strong>for</strong> programming. Missing access rights can lead to side effects in logic diagram<br />
debugging or cause problems when saving logic diagrams to directories with limited<br />
rights.<br />
"Push & Pop" when inserting function blocks<br />
Click on an icon in <strong>the</strong> toolbar or a menu option ("Push") to switch to insert mode.<br />
This mode is identified by a changed mouse pointer. Simply click on <strong>the</strong><br />
corresponding location to insert ("Pop") <strong>the</strong> selected function block. The "Esc"-key<br />
cancels this mode.<br />
Please proceed as follows to create an application:<br />
1. Selection of <strong>the</strong> device type to be programmed<br />
Once SafePLC has been started, or if a new logic plan is to be created, <strong>the</strong> following<br />
selection dialog will appear.<br />
<strong>Programming</strong> <strong>Manual</strong> – <strong>SMX</strong> Basic <strong>Module</strong>s 29.10.2009 Page 11 of 183
In a first step <strong>the</strong> system resources to be used must be selected on module level.<br />
- Selection of basic module<br />
- Number of I/O expansion modules See also: Equipment expansion<br />
- For equipment with analog processing set <strong>the</strong> corresponding switch<br />
Note:<br />
Due to <strong>the</strong> associated resources and <strong>the</strong>ir management in <strong>the</strong> programming<br />
environment, <strong>the</strong> set equipment type cannot be changed any more at a later date.<br />
2. Determination of periphery in terminal diagram<br />
The terminal diagram represents <strong>the</strong> connections to sensors and actuators of <strong>the</strong><br />
<strong>SMX</strong>-system.<br />
The following procedure is recommended:<br />
For modules with speed and position monitoring <strong>the</strong> definitions of sensors<br />
used and <strong>the</strong>ir parameters are required.<br />
The editor can be opened by double-clicking on <strong>the</strong> sensor configuration<br />
icon:<br />
Note:<br />
A red icon indicates <strong>the</strong> missing parameterization.<br />
For a module with analog processing <strong>the</strong> interfaces used must be<br />
parameterized.<br />
Note:<br />
A red icon indicates <strong>the</strong> missing parameterization.<br />
Selection of input and periphery modules (Emergency Stop, safety doors,<br />
sensors, etc.) via <strong>the</strong> toolbar "Input elements"<br />
Selection of required output modules (semi-conductor output, relay output, etc.)<br />
<strong>Programming</strong> <strong>Manual</strong> – <strong>SMX</strong> Basic <strong>Module</strong>s 29.10.2009 Page 12 of 183
3. Definition of monitoring functions and logic modules in <strong>the</strong> logic<br />
diagram<br />
The logic diagram shows <strong>the</strong> logic modules and <strong>the</strong>ir internal linkage<br />
<strong>Programming</strong> of <strong>the</strong> logic diagram by using:<br />
Logical and processing elements.<br />
Monitoring modules <strong>for</strong> drive monitoring (this is only possible, if <strong>the</strong><br />
associated sensors had been defined).<br />
Timers, flip-flops (trigger elements) and terminal blocks.<br />
After choosing <strong>the</strong> required modules, <strong>the</strong>se are subsequently linked with each o<strong>the</strong>r.<br />
For this purpose drag <strong>the</strong> mouse pointer across a "start connector", press<br />
<strong>the</strong> left mouse button and connect via a "target connector" in active state. Conclude<br />
this process by deactivating <strong>the</strong> left mouse button.<br />
<strong>Programming</strong> support by o<strong>the</strong>r diagnose and analysis tools.<br />
This includes <strong>the</strong> Info display, signal tracking, display of function block<br />
attributes in <strong>the</strong> message window , as well as quick localizing of modules in <strong>the</strong> logic<br />
diagram by double-clicking on <strong>the</strong> coloured BlockID in <strong>the</strong> message window.<br />
4. Compilation of monitoring program<br />
After completion of <strong>the</strong> programming process <strong>the</strong> logic diagram is compiled and<br />
trans<strong>for</strong>med into a machine readable <strong>for</strong>mat.<br />
This process consists of:<br />
Examination of open connectors in <strong>the</strong> logic diagram<br />
Examination of boundary conditions <strong>for</strong> <strong>the</strong> monitoring functions<br />
Examination of <strong>the</strong> correct assignment of input signatures<br />
Creation of a machine readable <strong>for</strong>mat <strong>for</strong> <strong>the</strong> <strong>SMX</strong>-system<br />
5. Program transfer to basic <strong>SMX</strong> module<br />
Setting <strong>the</strong> COM outPort<br />
Transfer of <strong>the</strong> machine program<br />
Testing <strong>the</strong> program on <strong>the</strong> <strong>SMX</strong> module<br />
Disabling <strong>the</strong> logic plan after approval<br />
Preparation of <strong>the</strong> configuration report and validation of <strong>the</strong> configuration<br />
<strong>Programming</strong> <strong>Manual</strong> – <strong>SMX</strong> Basic <strong>Module</strong>s 29.10.2009 Page 13 of 183
Logic Diagram<br />
SafePLC saves <strong>the</strong> configuration, <strong>the</strong> program sequence and <strong>the</strong> chosen<br />
parameterization as a Windows documents with <strong>the</strong> file name extension "*.plc<strong>SMX</strong>".<br />
The logic diagram is subdivided into field, which can take up <strong>the</strong> function blocks. The<br />
function blocks are inserted and displaced within this raster. Overlapping of function<br />
blocks is not possible.<br />
Within <strong>the</strong> logic diagram <strong>the</strong> two views "terminal diagram" and "logic diagram" are<br />
available <strong>for</strong> <strong>the</strong> user.<br />
The programmer is able to toggle between <strong>the</strong>se views as desired:<br />
Menu: View -> Change layout<br />
Keyboard: Crtl + Tab<br />
Control button in <strong>the</strong> toolbar "Drawing Aids"<br />
Permanent status display:<br />
In <strong>the</strong> left upper corner of <strong>the</strong> logic diagram you find a status display with <strong>the</strong><br />
following meanings:<br />
Active logic diagram view: Text "terminal diagram" or "logic diagram" in<br />
compliance with <strong>the</strong> chosen context.<br />
Actual diagram access: Padlock symbolizes locked diagram.<br />
Compiler status: The background colour of <strong>the</strong> status display has <strong>the</strong><br />
following meaning:<br />
o Red: Logic diagram has not been compiled or is faulty<br />
o Green: Logic diagram has been compiled without faults, diagram<br />
can be transferred to <strong>the</strong> <strong>SMX</strong>-system.<br />
Terminal Diagram<br />
The terminal plan describes <strong>the</strong> external port assignments in a <strong>SMX</strong>-system to <strong>the</strong><br />
chosen sensors and actuators. When creating a new diagram (File->New...) <strong>the</strong><br />
terminal diagram shows all available inPorts and outPorts, as well as fur<strong>the</strong>r sensor<br />
interfaces (encoders, analog sensors).<br />
Definition of sensor interface:<br />
Determination and parameterization of sensor interface and analog interface<br />
Definition of inPorts and outPorts:<br />
Selection and parameterization of inPorts and outPorts<br />
When inserting a new or double-clicking on an already existing function block, <strong>the</strong><br />
associated attribute editor is opened and <strong>the</strong> parameters can be modified.<br />
<strong>Programming</strong> <strong>Manual</strong> – <strong>SMX</strong> Basic <strong>Module</strong>s 29.10.2009 Page 14 of 183
Status display of logic<br />
diagram<br />
Semi-conductor -<br />
outPorts on <strong>SMX</strong><br />
module<br />
Relay - outPorts on<br />
<strong>SMX</strong> module<br />
Sensor function block<br />
Input signal list<br />
Periphery elements tro<br />
be inserted<br />
OutPorts <strong>for</strong> EMU<br />
monitoring<br />
InPorts <strong>for</strong> short-circuit<br />
monitoring<br />
Analog signal blocks<br />
internal relays and<br />
semi-conductor<br />
elements to be inserted<br />
If function blocks are inserted into <strong>the</strong> terminal diagram, <strong>the</strong> elements will<br />
automatically be wired. In some instances it may happen, that <strong>the</strong> connections are<br />
unfavourably displayed. However, this does not affect <strong>the</strong> function! When moving <strong>the</strong><br />
corresponding block, <strong>the</strong> connecting wiring will be redrawn and may appear more<br />
distinctly.<br />
Tip: Start at <strong>the</strong> left edge of <strong>the</strong> logic diagram and add modules from top to bottom.<br />
Note: Since no logic elements must be defined in this view, <strong>the</strong> corresponding<br />
commands are disabled.<br />
<strong>Programming</strong> <strong>Manual</strong> – <strong>SMX</strong> Basic <strong>Module</strong>s 29.10.2009 Page 15 of 183
Logic Diagram<br />
In <strong>the</strong> logic diagram linkages take place between inPort, monitoring, outPort and logic<br />
modules.<br />
In this respect <strong>the</strong> outPort connectors on <strong>the</strong> inPort elements correspond with <strong>the</strong><br />
input data of <strong>the</strong> logic diagram. In <strong>the</strong> same way <strong>the</strong> inPort connectors of <strong>the</strong> outPort<br />
elements must be viewed as output data of <strong>the</strong> diagram.<br />
In order to be able to create a clearly structured logic diagram, one can define socalled<br />
terminal blocks. These represent a named connection between inPort and<br />
outPort connectors of function blocks. One or several marker outPort blocks (outPort<br />
terminals) can be defined <strong>for</strong> a marker setting block (inPort terminal) .<br />
<strong>Programming</strong> <strong>Manual</strong> – <strong>SMX</strong> Basic <strong>Module</strong>s 29.10.2009 Page 16 of 183
Elements automatically selected<br />
via signal tracking<br />
Marker setting<br />
(e.g. Emergency Stop)<br />
InPort function block<br />
Logic module "AND"<br />
Monitoring module<br />
permanently activated<br />
Monitoring module<br />
signal dependent activated<br />
Marker outPort<br />
(e.g. 2 x Emergency Stop)<br />
Logic module<br />
(e.g. timer)<br />
Assigned relay -<br />
outPort on <strong>SMX</strong><br />
module<br />
Assigned semiconductor<br />
- outPort on<br />
<strong>SMX</strong> module<br />
Tip:<br />
Use <strong>the</strong> comment line <strong>for</strong> connecting point inPorts. This in<strong>for</strong>mation simplifies <strong>the</strong> use<br />
of complementary connecting point outPorts. This contributes to clarity!<br />
Note: Parameters of <strong>the</strong> inPort elements cannot be modified in this view.<br />
<strong>Programming</strong> <strong>Manual</strong> – <strong>SMX</strong> Basic <strong>Module</strong>s 29.10.2009 Page 17 of 183
Preparing <strong>the</strong> Wiring<br />
The assignments in <strong>the</strong> logic diagram are created by linking <strong>the</strong> inPort and<br />
outPort connectors of <strong>the</strong> functional modules. An outPort of a module may, if<br />
necessary, be multiply connected with inPorts on o<strong>the</strong>r modules, whereby any inPort<br />
must only be assigned once. Apart from this, certain module groups cannot be<br />
interconnected <strong>for</strong> technical reasons. In case of an invalid connection <strong>the</strong> program<br />
will display a corresponding message.<br />
Connection set-up:<br />
Select a start connector with <strong>the</strong> left mouse button<br />
Hold <strong>the</strong> left button activated and position <strong>the</strong> mouse pointer<br />
deactivate <strong>the</strong> button when <strong>the</strong> pointer is on <strong>the</strong> target connector<br />
Note: Connections can only be selected with a mouse click or by choosing a<br />
connector.<br />
Tip: If all connections of a module are to be deleted, one should delete <strong>the</strong><br />
associated function block. The connected connections will in this case be<br />
automatically deleted.<br />
<strong>Automatic</strong> connection<br />
The editor routes a new connection automatically. The graphics display can be varied<br />
and <strong>the</strong> overall presentation optimized by simply moving <strong>the</strong> function blocks. In<br />
complex diagrams it may happen that a connecting line will intersect with a function<br />
block. This behaviour has no influence on <strong>the</strong> internal function of <strong>the</strong> linkage.<br />
User defined connection<br />
A command <strong>for</strong> <strong>the</strong> drawing of user defined connecting lines is additionally available.<br />
These will remain existent, until <strong>the</strong> dislocation of an associated function block <strong>for</strong>ces<br />
<strong>the</strong> recalculation of <strong>the</strong> control points (see automatic connection)<br />
A user defined connection is set up as follows<br />
1.) ei<strong>the</strong>r by selecting <strong>the</strong> connection to be edited and invoking <strong>the</strong> command:<br />
"User defined connecting points" in <strong>the</strong> "Edit" menu.<br />
2.) or by opening <strong>the</strong> context menu (right mouse button) while <strong>the</strong> mouse pointer<br />
is positioned on <strong>the</strong> corresponding connection and selecting <strong>the</strong> command<br />
"User defined connecting points".<br />
3.) Input of control points <strong>for</strong> orthogonal connecting lines , i.e. <strong>the</strong> connecting lines<br />
always run horizontally and vertically. The program connects <strong>the</strong> entered<br />
points, until <strong>the</strong> drawing command is terminated.<br />
4.) Termination of command with <strong>the</strong> Enter-key (Return) and drawing of <strong>the</strong><br />
connection by <strong>the</strong> editor.<br />
Note: The program matches <strong>the</strong> first and <strong>the</strong> last control point to <strong>the</strong><br />
associated function block connector. The inPort and outPort connector is not<br />
considered a control point and does <strong>the</strong>re<strong>for</strong>e not need to be specified.<br />
<strong>Programming</strong> <strong>Manual</strong> – <strong>SMX</strong> Basic <strong>Module</strong>s 29.10.2009 Page 18 of 183
Tip: Visual corrections to <strong>the</strong> logic diagram should only be made just be<strong>for</strong>e <strong>the</strong> logic<br />
digram is blocked. Only <strong>the</strong>n <strong>the</strong> layout is complete and <strong>the</strong> blocks do not need to be<br />
displaced any more.<br />
Message Window<br />
Besides <strong>the</strong> output of status and error messages as well as <strong>the</strong> display of results<br />
from <strong>the</strong> examination of <strong>the</strong> logic diagram, <strong>the</strong> messages window also is a powerful<br />
tool <strong>for</strong> checking function block data within <strong>the</strong>ir context.<br />
Quick Jump<br />
By double-clicking on <strong>the</strong> colour-coded BlockID's in <strong>the</strong> message window one can<br />
have <strong>the</strong> associated block centred in <strong>the</strong> logic diagram window. This enables quick<br />
localization of function blocks belonging to an output.<br />
Context menu in message window<br />
Message window Hides an active message window.<br />
Clear window Deletes <strong>the</strong> contents of <strong>the</strong> message window.<br />
Select all and copy Copies <strong>the</strong> entire contents of <strong>the</strong> message window into <strong>the</strong><br />
clipboard, making <strong>the</strong> text available <strong>for</strong> o<strong>the</strong>r Windows programs via <strong>the</strong> "Insert"<br />
command.<br />
Search To find text within <strong>the</strong> message window.<br />
Help on message window Opens <strong>the</strong> help page<br />
Docking of message window Two-way switch to enable <strong>the</strong> message window to<br />
dock to <strong>the</strong> frame of <strong>the</strong> main program or to position <strong>the</strong> window freely on <strong>the</strong> screen.<br />
Note: The "docking" behaviour <strong>for</strong> <strong>the</strong> message window of <strong>the</strong> application can be<br />
configured in <strong>the</strong> menu "File->Settings".<br />
<strong>Programming</strong> <strong>Manual</strong> – <strong>SMX</strong> Basic <strong>Module</strong>s 29.10.2009 Page 19 of 183
Program Creation<br />
After <strong>the</strong> program has been finished, <strong>the</strong> compilation process can be started by<br />
invoking <strong>the</strong> compiler. The compilation process starts <strong>the</strong> following internal<br />
processes.<br />
Verifying <strong>for</strong> open connectors<br />
SafePLC makes sure that all connections between function blocks can be opened.<br />
Unconnected connectors are recognized as faults.<br />
Verifying <strong>for</strong> unreferenced "Connecting point" Blocks<br />
SafePLC makes sure that all "connecting point" blocks inserted in <strong>the</strong> logic diagram<br />
are used. Unsolved references are recognized as faults.<br />
Verifying <strong>the</strong> value ranges of <strong>the</strong> monitoring functions<br />
SafePLC verifies whe<strong>the</strong>r <strong>the</strong> parameters of <strong>the</strong> monitoring functions comply with <strong>the</strong><br />
currently chosen value ranges of <strong>the</strong> sensor interfaces, be<strong>for</strong>e <strong>the</strong> machine readable<br />
code is generated. This verification does not replace <strong>the</strong> context related evaluation of<br />
data after changes made by <strong>the</strong> user!<br />
Creation of <strong>the</strong> instruction list (IL)<br />
The IL-code created on basis of <strong>the</strong> function blocks is output in <strong>the</strong> message window,<br />
where it can also be verified, The code segments associated with <strong>the</strong> function blocks<br />
are identified by <strong>the</strong> corresponding BlockID.<br />
Creating <strong>the</strong> OP code<br />
Generation of a machine readable code <strong>for</strong> <strong>the</strong> <strong>SMX</strong>-system, which is <strong>the</strong>n<br />
transferred toge<strong>the</strong>r with <strong>the</strong> parameter data.<br />
Message window<br />
All results of <strong>the</strong> compilation process are reported in <strong>the</strong> message window. Should<br />
faults be found, <strong>the</strong> message window will automatically pop up.<br />
Security CRCs<br />
After a successful compiler run a total of three CRC-signatures are made:<br />
Equipment configuration CRC: Signature concerning program and<br />
parameter data<br />
Parameter CRC: Signature concerning parameter data<br />
Program CRC: Signature concerning <strong>the</strong> program<br />
The calculated CRC-values can be displayed in off-line mode (no connection to<br />
module) via <strong>the</strong> menu "File->Diagram Management".<br />
Important:<br />
This display is only in<strong>for</strong>mative and must not be used <strong>for</strong> <strong>the</strong> safety related<br />
documentation!<br />
<strong>Programming</strong> <strong>Manual</strong> – <strong>SMX</strong> Basic <strong>Module</strong>s 29.10.2009 Page 20 of 183
Transferring <strong>the</strong> Program on <strong>the</strong> <strong>SMX</strong><br />
<strong>Module</strong><br />
This paragraph describes <strong>the</strong> data and program transfer to a basic <strong>SMX</strong> module.<br />
When starting a connection request ("File-> Connection Dialog" or via <strong>the</strong> toolbar<br />
) <strong>the</strong> following window is displayed.<br />
Connection settings<br />
In order to be able to set up a connection with a <strong>SMX</strong>-system, <strong>the</strong> transfer<br />
parameters must be set accordingly.<br />
Note:<br />
The connection between PC and <strong>SMX</strong>-system is based on a USB/RS485 interface.<br />
This requires fault-free installation of <strong>the</strong> correct driver. This driver is included in <strong>the</strong><br />
scope of delivery and is located in <strong>the</strong> installation directory of <strong>the</strong> SafePLC<br />
programming environment (directory RS485_USB_Treiber).<br />
<strong>Programming</strong> <strong>Manual</strong> – <strong>SMX</strong> Basic <strong>Module</strong>s 29.10.2009 Page 21 of 183
PC-COM<br />
The COM interface used by <strong>the</strong> Windows driver must be set.<br />
CAN Bus<br />
Address setting <strong>for</strong> diagnostics channel via CAN bus. The setting uses <strong>the</strong> hex data<br />
<strong>for</strong>mat.<br />
Address of <strong>the</strong> 1st CAN telegram: 0x001 to 0x063 or 0x83 to 0x7FF.<br />
Aktivating extended data with CAN bus<br />
Address of <strong>the</strong> 2nd CAN telegram: 0x001 to 0x063 or 0x83 to 0x7FF.<br />
The value must not be <strong>the</strong> same as <strong>the</strong> 1st CAN address.<br />
Cyclic transmission<br />
This option can be used to set <strong>the</strong> <strong>SMX</strong>-system transmission interval in cycles<br />
(1 cycle = 8ms).<br />
Connection dialog<br />
Connect: Starts <strong>the</strong> connection to <strong>the</strong> <strong>SMX</strong>-system<br />
Quit: Cancels an active connection.<br />
<strong>Programming</strong> <strong>Manual</strong> – <strong>SMX</strong> Basic <strong>Module</strong>s 29.10.2009 Page 22 of 183
Send configuration: Transmits <strong>the</strong> configuration of <strong>the</strong> logic diagram to <strong>the</strong><br />
<strong>SMX</strong>-system. This is only possible in "Stop" mode.<br />
Start: Starts <strong>the</strong> sequencing program<br />
Stop: Stops <strong>the</strong> sequencing program<br />
Diagnose >>: Extends <strong>the</strong> dialog by <strong>the</strong> diagnose function<br />
(see diagnose of a transferred program).<br />
Validation:<br />
Opens <strong>the</strong> validation dialog<br />
Validation dialog<br />
The proper per<strong>for</strong>mance of a validation in con<strong>for</strong>mance with <strong>the</strong> demanded safety<br />
regulations is described in <strong>the</strong> chapter "Validating an <strong>SMX</strong>-system".<br />
<strong>Programming</strong> <strong>Manual</strong> – <strong>SMX</strong> Basic <strong>Module</strong>s 29.10.2009 Page 23 of 183
Generate report<br />
Generation of a validation report.<br />
Disable configuration<br />
After each transfer of configuration data to an <strong>SMX</strong>-system, <strong>the</strong>se data are marked<br />
as "not validated". The basic group signalizes this by means of a yellow flashing of<br />
<strong>the</strong> status LED. The command "Disable configuration" disables access to <strong>the</strong><br />
configuration data in <strong>the</strong> basic group. This is indicated by a green flashing status<br />
LED.<br />
Read out binary file from <strong>SMX</strong>…<br />
Reads out <strong>the</strong> current <strong>SMX</strong> equipment configuration in a machine readable from.<br />
These data are not changed by SafePLC and can be saved to <strong>the</strong> drive in this <strong>for</strong>m.<br />
Send binary file to <strong>SMX</strong>…<br />
Transfer of a machine readable equipment configuration from <strong>the</strong> PC drive to <strong>the</strong><br />
<strong>SMX</strong>-system.<br />
Note:<br />
When transferring machine readable program and parameter data, organizational<br />
measures must be applied to ensure that <strong>the</strong> currently valid equipment configuration<br />
con<strong>for</strong>ms with <strong>the</strong> safety related documentation of <strong>the</strong> machine or system.<br />
Diagnostic Functions<br />
When clicking on <strong>the</strong> diagnostics button <strong>the</strong> connection dialog is extended by<br />
additional diagnostics elements.<br />
Diagnose Start: Two-way switch to start and stop <strong>the</strong> diagnose: The corresponding<br />
mode ( = Off = On) is also displayed in <strong>the</strong> dialog text, so that feedback about<br />
<strong>the</strong> current status is available, even in case of a minimized dialog. After successful<br />
starting of <strong>the</strong> diagnose, <strong>the</strong> inscription of <strong>the</strong> switch will change to "Diagnose Stop".<br />
Note: A correct diagnose requires <strong>the</strong> adjustment of data between logic diagram and<br />
equipment configuration. A missing logic diagram or a discrepancy between <strong>the</strong><br />
available logic diagram and <strong>the</strong> equipment configuration only permits a limited<br />
diagnose. The functionality "Diagnose function modules" is in this case not available.<br />
<strong>Programming</strong> <strong>Manual</strong> – <strong>SMX</strong> Basic <strong>Module</strong>s 29.10.2009 Page 24 of 183
(Scope): Opens <strong>the</strong> Scope monitor dialog. This enables <strong>the</strong> representation of<br />
various process data.<br />
Process image: Visualization of <strong>the</strong> inPort/outPort image of <strong>the</strong> <strong>SMX</strong>-system.<br />
FLogic diagram: Enables selective monitoring of memory states of pre-selected<br />
function blocks.<br />
System info: System in<strong>for</strong>mation about <strong>the</strong> <strong>SMX</strong>-module. As follows:<br />
Parameters<br />
CRC equipment configuration<br />
CRC parameters<br />
CRC program<br />
Transfer counter<br />
Serial number<br />
Version number<br />
Description<br />
CRC signature concerning program and<br />
parameter data<br />
CRC signature concerning <strong>the</strong><br />
parameters<br />
CRC concerning <strong>the</strong> program<br />
Status of an internal transfer counter<br />
This counter is incremented during each<br />
transfer action to <strong>the</strong> <strong>SMX</strong>-system and<br />
can be used as reference <strong>for</strong> <strong>the</strong><br />
purpose of documentation.<br />
Current serial number of <strong>the</strong> equipment<br />
Firmware version number<br />
<strong>Programming</strong> <strong>Manual</strong> – <strong>SMX</strong> Basic <strong>Module</strong>s 29.10.2009 Page 25 of 183
Sensor position: Shows <strong>the</strong> original value of <strong>the</strong> connected speed/position sensors.<br />
Encoder interface:<br />
Shows <strong>the</strong> transverse mode voltages of <strong>the</strong> encoder driver modules interface 1 and<br />
interface 2 as well as <strong>the</strong> status of <strong>the</strong> inPort bridges in <strong>the</strong> encoder interface.<br />
If one of <strong>the</strong> values <strong>for</strong> <strong>the</strong> voltage condition is 0, <strong>the</strong> encoder is defective or not<br />
connected.<br />
Voltage values of <strong>the</strong> two analog voltage inPorts on system A and system B (e.g.<br />
<strong>SMX</strong> 12A) are also shown:<br />
System A analog pass1: Analog voltage AIN1<br />
System B analog pass1: Analog voltage AIN2<br />
System A analog pass2: Analog voltage AIN3<br />
System B analog pass2: Analog voltage AIN4<br />
System A / system B AnalogFilter1: Evaluate voltage AIN1 with AIN2<br />
System A / system B AnalogFilter2: Evaluate voltage AIN3 with AIN4<br />
Analog adder: Voltage after adding circuit<br />
Procedure <strong>for</strong> logic diagram diagnose<br />
When running a logic diagram diagnose, <strong>the</strong> current inPort and outPort states of <strong>the</strong><br />
function blocks are displayed according to <strong>the</strong>ir logic condition "0" or "1" on <strong>the</strong><br />
selected module.<br />
Please proceed as follows:<br />
Step 1: Selecting <strong>the</strong> diagnostic function<br />
Select <strong>the</strong> diagnostic function by activating <strong>the</strong> "function modules" tab via:<br />
Connection->Diagnose->Function modules.<br />
Step 2: Selecting <strong>the</strong> data to be displayed<br />
Selection of <strong>the</strong> function blocks desired <strong>for</strong> diagnose in <strong>the</strong> current context . The<br />
connectors <strong>for</strong> <strong>the</strong> highlighted modules are added to <strong>the</strong> diagnose list via <strong>the</strong> control<br />
button "Add". In contrast to this, entries can also be deleted from <strong>the</strong> list by marking<br />
<strong>the</strong>se and clicking on <strong>the</strong> control button "Remove".<br />
Double-clicking on a list entry shows <strong>the</strong> associated data path in <strong>the</strong> logic diagram.<br />
This functionality can also be achieved vy using <strong>the</strong> control button "Show".<br />
Note: The symbol addresses shown in <strong>the</strong> list are also used in <strong>the</strong> compilation and in<br />
<strong>the</strong> validation report.<br />
Tip: The "Select all" command from <strong>the</strong> context menu (right mouse button) can be<br />
used to select all data from <strong>the</strong> logic diagram.<br />
<strong>Programming</strong> <strong>Manual</strong> – <strong>SMX</strong> Basic <strong>Module</strong>s 29.10.2009 Page 26 of 183
Step 3: Starting <strong>the</strong> debugger<br />
The selected data can only be diagnosed if <strong>the</strong> in<strong>for</strong>mation in <strong>the</strong> logic diagram<br />
corresponds with <strong>the</strong> in<strong>for</strong>mation in <strong>the</strong> actively connected <strong>SMX</strong>-system. The<br />
adjustment is made by clicking on <strong>the</strong> control button "Diagnose Start".<br />
Note: The implemented debugging function requires intensive data transfer between<br />
<strong>SMX</strong>-system and SafePLC. This results in a temporally delayed display of data.<br />
Quick status changes on module outPorts may <strong>the</strong>re<strong>for</strong>e not be detectable.<br />
The diagnose is solely available in operating mode "Run". In any o<strong>the</strong>r mode of<br />
operation <strong>the</strong> process image is passivated.<br />
<strong>Programming</strong> <strong>Manual</strong> – <strong>SMX</strong> Basic <strong>Module</strong>s 29.10.2009 Page 27 of 183
The Scope Monitor<br />
Parameterization of drive monitoring requires exact knowledge of process data<br />
when viewed from <strong>the</strong> <strong>SMX</strong>-system. Knowledge about <strong>the</strong> temporal course of speed,<br />
acceleration and position is of utmost importance. Only this enables <strong>the</strong> setting of<br />
correct threshold values and limiting parameters.<br />
All available graphics functions read <strong>the</strong> required process data ONLINE from <strong>the</strong><br />
active basic <strong>SMX</strong>-group through <strong>the</strong> communication interface <strong>for</strong> time-based<br />
representation. Up-to-date values are inserted at <strong>the</strong> right border of <strong>the</strong> Scope<br />
Monitor, moved fur<strong>the</strong>r to <strong>the</strong> left during recording, until <strong>the</strong>y finally disappear at <strong>the</strong><br />
left border of <strong>the</strong> screen. Although <strong>the</strong>se data have disappeared from <strong>the</strong> visible<br />
window, <strong>the</strong>y are still maintained in a buffer memory and can still be moved back into<br />
<strong>the</strong> visible area by sliding <strong>the</strong> scroll bar below <strong>the</strong> graphics window.<br />
Note: With an active Scope Monitor <strong>the</strong> output of debugging of process image and<br />
logic diagram is hidden and <strong>the</strong> diagnostics tabulator is blocked throughout <strong>the</strong><br />
connection dialog. These data cannot be made available in this mode.<br />
<strong>Programming</strong> <strong>Manual</strong> – <strong>SMX</strong> Basic <strong>Module</strong>s 29.10.2009 Page 28 of 183
Cursor 1, Cursor 2: With <strong>the</strong>se slide controllers two cursor positions <strong>for</strong> displaying<br />
specific diagram values are available. Changing <strong>the</strong> position of <strong>the</strong> slide controller<br />
moves a display line in <strong>the</strong> diagram. The Scope window shows values <strong>for</strong> <strong>the</strong><br />
corresponding cursor positions in <strong>for</strong>m of a legend. Time related assignments of <strong>the</strong><br />
cursor positions are also available.<br />
Scaling<br />
Opens a dialog to scale <strong>the</strong> displayed diagram function. This enables <strong>the</strong> adaptation<br />
of <strong>the</strong> Y-values in <strong>the</strong> individual graphs by means of a multiplication factor.<br />
Start / Stop<br />
Start or stop recording<br />
Maximize >><br />
Enlarges <strong>the</strong> Scope Monitor to <strong>the</strong> complete available screen area. With <strong>the</strong> control<br />
button "Normal
Preparing <strong>the</strong> measurement<br />
Choose <strong>the</strong> desired measuring scheme first!<br />
In case of a speed oriented measurement <strong>the</strong> current recording time <strong>for</strong> <strong>the</strong><br />
corresponding axis is displayed on <strong>the</strong> X-axis. The measuring data <strong>for</strong> <strong>the</strong> graph are<br />
read by <strong>the</strong> module, standardized and displayed with <strong>the</strong> correct time reference. The<br />
recording memory is approx. 15 minutes.<br />
The measuring process is automatically stopped when <strong>the</strong> buffer memory is full. The<br />
previous measurement is automatically saved under "ScopeTempData.ScpXml".<br />
With position oriented measurement <strong>the</strong> configured measuring range of <strong>the</strong> set axis<br />
is displayed on <strong>the</strong> X-axis. Cursor 1 is in "Actual Position" of <strong>the</strong> axis and is<br />
continuously updated via <strong>the</strong> data link. Cursor 2 can be displaced as required <strong>for</strong> <strong>the</strong><br />
determination of data.<br />
Note: When changing <strong>the</strong> scheme, any recorded data from previous measurements<br />
will be lost.<br />
When changing <strong>the</strong> dialog size <strong>the</strong> display data must be rescaled. This requires<br />
position oriented measuring and resetting <strong>the</strong> data buffer (SSX).<br />
"Start" measurement<br />
The control button "Start" is only available in case of an active connection to <strong>the</strong><br />
<strong>SMX</strong>-system. After clicking on this control button <strong>the</strong> data will be cyclically transferred<br />
to <strong>the</strong> buffer memory and displayed in <strong>the</strong> diagram from left to right. Active recording<br />
can be stopped with <strong>the</strong> "Stop" control button.<br />
"Stopping" a measurement and viewing data<br />
After completion of <strong>the</strong> measurement <strong>the</strong> data can be analysed by moving <strong>the</strong> slide<br />
controllers accordingly.<br />
Measuring schemes<br />
Encoder data<br />
Functionality<br />
Recording of scaled position values of system A<br />
and system B over <strong>the</strong> course of time.<br />
Recording of process values <strong>for</strong> speed and<br />
acceleration over <strong>the</strong> course of time.<br />
Note:<br />
Internally <strong>the</strong> position value of system A is used to generate<br />
<strong>the</strong> process value <strong>for</strong> <strong>the</strong> position.<br />
<strong>Programming</strong> <strong>Manual</strong> – <strong>SMX</strong> Basic <strong>Module</strong>s 29.10.2009 Page 30 of 183
Application<br />
Encoder speed<br />
Functionality<br />
Scaling of <strong>the</strong> encoder systems A and B in case<br />
of position monitoring. In case of a correctly<br />
scaled encoder system <strong>the</strong>re should be no<br />
significant deviation between positions A and B,<br />
or <strong>the</strong> deviation should not exceed <strong>the</strong><br />
"permissible deviation" set in <strong>the</strong> encoder dialog.<br />
Analysis and course of encoder signal <strong>for</strong><br />
diagnostic purposes (e.g. trouble shooting, etc.).<br />
Acceleration and speed behaviour of <strong>the</strong> drive.<br />
Detection of thresholds.<br />
Recording <strong>the</strong> current speed of system A and<br />
system B over <strong>the</strong> course of time.<br />
Recording <strong>the</strong> difference of speed signals from<br />
system A and system B over <strong>the</strong> course of time.<br />
Note:<br />
Internally <strong>the</strong> speed value from system A is used to<br />
generate <strong>the</strong> process value <strong>for</strong> <strong>the</strong> speed.<br />
Application<br />
SSX data<br />
Functionality<br />
Application<br />
Scaling of <strong>the</strong> encoder systems A and B in case<br />
of speed monitoring. In case of a correctly scaled<br />
encoder system <strong>the</strong>re should be no significant<br />
deviation between speeds A and B, or <strong>the</strong><br />
deviation should not exceed <strong>the</strong> permissible<br />
"speed threshold" set in <strong>the</strong> encoder dialog.<br />
Analysis and course of encoder signal <strong>for</strong><br />
diagnostic purposes (e.g. trouble shooting, etc.).<br />
Recording of process data <strong>for</strong> speed and<br />
acceleration over <strong>the</strong> course of time.<br />
Recording of speed limit <strong>for</strong> <strong>the</strong> monitoring<br />
function over <strong>the</strong> course of time.<br />
The diagram shows <strong>the</strong> dynamic behaviour of <strong>the</strong><br />
drive via <strong>the</strong> visualization of speed and<br />
acceleration.<br />
With <strong>the</strong> SSX not activated, <strong>the</strong> limiting speed<br />
remains zero.<br />
When activating <strong>the</strong> SSX-function, <strong>the</strong> limiting<br />
speed is taken from <strong>the</strong> current speed and<br />
projected down.<br />
If <strong>the</strong> drive with its current speed remains below<br />
<strong>the</strong> limiting speed, <strong>the</strong> system will not be shut<br />
down.<br />
<strong>Programming</strong> <strong>Manual</strong> – <strong>SMX</strong> Basic <strong>Module</strong>s 29.10.2009 Page 31 of 183
SEL 1 / SEL 2 data<br />
Functionality<br />
Application<br />
Recording of process data <strong>for</strong> speed and<br />
acceleration over <strong>the</strong> position or <strong>the</strong> course of<br />
time.<br />
Visualization of current position in <strong>for</strong>m of <strong>the</strong><br />
parallel moving cursor:<br />
Visualization of <strong>the</strong> current stopping distance in<br />
<strong>for</strong>m of a trailing pointer.<br />
The diagram shows <strong>the</strong> dynamic stopping<br />
distance value as minimum value <strong>for</strong> <strong>the</strong> braking<br />
distance.<br />
Examination of <strong>the</strong> set parameter values in <strong>the</strong><br />
SEL-function, examination of <strong>the</strong> available<br />
reserve <strong>for</strong> shut-down.<br />
<strong>Programming</strong> <strong>Manual</strong> – <strong>SMX</strong> Basic <strong>Module</strong>s 29.10.2009 Page 32 of 183
Diagram Management<br />
With <strong>the</strong> diagram management <strong>the</strong> logic diagrams can be locked against unintended<br />
or unauthorized modifications. It also provides documentation possibilities <strong>for</strong><br />
program creation.<br />
Diagram access<br />
Here one can disable or enable access to <strong>the</strong> function blocks in <strong>the</strong> current logic<br />
diagram. This means, that in a locked logic diagram all menu options and toolbars <strong>for</strong><br />
adding function blocks appear in grey (= locked). Moreover, parameters in function<br />
blocks, that had already been added, cannot be changed.<br />
"Unlocking" requires a password. The configured values and <strong>the</strong> functional modules<br />
of a locked diagram may in this case be viewed, but cannot be modified. This<br />
functionality make sure that no changes can be made to <strong>the</strong> logic diagram by<br />
unauthorized persons.<br />
<strong>Programming</strong> <strong>Manual</strong> – <strong>SMX</strong> Basic <strong>Module</strong>s 29.10.2009 Page 33 of 183
When a logic diagram is locked, <strong>the</strong> dialog "Save File" will appear when exiting <strong>the</strong><br />
diagram management, so that possible changes will not be lost.<br />
Note:<br />
Logic diagrams can only be unlocked using <strong>the</strong> password that was applied when <strong>the</strong><br />
diagram was locked. A locked logic diagram can no longer be compiled ! However,<br />
access to <strong>the</strong> <strong>SMX</strong>-module is still possible.<br />
Program in<strong>for</strong>mation<br />
This in<strong>for</strong>mation serves <strong>the</strong> documentation and identification of <strong>the</strong> logic diagram.<br />
Programmer:<br />
Name of <strong>the</strong> responsible programmer.<br />
CRC equipment configuration:<br />
Signature concerning program and parameter data.<br />
Parameter CRC:<br />
Signature concerning parameter data, i.e. adjustment values of sensors, actuators,<br />
timers, etc.<br />
Program CRC:<br />
Signature of <strong>the</strong> PLC-program.<br />
Compiler ID:<br />
Identification of activation dongle.<br />
Indicated CRC on <strong>the</strong> <strong>SMX</strong>-module<br />
Indication of <strong>the</strong> actually available CRCs on <strong>the</strong> <strong>SMX</strong>-module by operating <strong>the</strong> "Func"<br />
button, in <strong>the</strong> following sequence<br />
Indication of <strong>the</strong> actually available CRCs on <strong>the</strong> <strong>SMX</strong>-module by operating <strong>the</strong> "Func"<br />
button (hold depressed <strong>for</strong> 1 second) in "RUN" mode:<br />
P xxxxx1 - C xxxxx2 - Lxxxxx3<br />
xxxxx1 -> Signature concerning program and parameter data<br />
xxxxx2 -> Signature concerning parameter data<br />
xxxxx3 -> Signature of <strong>the</strong> PLC-program<br />
Note:<br />
If <strong>the</strong> CRC is used <strong>for</strong> <strong>the</strong> test report, it is recommended to lock <strong>the</strong> logic diagram,<br />
since this prevents accidental modification.<br />
Comment:<br />
This input field provides a descriptive field <strong>for</strong> <strong>the</strong> input of any text. Here one can<br />
document e.g. program or parameter changes during <strong>the</strong> life cycle of <strong>the</strong> currently<br />
used device.<br />
<strong>Programming</strong> <strong>Manual</strong> – <strong>SMX</strong> Basic <strong>Module</strong>s 29.10.2009 Page 34 of 183
Configuration Report<br />
SafePLC uses <strong>the</strong> validation function (Connection->Validation) to create a<br />
configuration report <strong>for</strong> <strong>the</strong> equipment configuration. This function is only available in<br />
case of an active connection to an <strong>SMX</strong>-system.<br />
The report is saved in a file and can subsequently be edited.<br />
Attention<br />
The printed out file serves as model <strong>for</strong> <strong>the</strong> safety related examination!<br />
Note<br />
The report can only be created after <strong>the</strong> logic diagram has been saved.<br />
The generated text file (*.txt) has <strong>the</strong> same name and is located in <strong>the</strong> same<br />
directory as <strong>the</strong> associated logic diagram.<br />
1. Step: Editing <strong>the</strong> report header<br />
The following fields can be edited in <strong>the</strong> header.<br />
Equipment: Code designation of equipment<br />
Customer:<br />
Supplier:<br />
Installer:<br />
Operator of equipment<br />
Manufacturer of machine / equipment<br />
In<strong>for</strong>mation about commissioning of equipment<br />
<strong>Programming</strong> <strong>Manual</strong> – <strong>SMX</strong> Basic <strong>Module</strong>s 29.10.2009 Page 35 of 183
2. Step: Filling in <strong>the</strong> equipment description<br />
Equipment designation: describes <strong>the</strong> functionality or field of application of <strong>the</strong><br />
equipment<br />
Installation location: describes <strong>the</strong> exact location of <strong>the</strong> equipment<br />
End customer: Operator of equipment<br />
Short description: safety related equipment features<br />
Description of function: safety related equipment features to be monitored by<br />
<strong>the</strong> safety module.<br />
3. Step: Individual proof<br />
Serial-no. from:<br />
Element:<br />
Designation:<br />
Place of installation:<br />
Designation in wiring diagram<br />
<strong>Module</strong> type (see sticker)<br />
File name of logic diagram<br />
Designation of control cabinet that contains <strong>the</strong> safety<br />
module<br />
Manufacturer and type are fixed.<br />
Serial number: Serial-number of <strong>the</strong> safety module (sticker)<br />
Identical with sticker: must be activated acc. to <strong>the</strong> entered serial number.<br />
Equipment variant:<br />
PLC-function<br />
Position processing<br />
: Me without safety bus<br />
: <strong>Module</strong> with position processing<br />
(can be set in <strong>the</strong> encoder dialog)<br />
The CRC-signature of <strong>the</strong> configuration set must be entered in hand writing<br />
after <strong>the</strong> repirt has been printed out (CRC is displayed in <strong>the</strong> "Logic Diagram<br />
Management" or in <strong>the</strong> 7-segment display).<br />
Identical with module: Here <strong>the</strong> responsible tester confirms that <strong>the</strong> CRC's<br />
displayed in <strong>the</strong> programming desktop are identical with <strong>the</strong> CRC stored in <strong>the</strong><br />
equipment..<br />
(Note: The CRC in <strong>the</strong> equipment can be read out via <strong>the</strong> seven-segment<br />
display by simply pressing <strong>the</strong> function key in "RUN-Mode")<br />
<strong>Programming</strong> <strong>Manual</strong> – <strong>SMX</strong> Basic <strong>Module</strong>s 29.10.2009 Page 36 of 183
Checking <strong>the</strong> correct function:<br />
1. The correct program and parameter data must be loaded to be able to<br />
generate <strong>the</strong> validation report!<br />
2. The test engineer must once again validate all configured data in <strong>the</strong> printed<br />
report by providing evidence of <strong>the</strong> programmed functions on <strong>the</strong> equipment /<br />
machine.<br />
3. All parameterized limiting values of <strong>the</strong> monitoring functions used must be<br />
checked <strong>for</strong> correctness. Attention must be paid to <strong>the</strong> response times<br />
mentioned in <strong>the</strong> installation manual.<br />
4. A successfully executed validation should be completed by clicking on <strong>the</strong><br />
control button "Lock validation".<br />
Note:<br />
If a new configuration is loaded to <strong>the</strong> <strong>SMX</strong>-system, <strong>the</strong> system LED will, in<br />
case of fault-free operation, subsequently light YELLOW. This signalizes a<br />
non-validated application! When actuating <strong>the</strong> control button "Lock validation"<br />
while actively connected with <strong>the</strong> module, <strong>the</strong> LED will subsequently flash<br />
GREEN.<br />
<strong>Programming</strong> <strong>Manual</strong> – <strong>SMX</strong> Basic <strong>Module</strong>s 29.10.2009 Page 37 of 183
Program Development Aids<br />
Program development aids can be found in <strong>the</strong> "Drawing Aid" toolbar in <strong>the</strong> top left<br />
corner.<br />
Info display<br />
With <strong>the</strong> info display activated <strong>the</strong> attributes of <strong>the</strong> element touched by <strong>the</strong> mouse<br />
pointer will be displayed. The dynamics of this display can be adapted in <strong>the</strong> "File<br />
settings" dialog. The info display can also be activated with <strong>the</strong> "Ctrl"-key. The<br />
display will continue, until this key is released again.<br />
Signal tracking<br />
This command selects all o<strong>the</strong>r functional modules, which are linked with a<br />
currently selected block. This way all coherent linkages of modules can be<br />
represented.<br />
Tip: This function visualizes coherent areas which are interconnected via connecting<br />
points.<br />
Note: This command is only active, when exactly 1 function block has been selected.<br />
Copying attributes into <strong>the</strong> message window<br />
All attributes belonging to a block selection can also be output in <strong>the</strong> message<br />
window. This is possible ei<strong>the</strong>r with <strong>the</strong> menu command "Edit->Attributes into<br />
Message Window" or via <strong>the</strong> function block context menu.<br />
Tip: The attributes of all functional modules can be copied using <strong>the</strong> command<br />
"Attributes into Message Window". In this case no functional module must be<br />
selected.<br />
Note: When selecting <strong>the</strong> command via <strong>the</strong> context menu, <strong>the</strong> mouse pointer must<br />
be positioned on a selected block.<br />
<strong>Programming</strong> <strong>Manual</strong> – <strong>SMX</strong> Basic <strong>Module</strong>s 29.10.2009 Page 38 of 183
Quick selection<br />
By double-clicking on <strong>the</strong> colour-coded BlockID's in <strong>the</strong> message window one can<br />
have <strong>the</strong> associated block centred in <strong>the</strong><br />
logic diagram window. This enables quick localization of function blocks belonging to<br />
an output and to make necessary changes, if this is required.<br />
<strong>Programming</strong> <strong>Manual</strong> – <strong>SMX</strong> Basic <strong>Module</strong>s 29.10.2009 Page 39 of 183
Predefined Function Blocks<br />
Representation of <strong>the</strong> available inPorts and outPorts of <strong>the</strong> <strong>SMX</strong>-system.<br />
Sensor interface<br />
This block describes <strong>the</strong> speed and position sensors, <strong>the</strong> signal list <strong>for</strong> <strong>the</strong> digital<br />
inPorts and, if available, <strong>the</strong> analog inPorts. The parameter editor <strong>for</strong> <strong>the</strong><br />
individual elements is started by double-clicking, or via <strong>the</strong> context menu<br />
"Properties…".<br />
Speed and position sensors<br />
Double-clicking on one of <strong>the</strong>se elements opens <strong>the</strong> encoder configuration dialog.<br />
The parameters to be entered are described in detail in <strong>the</strong> section "Encoder<br />
configuration".<br />
Visualization of a PDM function used <strong>for</strong> fuinction control of sensor<br />
monitoring<br />
Digital inPorts<br />
Determination of properties <strong>for</strong> digital input signal Linkage takes place<br />
automatically when inserting function blocks described below. Double-clicking on<br />
a signal list opens a comment window with <strong>the</strong> possibility of entering describing<br />
text.<br />
<strong>Programming</strong> <strong>Manual</strong> – <strong>SMX</strong> Basic <strong>Module</strong>s 29.10.2009 Page 40 of 183
Analog inPorts<br />
Double-clicking on this logic diagram element opens <strong>the</strong> configuration dialog to<br />
determine <strong>the</strong> analog signal monitoring. (See: Analog signal input).<br />
<strong>SMX</strong> outPorts<br />
This block consists of <strong>the</strong> signal lists <strong>for</strong> <strong>the</strong> freely programmable outPorts,<br />
consisting of relay, semi-conductor and auxiliary outPorts. As with <strong>the</strong> input<br />
signals wiring also takes place automatically when adding <strong>the</strong> associated function<br />
blocks.<br />
<strong>Programming</strong> <strong>Manual</strong> – <strong>SMX</strong> Basic <strong>Module</strong>s 29.10.2009 Page 41 of 183
Adding InPort Blocks<br />
The inPort elements create <strong>the</strong> digital connection between one or several<br />
connected sensors and/or fur<strong>the</strong>r lower-level switching devices in <strong>the</strong> <strong>SMX</strong><br />
System. Each inPort element, except <strong>the</strong> mode selector switch, provides one<br />
logic output signal "0" or "1" <strong>for</strong> fur<strong>the</strong>r processing in <strong>the</strong> PLC.<br />
The inPort elements are added and edited in <strong>the</strong> "Terminal Diagram" view.<br />
The resource control of <strong>the</strong> function block elements <strong>for</strong> <strong>the</strong> <strong>SMX</strong>-system<br />
manages <strong>the</strong> available elements, <strong>the</strong> number of which may be limited.<br />
If no fur<strong>the</strong>r elements are available when programming <strong>the</strong> terminal diagram, <strong>the</strong><br />
commands <strong>for</strong> adding <strong>the</strong> corresponding modules or function blocks will be<br />
disabled. This is visualized by menu options or toolbars appearing in grey. These<br />
resources can be released again by deleting <strong>the</strong> corresponding function blocks.<br />
The inPort elements are structured according to <strong>the</strong>ir application<br />
(example enable button).<br />
Note<br />
The assignment of <strong>the</strong> selected inPort elements and <strong>the</strong>ir parameterization<br />
has a direct effect on <strong>the</strong> per<strong>for</strong>mance level to be achieved. The explanations<br />
in <strong>the</strong> installation manual <strong>for</strong> <strong>the</strong> <strong>SMX</strong>-System must <strong>for</strong> this purpose be strictly<br />
followed!<br />
<strong>Programming</strong> <strong>Manual</strong> – <strong>SMX</strong> Basic <strong>Module</strong>s 29.10.2009 Page 42 of 183
The configuration of inPort elements generally takes place in <strong>the</strong> same way. The<br />
parameter editor to define <strong>the</strong> following properties opens upon selection:<br />
Switch type<br />
Determination of <strong>the</strong> planned input signals. A logic input signal <strong>for</strong> fur<strong>the</strong>r linkage<br />
in <strong>the</strong> PLC may consist of one or several external signal paths. The description of<br />
<strong>the</strong> individual elements lists <strong>the</strong> respective possibilities and combination in tabular<br />
<strong>for</strong>m.<br />
For time-out monitored signal types a limited number is available.<br />
Signal-No.<br />
Determination of <strong>the</strong> external signal to a terminal connection of <strong>the</strong> <strong>SMX</strong>-system.<br />
The number of available terminal connections is determined by <strong>the</strong> actually<br />
available <strong>SMX</strong>-module configuration. Signals that are already in use no longer<br />
appear in <strong>the</strong> selection dialog. The editor always shows resource limitations within<br />
<strong>the</strong> corresponding context in a message window.<br />
Cross-shorting test<br />
Source of <strong>the</strong> input signal used. Two signal pulses, Pulse1 and Pulse2, are<br />
available. The "OFF" option can be alternatively selected. Cross-shorting in <strong>the</strong><br />
external wiring can be detected by using <strong>the</strong> signatures.<br />
Starting behaviour<br />
Determination of <strong>the</strong> behaviour of an inPort element when changing <strong>the</strong> state of<br />
<strong>the</strong> logic output value in <strong>the</strong> logic diagram from "0" to "1".<br />
automatic<br />
Processing of <strong>the</strong> defined input signals without confirmation or acknowledgement.<br />
Start type Function Scheme<br />
<strong>Automatic</strong> <strong>Automatic</strong> start after an<br />
start<br />
equipment reset or after<br />
activation of switching<br />
function.<br />
OutPort of <strong>the</strong> inPort<br />
Geräte-Anlauf<br />
Schaltfunktion<br />
element becomes "1" when<br />
<strong>the</strong> safety circuit is<br />
closed/active acc. to <strong>the</strong><br />
OutPort Ausgang<br />
definition of <strong>the</strong> switch type<br />
Equipment start<br />
Switching function<br />
monitored<br />
Release of <strong>the</strong> monitored inPort element in case of descending edge on <strong>the</strong><br />
specified monitoring inPort. This is required at any time when <strong>the</strong> monitored inPort<br />
element is to be switched.<br />
Example: Start of a drive only after this has been confirmed by <strong>the</strong> operating<br />
personnel.<br />
<strong>Programming</strong> <strong>Manual</strong> – <strong>SMX</strong> Basic <strong>Module</strong>s 29.10.2009 Page 43 of 183
With monitored starting mode an additional connector <strong>for</strong> linking with a start<br />
element is provided. Here one can configure <strong>the</strong> continuous behaviour <strong>for</strong><br />
monitoring <strong>the</strong> inPort element during <strong>the</strong> start phase.<br />
Start test<br />
<strong>Manual</strong> starting after equipment reset or interruption of <strong>the</strong> defined safety circuit,<br />
including testing of <strong>the</strong> connected control station. The control station must trigger<br />
once in monitoring direction and switch back on again. Followed by normal<br />
operation. This non-recurrent triggering of <strong>the</strong> inPort element when starting (or<br />
resetting) <strong>the</strong> monitored equipment ensures <strong>the</strong> function of <strong>the</strong> inPort element at<br />
<strong>the</strong> time of starting. A start test can be per<strong>for</strong>med <strong>for</strong> all inPort elements, except<br />
<strong>the</strong> mode selector switch.<br />
An activated start test is indicated by a red rectangle on an added function block.<br />
Normally closed<br />
contact<br />
Comment<br />
Input of a comment text to appear on <strong>the</strong> module.<br />
Enable switch<br />
Switch type Designation Comment<br />
1 (eSwitch_1o) 1 normally closed Enable switch standard<br />
2 (eSwitch_1s) 1 normally open Enable switch standard<br />
3 (eSwitch_2o) 2 normally closed Enable switch higher<br />
requirements<br />
4 (eSwitch_2oT) 2 normally closed time<br />
monitored<br />
Enable switch monitored<br />
<strong>Programming</strong> <strong>Manual</strong> – <strong>SMX</strong> Basic <strong>Module</strong>s 29.10.2009 Page 44 of 183
Emergency Stop<br />
Switch type Designation Comment<br />
1 (eSwitch_1o) 1 normally closed Emergency Stop standard<br />
3 (eSwitch_2o) 2 normally closed Emergency stop higher<br />
requirements<br />
4 (eSwitch_2oT) 2 normally closed time<br />
monitored<br />
Emergency Stop monitored<br />
Door - Monitoring<br />
Switch type Designation Comment<br />
3 eSwitch_2o 2 normally closed Door monitoring higher<br />
requirements<br />
4 eSwitch_2oT 2 normally closed time<br />
monitored<br />
5 eSwitch_1s1o 1 normally open + 1 normally<br />
closed<br />
6 eSwitch_1s1oT 1 normally open + 1 normally<br />
closed time monitored<br />
7 eSwitch_2s2o 2 normally open + 2 normally<br />
closed<br />
8 eSwitch_2s2oT 2 normally open + 2 normally<br />
closed time monitored<br />
Door monitoring monitored<br />
Door monitoring higher<br />
requirements<br />
Door monitoring monitored<br />
Door monitoring higher<br />
requirements<br />
Door monitoring monitored<br />
9 eSwitch_3o 3 normally closed Door monitoring higher<br />
requirements<br />
10 eSwitch_3oT 3 normally closed time<br />
monitored<br />
Two-hand button<br />
Door monitoring monitored<br />
Switch type Comment Classification<br />
11 eTwoHand_2o 2 normally open + 2 normally<br />
closed<br />
Two-hand button higher<br />
requirements type III C<br />
12 eTwoHand_2s 2 normally open Two-hand button monitored type<br />
III A<br />
Note: With <strong>the</strong>se inPort elements a fixed pulse assignment takes place, which cannot<br />
be influenced by <strong>the</strong> user!<br />
index<br />
<strong>Programming</strong> <strong>Manual</strong> – <strong>SMX</strong> Basic <strong>Module</strong>s 29.10.2009 Page 45 of 183
Light curtain<br />
Switch type Designation Comment<br />
3 eSwitch_2o 2 normally closed Light curtain higher<br />
requirements<br />
4 eSwitch_2oT 2 normally closed time Light curtain monitored<br />
monitored<br />
5 eSwitch_1s1o 1 normally open + 1<br />
normally closed<br />
Light curtain higher<br />
requirements<br />
6 eSwitch_1s1oT 1 normally open + 1<br />
normally closed time<br />
monitored<br />
Light curtain monitored<br />
index<br />
Mode selector switch<br />
Switch type Designation Comment<br />
13 eMode_1s1o Selector switch normally<br />
closed/normally open<br />
Mode selector switch<br />
monitored<br />
14 eMode_3switch Selector switch 3 steps Mode selector switch<br />
monitored<br />
Safety note: When changing <strong>the</strong> status of <strong>the</strong> switch <strong>the</strong> SafePLC program to be<br />
created must ensure that <strong>the</strong> outPorts of <strong>the</strong> module are deactivated (note:<br />
Standard 60204-Part1-Paragraph 9.2.3).<br />
<strong>Programming</strong> <strong>Manual</strong> – <strong>SMX</strong> Basic <strong>Module</strong>s 29.10.2009 Page 46 of 183
Sensor<br />
1 eSwitch_1o 1 normally closed Sensor input standard<br />
2 sSwitch_1s 1 normally open Sensor input standard<br />
3 eSwitch_2o 2 normally closed Sensor input higher<br />
requirements<br />
4 eSwitch_2oT 2 normally closed time Sensor input monitored<br />
monitored<br />
5 eSwitch_1s1oT 1 normally open + 1<br />
normally closed time<br />
monitored<br />
Sensor input monitored<br />
Start-up Test<br />
Each switch element has <strong>the</strong> ability <strong>for</strong> running an automatic function test (= start-up<br />
test). Altoge<strong>the</strong>r two switch elements can be configured with start-up test.<br />
<strong>Programming</strong> <strong>Manual</strong> – <strong>SMX</strong> Basic <strong>Module</strong>s 29.10.2009 Page 47 of 183
Start type Function IL Scheme<br />
Start test <strong>Manual</strong> staring after a new<br />
start or an alarm reset,<br />
including testing of <strong>the</strong><br />
LD E1<br />
ST MX.y1<br />
Equipment Geräte-Anlauf start<br />
connected monitoring<br />
equipment.<br />
LD NOT MX.y1<br />
Switching Schaltfunktion function<br />
The monitoring equipment ST MEAA_EN.1<br />
must trigger once in<br />
Output Ausgang<br />
monitoring direction and<br />
switch back on again.<br />
LD MX.y1<br />
ST MEAA_EN.2<br />
Followed by normal operation.<br />
E1: Switching function<br />
y1: auxiliary marker<br />
LD MEA.1<br />
AND MX.y1<br />
ST MX.2<br />
Start and RESET Element<br />
This inPort element offers both extended monitoring functionality, as well as <strong>the</strong><br />
possibility to reset an occurring alarm.<br />
use <strong>for</strong> start monitoring<br />
With start monitoring activated, an AWL code segment <strong>for</strong> monitoring an assigned<br />
inPort segment during restarting or an alarm reset of <strong>the</strong> equipment/machine to<br />
be monitored is automatically generated.<br />
<strong>Programming</strong> <strong>Manual</strong> – <strong>SMX</strong> Basic <strong>Module</strong>s 29.10.2009 Page 48 of 183
This function related testing of a periphery element (e.g. actuation of <strong>the</strong> emergency<br />
stop switch) is intended to ensure its functionality when <strong>the</strong> equipment is started.<br />
List of starting types by means of a enable button:<br />
Start type<br />
Start type Function IL Scheme<br />
<strong>Manual</strong> start<br />
(by hand)<br />
<strong>Manual</strong> start after equipment<br />
reset.<br />
OutPort of <strong>the</strong> inPort element<br />
becomes 1 when <strong>the</strong> safety<br />
circuit is closed/active acc. to<br />
<strong>the</strong> definition of <strong>the</strong> switch type<br />
and <strong>the</strong> start button has been<br />
pressed 1 x.<br />
OutPort becomes 0 after safety<br />
circuit is open.<br />
LD E1<br />
ST MX.y1<br />
LD MX.y1<br />
AND E2<br />
S MX.y2<br />
LD NOT MX.y1<br />
R MX.y2<br />
Switching<br />
Schaltfunktion<br />
function<br />
Start-Taster button<br />
Output Ausgang<br />
Start<br />
monitored<br />
E1: Switching function<br />
E2: Start button<br />
y1: Auxiliary marker 1<br />
y2: Auxiliary marker 2<br />
y3: Auxiliary marker 3<br />
<strong>Manual</strong> start after equipment<br />
reset with monitoring of start<br />
circuit <strong>for</strong> static 1-signal.<br />
OutPort of <strong>the</strong> inPort element<br />
becomes 1 when <strong>the</strong> safety<br />
circuit is closed/active acc. to<br />
<strong>the</strong> definition of <strong>the</strong> switch type<br />
and <strong>the</strong> start button has been<br />
pressed 1 x and released<br />
again.<br />
OutPort becomes 0 after safety<br />
circuit is open.<br />
E1: Switching function<br />
E2: Start button<br />
y1: Auxiliary marker 1<br />
y2: Auxiliary marker 2<br />
y3: Auxiliary marker 2<br />
y4: Auxiliary marker 3<br />
LD MX.y2<br />
AND MX.y1<br />
ST MX.y3<br />
LD E1<br />
ST MX.y1<br />
LD MX.y1<br />
AND E2<br />
S MX.y2<br />
LD NOT MX.y1<br />
R MX.y2<br />
LD MX.y2<br />
AND MX.y1<br />
AND NOT E2<br />
S MX.y3<br />
LD NOT MX.y1<br />
R MX.y3<br />
LD MX.y3<br />
AND MX.y1<br />
ST MX.y4<br />
Schaltfunktion<br />
Switching<br />
function<br />
Start-Taster button<br />
Output Ausgang<br />
The monitoring inPort of <strong>the</strong> start element must be connected to <strong>the</strong> outPort of <strong>the</strong><br />
inPort elements labelled "Start element". Several elements can be monitored.<br />
e.g.<br />
<strong>Programming</strong> <strong>Manual</strong> – <strong>SMX</strong> Basic <strong>Module</strong>s 29.10.2009 Page 49 of 183
Note: When editing <strong>the</strong> associated inPort element, <strong>the</strong> connection with <strong>the</strong> start<br />
element is deleted and cannot be restored automatically. It must be subsequently<br />
supplemented manually.<br />
InPort - Signal No. 1<br />
As with <strong>the</strong> inPort elements, this selection list is used to determine <strong>the</strong> inPort to<br />
which <strong>the</strong> button <strong>for</strong> <strong>for</strong> <strong>the</strong> start element is to be connected. This inPort is<br />
internally limited to <strong>the</strong> assignment to a basic module (E0.1 to E0.14). When <strong>the</strong><br />
AlarmReset option is used, no cross-shorting monitoring can be permitted <strong>for</strong> this<br />
inPort. In <strong>the</strong> dialog <strong>the</strong> corresponding input field is fixed to "OFF".<br />
use as AlarmReset (normally open)<br />
With this option currently present malfunctions (= ALARM) or triggered monitoring<br />
functions can be reset through a connected normally open contact.<br />
The following table shows an overview of all monitoring functions and <strong>the</strong>ir<br />
acknowledgement in triggered state.<br />
Monitoring functions<br />
SEL<br />
SLP<br />
SCA<br />
SSX<br />
SLI<br />
SDI<br />
SLS<br />
SOS<br />
SAC<br />
PDM<br />
ECS<br />
Acknowledgement required<br />
Yes<br />
Yes<br />
No<br />
Yes<br />
Yes<br />
Yes<br />
Yes<br />
Yes<br />
No<br />
No<br />
Yes<br />
Note<br />
The same functionality is achieved when using <strong>the</strong> "Function" button of <strong>the</strong><br />
basic <strong>SMX</strong> module.<br />
Error messages of type "FatalError" require a restart of <strong>the</strong> basic <strong>SMX</strong><br />
module.<br />
The alarm reset input can be operated with 24V continuous voltage and is<br />
edge triggered.<br />
<strong>Programming</strong> <strong>Manual</strong> – <strong>SMX</strong> Basic <strong>Module</strong>s 29.10.2009 Page 50 of 183
use as Logic Reset (normally open)<br />
This option makes <strong>the</strong> reset-acknowlegement functionality in <strong>the</strong> logic diagram<br />
available <strong>for</strong> fur<strong>the</strong>r processing. In this case a function element is automatically<br />
generated, which can be used <strong>for</strong> linkage with a logic functionality. This logic reset<br />
signal is normally used <strong>for</strong> <strong>the</strong> acknowledgement of RS-FlipFlops.<br />
e.g.<br />
saving and resetting of SCA-module errors via RS-FlipFlop.<br />
Switch type Comment Classification Classification SIL<br />
category<br />
1 normally open Alarm reset<br />
-- --<br />
standard (evaluation<br />
of edge)<br />
1 normally open Logic reset standard Category 3 SIL 2<br />
1 normally open Start monitoring<br />
standard (optional<br />
function)<br />
-- --<br />
<strong>Programming</strong> <strong>Manual</strong> – <strong>SMX</strong> Basic <strong>Module</strong>s 29.10.2009 Page 51 of 183
Analog interface<br />
A special parameter editor is available <strong>for</strong> parameterizing <strong>the</strong> analog interface. The<br />
associated block symbol in <strong>the</strong> terminal diagram will appear against a red<br />
background, as long as this interface has not been parameterized. After<br />
parameterization <strong>the</strong> background colour changes to green.<br />
For safety tasks two physically analog input signals each are required. These can be<br />
scaled according to <strong>the</strong>ir signal characteristics and wired with low-pass filters.<br />
In <strong>the</strong> terminal diagram <strong>the</strong> analog inPorts and <strong>the</strong> associated filter modules are<br />
shown accordingly. Double-clicking opens <strong>the</strong> editor <strong>for</strong> <strong>the</strong> selected element.<br />
Analog inPort Ain1 / Ain2<br />
This dialog enables scaling of <strong>the</strong> applied analog sensor signals.<br />
The sensor signals Sensor1 and Sensor2 are used by <strong>the</strong> <strong>SMX</strong> System to<br />
generate a secure analog in<strong>for</strong>mation Ain1 <strong>for</strong> fur<strong>the</strong>r processing by special<br />
monitoring modules. There is also <strong>the</strong> possibility to use <strong>the</strong> sensor signals Sensor<br />
3 and Sensor 4 to calculate <strong>the</strong> secure standardized analog in<strong>for</strong>mation Ain2.<br />
<strong>SMX</strong> uses a calculation method which transfers an analog input in<strong>for</strong>mation in a<br />
standardized image area ranging from 0 to 100 %.<br />
<strong>Programming</strong> <strong>Manual</strong> – <strong>SMX</strong> Basic <strong>Module</strong>s 29.10.2009 Page 52 of 183
Perm. deviation sensor 1/2<br />
Max. permissible deviation between <strong>the</strong> two analog input signals Sensor 1/Sensor<br />
2 or Sensor 3/Sensor 4 respectively. Default value in percent of <strong>the</strong> standardized<br />
maximum signal range.<br />
Nominal value minimum<br />
Lower limit of <strong>the</strong> input signal in millivolt. After standardization this signal level has<br />
a value of 0 %.<br />
Nominal value maximum<br />
Upper limit of <strong>the</strong> input signal in millivolt. After standardization this signal level has<br />
a value of 100 %.<br />
Input filter<br />
Low-pass filter <strong>for</strong> <strong>the</strong> assigned input signal<br />
Note<br />
The filter response times specified in <strong>the</strong> installation manual must be taken<br />
into account!<br />
Analog adder<br />
The analog adder enables weighting of <strong>the</strong> standardized analog signals.<br />
<strong>Programming</strong> <strong>Manual</strong> – <strong>SMX</strong> Basic <strong>Module</strong>s 29.10.2009 Page 53 of 183
Two input signals, which have already been standardized, can be added toge<strong>the</strong>r<br />
in a defined ratio to each o<strong>the</strong>r. The corresponding signal components are<br />
determined in percent.<br />
<strong>Programming</strong> <strong>Manual</strong> – <strong>SMX</strong> Basic <strong>Module</strong>s 29.10.2009 Page 54 of 183
Inserting OutPort elements<br />
The outPort elements create <strong>the</strong> digital connection between one or several<br />
connected external switching circuits in <strong>the</strong> <strong>SMX</strong> System. Each outPort element is<br />
triggered by a logic input signal "0" or "1" via <strong>the</strong> logic diagram.<br />
The outPort elements are added and edited in <strong>the</strong> "Terminal Diagram" view.<br />
The resource control of <strong>the</strong> function block elements <strong>for</strong> <strong>the</strong> <strong>SMX</strong>-system<br />
manages <strong>the</strong> available elements.<br />
Relais outPort<br />
OutPort type<br />
Single<br />
2 single relays (K1 to K2) can be selected independently from each o<strong>the</strong>r.<br />
Redundant<br />
Two relay outPorts are combined and always switched toge<strong>the</strong>r.<br />
Note<br />
Follow <strong>the</strong> explanations in <strong>the</strong> installation manual when using relay outPorts in safety<br />
applications.<br />
For exact contact monitoring see chapter EMU-function<br />
<strong>Programming</strong> <strong>Manual</strong> – <strong>SMX</strong> Basic <strong>Module</strong>s 29.10.2009 Page 55 of 183
Semi-conductor outPort<br />
Semi-conductor outPort as standard outPort<br />
Certain semi-conductor outPorts can solely be used as auxiliary outPorts and are<br />
thus not suitable <strong>for</strong> safety applications (refer to <strong>the</strong> installation manual <strong>for</strong> details).<br />
The editor can only be used to set <strong>the</strong> initial assignment.<br />
Semi-conductor outPort with safety function<br />
Semii-conductor outPorts with safety function are internally structured with two<br />
channels and can be combined with external contact monitoring (EMU).<br />
For exact contact monitoring see chapter EMU function<br />
<strong>Programming</strong> <strong>Manual</strong> – <strong>SMX</strong> Basic <strong>Module</strong>s 29.10.2009 Page 56 of 183
HiLo Outport<br />
Semi-conductor outPort as standard or safety outPort<br />
HiLo semi-conductor outPorts can be used individually as standard outPorts and<br />
grouped as safety outPorts (refer to <strong>the</strong> installation manual <strong>for</strong> details).<br />
The editor can be used to set <strong>the</strong> initial assignment.<br />
OutPort type<br />
Single<br />
"HISIDE" (= P-switching) or "LOSIDE" (= M-switching) can be selected as standard<br />
outPort. The use of single standard outPorts is not suitable <strong>for</strong> safety outPorts.<br />
<strong>Programming</strong> <strong>Manual</strong> – <strong>SMX</strong> Basic <strong>Module</strong>s 29.10.2009 Page 57 of 183
Redundant<br />
With <strong>the</strong> option "Redundant" <strong>the</strong> editor compellingly specifies a combination of<br />
"HISIDE" and "LOSIDE" outPorts.<br />
For exact contact monitoring see chapter EMU-function<br />
EMU Function<br />
The multiplication of contacts and power normally requires additional switching<br />
devices, which are triggered through <strong>the</strong> outPorts of <strong>the</strong> <strong>SMX</strong>-system. EMU<br />
monitoring realizes <strong>the</strong> "Safety relay" function by processing an external feedback<br />
circuit.<br />
Applications with higher safety requirements among o<strong>the</strong>rs require functional<br />
monitoring <strong>for</strong> <strong>the</strong>se switching devices. For this purpose <strong>the</strong> switching devices must<br />
be equipped with positively driven auxiliary contacts. Contacts to be monitored are<br />
switched in series and are closed when in idle state. It is verified whe<strong>the</strong>r all contacts<br />
are closed when <strong>the</strong> outPort is not switched on and open in switched on state. Time<br />
related expectations can be parameterized. The same sources as <strong>for</strong> <strong>the</strong> inPorts are<br />
also used to supply <strong>the</strong> contacts to be monitored.<br />
Note<br />
Details to this subject can be found in <strong>the</strong> circuitry examples of <strong>the</strong> installation<br />
manual.<br />
Feedback circuit<br />
Switch to activate EMU monitoring<br />
Feedback channel<br />
Digital inPort of <strong>the</strong> feedback circuit. The outPorts <strong>for</strong> activation of <strong>the</strong> external<br />
switching function and <strong>the</strong> feedback circuit are located on <strong>the</strong> same <strong>SMX</strong>-system<br />
module (basic module or expansion module).<br />
Pickup time<br />
Variable time slot (closing delay) <strong>for</strong> testing <strong>the</strong> safety contacts<br />
Min{T EMU } = 8 msec<br />
Max{T EMU } = 3000 msec<br />
Dropout time<br />
Variable time slot (release delay) <strong>for</strong> testing <strong>the</strong> safety contacts<br />
Min{T EMU } = 8 msec<br />
Max{T EMU } = 3000 msec<br />
<strong>Programming</strong> <strong>Manual</strong> – <strong>SMX</strong> Basic <strong>Module</strong>s 29.10.2009 Page 58 of 183
The Logic <strong>Module</strong>s<br />
These modules <strong>for</strong>m <strong>the</strong> basis <strong>for</strong> creating a program <strong>for</strong> <strong>the</strong> safety application.<br />
They enable <strong>the</strong> logic linkage of <strong>the</strong> inPorts with monitoring functions with and <strong>the</strong><br />
outPorts. Inserting logic modules is only possible in <strong>the</strong> "logic diagram" view,<br />
o<strong>the</strong>rwise <strong>the</strong> associated menu commands are disabled. This is <strong>the</strong> case when<br />
<strong>the</strong> resources <strong>for</strong> a module are already exhausted, e.g. after all timer modules<br />
have been inserted.<br />
Logic AND<br />
"AND"-operations of maximum 5 output signals from o<strong>the</strong>r function blocks.<br />
The AND-operation provides <strong>the</strong> signal state "1" <strong>for</strong> all input signals "1" as logical<br />
result, o<strong>the</strong>rwise "0".<br />
Note: The number of inPort connectors can only be reduced in case of free<br />
connectors. If all connectors have linkages assigned, <strong>the</strong>se must be deleted<br />
be<strong>for</strong>ehand.<br />
Logic OR<br />
"OR"-operations of maximum 5 output signals from o<strong>the</strong>r function blocks.<br />
The OR-operation provides <strong>the</strong> signal state "1" <strong>for</strong> at least one inPort with signal<br />
state "1", o<strong>the</strong>rwise "0".<br />
<strong>Programming</strong> <strong>Manual</strong> – <strong>SMX</strong> Basic <strong>Module</strong>s 29.10.2009 Page 59 of 183
Logic EXKLUSIV OR<br />
"EXCLUSIVE OR"-operations of 2 output signals from o<strong>the</strong>r function blocks.<br />
The XOR-module provides "1" as logic result, if one inPort has <strong>the</strong> input signal "1"<br />
and <strong>the</strong> inPort has <strong>the</strong> input signal "0", o<strong>the</strong>rwise "0".<br />
Logic NOT<br />
The logic result of this function block is <strong>the</strong> negation of <strong>the</strong> input signal. The<br />
term negation means that <strong>the</strong> logic result is reversed (negated).<br />
index<br />
<strong>Programming</strong> <strong>Manual</strong> – <strong>SMX</strong> Basic <strong>Module</strong>s 29.10.2009 Page 60 of 183
RS Flip Flop<br />
Set / reset contact element. This switching element shows <strong>the</strong> following<br />
characteristics:<br />
The logic result during initialization of <strong>the</strong> element is "0".<br />
The logic result becomes "1", if an edge change from "0" to "1" takes place at<br />
<strong>the</strong> "Set" inPort. The outPort remains at "1", even if <strong>the</strong> state of <strong>the</strong> "Set"<br />
inPort changes back to "0".<br />
The logic result becomes "0", if an edge change from "0" to "1" takes place at<br />
<strong>the</strong> "Set" inPort.<br />
With both inPorts set to "1", <strong>the</strong> result is "0"!<br />
Reset<br />
Set<br />
Note: The desired switching state of this element is only achieved by linking as<br />
specified in <strong>the</strong> labelling.<br />
index<br />
<strong>Programming</strong> <strong>Manual</strong> – <strong>SMX</strong> Basic <strong>Module</strong>s 29.10.2009 Page 61 of 183
Timer<br />
Function block that starts a counter in <strong>the</strong> event of an edge change. After<br />
<strong>the</strong> specified temporal delay <strong>the</strong> logic result will become "1" or "0".<br />
Block ID: Instance of <strong>the</strong> timer module.<br />
Delay: Parameterized time<br />
T min = 8 ms<br />
T max = 533 min (31999992 ms)<br />
Note: The programmable values always correspond with <strong>the</strong> integer multiple of<br />
<strong>the</strong> <strong>SMX</strong> cycle time of 8 msec!<br />
Characteristic<br />
pickup delayed<br />
InPort<br />
OutPort function<br />
"0" The outPort continuously remains at "0"<br />
Edge "0" to "1" Once <strong>the</strong> parameterized time has expired <strong>the</strong> initial<br />
status of <strong>the</strong> timer module will change from "0" to "1".<br />
Status change "1" to "0" The outPort immediately changes to "0"<br />
<strong>Programming</strong> <strong>Manual</strong> – <strong>SMX</strong> Basic <strong>Module</strong>s 29.10.2009 Page 62 of 183
Dropout delayed<br />
InPort<br />
OutPort function<br />
"0" The outPort continuously remains at "0"<br />
Edge "0" to "1" The outPort immediately changes to "1" When <strong>the</strong><br />
counter has run out <strong>the</strong> outPort will change to "0"<br />
Status change "1" to "0" The outPort immediately changes to "0"<br />
Permanently logic "1" module<br />
This module constantly provides <strong>the</strong> value "1". This function can be used to<br />
program static states in <strong>the</strong> logic diagram.<br />
Example: Assignment of an unused inPort on a direction dependent SDI<br />
Result of <strong>the</strong> EMU module<br />
This module delivers <strong>the</strong> result of <strong>the</strong> EMU-function that has been<br />
parameterized in <strong>the</strong> outPort module. Fault-free EMU-function is fed back as<br />
status "1".<br />
<strong>Programming</strong> <strong>Manual</strong> – <strong>SMX</strong> Basic <strong>Module</strong>s 29.10.2009 Page 63 of 183
Connecting Point InPort<br />
The "Connecting Point InPort" supports <strong>the</strong> clearly arranged representation<br />
of logic diagrams. These modules provide virtual connections in <strong>the</strong> logic diagram.<br />
The connecting point reference numbers are automatically generated and cannot<br />
be changed, but <strong>the</strong> comment box enables appropriate allocation of <strong>the</strong> virtual<br />
connection. Activating <strong>the</strong> CTRL-key and selecting a "Connecting Point InPort"<br />
also selects <strong>the</strong> associated "Connecting Point OutPort" modules.<br />
Terminal number: Identification number of <strong>the</strong> connecting point.<br />
Note: When deleting "Connecting Point InPort" elements <strong>the</strong> dependent<br />
"Connecting Point OutPort" elements will automatically also be deleted. Be<strong>for</strong>e<br />
<strong>the</strong> deletion process <strong>the</strong> user will be warned.<br />
Tip: The use of a comment line simplifies <strong>the</strong> assignment of elements.<br />
index<br />
<strong>Programming</strong> <strong>Manual</strong> – <strong>SMX</strong> Basic <strong>Module</strong>s 29.10.2009 Page 64 of 183
Connecting Point OutPort<br />
This element is <strong>the</strong> equivalent to <strong>the</strong> "Connecting Point InPort". Selecting a<br />
terminal number sets up a virtual connection to a "Connecting Point InPort"<br />
function block.<br />
Terminal number: Identification number of <strong>the</strong> "Connecting Point InPort"<br />
element.<br />
Note: After assignment to a "Connecting Point InPort" element, <strong>the</strong> comment<br />
managed by this point is taken over by <strong>the</strong> "Connecting Point OutPort" element.<br />
index<br />
<strong>Programming</strong> <strong>Manual</strong> – <strong>SMX</strong> Basic <strong>Module</strong>s 29.10.2009 Page 65 of 183
Signal Channel<br />
The signal channel enables <strong>the</strong> functional transfer of data from <strong>the</strong> process<br />
image to a connected field bus. It is made up of two parts: <strong>the</strong> first part consists of<br />
56 bit logic data, <strong>the</strong> second part of a 64 bit wide process data channel. The data<br />
to be transferred can be freely assigned via a profile generator.<br />
Logic data<br />
A profile of <strong>the</strong> data to be transmitted from <strong>the</strong> logic diagram can be defined using<br />
a list:<br />
The signal channel list contains <strong>the</strong> references to <strong>the</strong> selected bit<br />
in<strong>for</strong>mation in <strong>the</strong> logic diagram.<br />
Enter <strong>the</strong> selected bit in<strong>for</strong>mation at <strong>the</strong> position of <strong>the</strong> set BitID (= bit<br />
position in signal channel)<br />
The bit positions are displayed based on 1<br />
The DeviceID enables reference to various modules<br />
<strong>Module</strong>ID: Number of function block in logic diagram.<br />
<strong>Module</strong>: Fur<strong>the</strong>r in<strong>for</strong>mation to <strong>the</strong> module<br />
Symbol address: Designation of <strong>the</strong> connector<br />
The numbers under <strong>the</strong> designation "<strong>Module</strong> outPorts" indicate:<br />
Number of status bits used / number of max. possible status bits<br />
<strong>Programming</strong> <strong>Manual</strong> – <strong>SMX</strong> Basic <strong>Module</strong>s 29.10.2009 Page 66 of 183
Add…<br />
Opens <strong>the</strong> "Add status bit" dialog. The module selected here is added at <strong>the</strong> end<br />
of <strong>the</strong> reference list.<br />
Delete<br />
Deletes <strong>the</strong> currently selected line from <strong>the</strong> reference list. The BitID's of <strong>the</strong><br />
following entries remain unchanged.<br />
Up<br />
Changes <strong>the</strong> currently selected line in <strong>the</strong> reference list by one line upwards and<br />
takes over this line's BitID.<br />
Down<br />
Changes <strong>the</strong> currently selected line in <strong>the</strong> reference list by one line downwards<br />
and takes over this line's BitID.<br />
Assign BitID<br />
Enables any desired BitID assignment.<br />
The assignment dialog can only be opened under <strong>the</strong> following conditions:<br />
- There must still be at least one free BitID available.<br />
- A line must be selected in <strong>the</strong> signal channel list<br />
The dialog can also be opened by double-clicking on a line<br />
- Setting <strong>the</strong> new bit position. The numbering system is 1-based.<br />
Sort BitID<br />
Sorts <strong>the</strong> signal channel list in <strong>the</strong> sequence of <strong>the</strong> assigned bit positions.<br />
Note: The assignment of status bits can only take place after a successful<br />
compiler run, because <strong>the</strong> addresses calculated by <strong>the</strong> compiler must be<br />
accepted. These are displayed in <strong>the</strong> "Symbol addresses" column. The entries in<br />
this column remain empty or are not updated, as long as <strong>the</strong> logic diagram has<br />
not been completely compiled.<br />
<strong>Programming</strong> <strong>Manual</strong> – <strong>SMX</strong> Basic <strong>Module</strong>s 29.10.2009 Page 67 of 183
Process data<br />
This part of <strong>the</strong> signal channel defines process data which are transferred from<br />
<strong>the</strong> <strong>SMX</strong>-system to ano<strong>the</strong>r field bus. 64 bit are available in total. The values set<br />
in <strong>the</strong> dialog are entered into <strong>the</strong> signal channel from "top" to "bottom"<br />
<strong>Programming</strong> <strong>Manual</strong> – <strong>SMX</strong> Basic <strong>Module</strong>s 29.10.2009 Page 68 of 183
Function Groups<br />
Function groups connect several functional modules to a superordinate logic<br />
structure. This matching group of modules is created inside <strong>the</strong> function group frame<br />
and connected via this frame.<br />
This grouping gives <strong>the</strong> logic diagram a much clearer structure and, with <strong>the</strong> export /<br />
import functionality, enables <strong>the</strong> creation of an own function library.<br />
Creating a function group frame<br />
Inserting a group module<br />
First <strong>the</strong> command "Insert group frame" is started by clicking on <strong>the</strong> toolbar button<br />
"Insert".<br />
The menu: Group->Insert group frame… can alternatively be invoked.<br />
The size of <strong>the</strong> group frame is determined with <strong>the</strong> mouse pointer.<br />
1.) First position <strong>the</strong> mouse pointer with <strong>the</strong> left mouse button in <strong>the</strong> left upper<br />
corner of <strong>the</strong> group frame and hold <strong>the</strong> mouse button depressed.<br />
2.) Then drag <strong>the</strong> mouse pointer while holding <strong>the</strong> left mouse button depressed<br />
and determine <strong>the</strong> bottom corner of <strong>the</strong> group area.<br />
3.) Releasing <strong>the</strong> mouse button will insert <strong>the</strong> group frame and open <strong>the</strong> group<br />
editor.<br />
Opening <strong>the</strong> group editor<br />
The group editor can optionally be opened by double-clicking in <strong>the</strong> status line of <strong>the</strong><br />
group frame, or via <strong>the</strong> context menu (right mouse button) of a selected module.<br />
<strong>Programming</strong> <strong>Manual</strong> – <strong>SMX</strong> Basic <strong>Module</strong>s 29.10.2009 Page 69 of 183
The tab-dialogs "Settings" and "Description" contain group related settings, as well as<br />
<strong>the</strong> function related description of <strong>the</strong> group. The control button "File" can be used to<br />
export <strong>the</strong> group into a file, or to import <strong>the</strong> group from a file.<br />
Setting <strong>the</strong> group management<br />
With <strong>the</strong> switch "Disable group management" <strong>the</strong> group modules can be disabled or<br />
enabled.<br />
With <strong>the</strong> switch set. <strong>the</strong> function block management of <strong>the</strong> frame is disabled and <strong>the</strong><br />
modules are tied to <strong>the</strong> group:<br />
<strong>Module</strong>s can no longer be removed from <strong>the</strong> group, whereby <strong>the</strong> configuration<br />
of parameters is still permitted.<br />
Deleting a group frame also deletes all group modules.<br />
No new modules can be added to <strong>the</strong> group.<br />
Group members appear "grey shaded".<br />
When disabled, <strong>the</strong> group has a time stamp assigned, which is also displayed<br />
when <strong>the</strong> group editor is opened.<br />
The control buttons <strong>for</strong> <strong>the</strong> info fields "Name", "Created by" and "Released by"<br />
are disabled.<br />
<strong>Programming</strong> <strong>Manual</strong> – <strong>SMX</strong> Basic <strong>Module</strong>s 29.10.2009 Page 70 of 183
The group status "disabled" is indicated by <strong>the</strong> padlock symbol in <strong>the</strong> status bar of<br />
<strong>the</strong> group module at <strong>the</strong> top left.<br />
When inserting a new group frame <strong>the</strong> switch "Disable group management " is set to<br />
unlocked state by default. After closing <strong>the</strong> group editor <strong>the</strong> drawn frame appears in<br />
<strong>the</strong> logic diagram and represents <strong>the</strong> active area of <strong>the</strong> group.<br />
Function blocks can be inserted, moved or deleted on this area. The modules<br />
will automatically be accepted in <strong>the</strong> group, unless <strong>the</strong> group is in disabled state. The<br />
functional modules in this case additionally show <strong>the</strong> number of <strong>the</strong> function group.<br />
Note:<br />
The following module types cannot be contained in a group. These are filtered out<br />
when <strong>the</strong> modules are moved into <strong>the</strong> frame area.<br />
o InPort modules<br />
o OutPort modules<br />
o All function blocks pre-defined in <strong>the</strong> logic diagram /e.g. encoders, analog<br />
modules, filters)<br />
o Signal channel module<br />
o Terminal blocks<br />
The group is able to accept maximum 200 function blocks.<br />
<strong>Programming</strong> <strong>Manual</strong> – <strong>SMX</strong> Basic <strong>Module</strong>s 29.10.2009 Page 71 of 183
Changing <strong>the</strong> size of a group frame<br />
A selected module can be adapted in size via its "Hotspot". For this purpose it is<br />
selected with <strong>the</strong> mouse pointer and changed in size with <strong>the</strong> left mouse button held<br />
depressed.<br />
Showing and hiding functional modules<br />
The modules contained in <strong>the</strong> group can be shown or hidden be clicking on <strong>the</strong><br />
control button in <strong>the</strong> status bar with <strong>the</strong> mouse pointer. When showing its content, <strong>the</strong><br />
size of <strong>the</strong> group module automatically adapts to <strong>the</strong> elements it contains.<br />
Note:<br />
Do not use <strong>the</strong> show/hide function while editing modules, as o<strong>the</strong>rwise <strong>the</strong> available<br />
free space may be optimized <strong>for</strong> fur<strong>the</strong>r modules. In this case <strong>the</strong> group needs to be<br />
manually enlarged again via <strong>the</strong> "Hotpoint".<br />
Tip:<br />
The size of <strong>the</strong> group frame can be fixed by using a text element in <strong>the</strong> bottom right<br />
hand corner.<br />
The visibility of <strong>the</strong> associated function blocks in <strong>the</strong> logic diagram can also be set in<br />
<strong>the</strong> group dialog using <strong>the</strong> switch "Show associated modules".<br />
Show modules<br />
The size of <strong>the</strong> group module is determined by <strong>the</strong> position of <strong>the</strong> functional modules<br />
contained <strong>the</strong>rein.<br />
Hide modules<br />
The group module is set to a size of approx. 2 x 3 fields of <strong>the</strong> logic diagram. The<br />
bitmap <strong>for</strong> <strong>the</strong> symbol is display.<br />
If several function groups are available, all group modules can be shown or hidden<br />
by using <strong>the</strong> symbol in <strong>the</strong> group toolbar. The same functionality is achieved<br />
via <strong>the</strong> "Group" menu.<br />
<strong>Programming</strong> <strong>Manual</strong> – <strong>SMX</strong> Basic <strong>Module</strong>s 29.10.2009 Page 72 of 183
Creating <strong>the</strong> group interface<br />
The group interface modules represent <strong>the</strong> interface of <strong>the</strong> function group to <strong>the</strong><br />
elements outside <strong>the</strong> group. Connections to function blocks outside <strong>the</strong> group can<br />
only be made via this interface module.<br />
Inserting a group interface module is started by clicking on <strong>the</strong> button in <strong>the</strong><br />
group toolbar (alternatively menu: Group->Insert interface module...) After placing a<br />
module inside a group frame <strong>the</strong> group interface editor is opened.<br />
Setting <strong>the</strong> usage<br />
This setting is used to determine <strong>the</strong> connection properties of <strong>the</strong> module as inPort or<br />
outPort.<br />
"as group inPort"<br />
This element represents <strong>the</strong> connection of function blocks outside <strong>the</strong> group to<br />
<strong>the</strong> external group elements. The module should be positioned on <strong>the</strong> left side of <strong>the</strong><br />
group area, if this is possible. The outPort connector must be wired fur<strong>the</strong>r inside <strong>the</strong><br />
group.<br />
"as group outPort"<br />
This module transfers a result from <strong>the</strong> group to externally located logic<br />
diagram elements.<br />
<strong>Programming</strong> <strong>Manual</strong> – <strong>SMX</strong> Basic <strong>Module</strong>s 29.10.2009 Page 73 of 183
Restrictions<br />
The dialog "Connection restrictions" can be used to set switches <strong>for</strong> group inPort and<br />
group outPort elements and prevent impermissible allocations.<br />
Note: When reusing group elements, <strong>the</strong>se restrictions prevent faulty or unintended<br />
connection of external function elements. Restrictions should always only be set after<br />
complete definition of <strong>the</strong> group context.<br />
Context: Defining a module:<br />
The interface module reads <strong>the</strong> type and <strong>the</strong> restriction criteria of <strong>the</strong> connected<br />
module and offers <strong>the</strong>se as restriction. The restriction is shown when <strong>the</strong> associated<br />
switching element is set.<br />
Example: A mode selector switch is connected to <strong>the</strong> group interface module. In user<br />
mode <strong>the</strong> group module always expects to be connected with <strong>the</strong> function block type<br />
"Mode selector switch"<br />
Context: Using a module<br />
When connecting to an external functional module, <strong>the</strong> interface module expects <strong>the</strong><br />
set restriction criteria. If <strong>the</strong>se are not fulfilled a compiler error will occur and <strong>the</strong><br />
program cannot be compiled.<br />
<strong>Programming</strong> <strong>Manual</strong> – <strong>SMX</strong> Basic <strong>Module</strong>s 29.10.2009 Page 74 of 183
Procedure <strong>for</strong> Creating a Function Group<br />
A function group is created via a group frame. Function blocks within <strong>the</strong> colour<br />
contrastive area of a group frame are assigned to this group. As long as a group<br />
module is still enabled, functional modules can be added to or deleted from <strong>the</strong> area<br />
of <strong>the</strong> group frame. A module contained in a function group indicates this status by<br />
showing <strong>the</strong> message "Contained in function group: No." in <strong>the</strong> info-display.<br />
Tips:<br />
- The function groups should remain in enabled condition <strong>for</strong> as short a time as<br />
possible.<br />
- If possible, only edit one group in <strong>the</strong> logic diagram.<br />
- Do not move enabled groups unnecessarily in <strong>the</strong> logic diagram.<br />
- Disable groups be<strong>for</strong>e saving!<br />
- Set up connections inside <strong>the</strong> function group as late as possible.<br />
- Ensure a sufficient size of <strong>the</strong> group frame.<br />
1. Step: Adding interface modules<br />
The functional modules contained in a group can only be linked with <strong>the</strong> function<br />
elements outside <strong>the</strong> group frame via <strong>the</strong> interface modules described above. In<br />
<strong>the</strong>se interface modules restrictions can be set as required, which will demand <strong>the</strong><br />
same connection constellation when importing <strong>the</strong> group into ano<strong>the</strong>r logic diagram.<br />
The interface modules enable a description of <strong>the</strong> input and output parameters of <strong>the</strong><br />
function group. The setting of restrictions should be documented in <strong>the</strong> description<br />
tab.<br />
2. Step: Adding functional modules to <strong>the</strong> group<br />
Functional modules can only be added to <strong>the</strong> group frame in enabled condition. This<br />
is indicated by <strong>the</strong> symbol in <strong>the</strong> status bar.<br />
If function blocks are to be added to a group, a module must ei<strong>the</strong>r be inserted within<br />
<strong>the</strong> group area, or it must be moved into this area.<br />
Note:<br />
No function blocks can be inserted by simply moving <strong>the</strong> group frame.<br />
Function blocks will only be accepted if <strong>the</strong>se modules are moved in from<br />
outside.<br />
Only logic modules and monitoring modules can be accepted in <strong>the</strong> group.<br />
InPort and outPort modules, pre-defined elements such as signal lists, analog<br />
modules or encoder modules are not permitted.<br />
Existing connections inside <strong>the</strong> functional modules are deleted upon transition<br />
into <strong>the</strong> group element<br />
<strong>Programming</strong> <strong>Manual</strong> – <strong>SMX</strong> Basic <strong>Module</strong>s 29.10.2009 Page 75 of 183
3. Step: Set up connection<br />
4. Step: Connect group interface<br />
5. Step: Set connection restrictions<br />
Testing function groups<br />
Imported group elements do not have a safety signature! Within <strong>the</strong> application <strong>the</strong><br />
function of <strong>the</strong> group element must be proven and verified by means of <strong>the</strong> validation<br />
process.<br />
Disabling a function group<br />
When disabling a function group, <strong>the</strong> functional modules contained in this group are<br />
tied to <strong>the</strong> group module. The modules can in this case no longer be deleted<br />
individually and only moved via <strong>the</strong> group module.<br />
Exporting a function group<br />
<strong>Programming</strong> <strong>Manual</strong> – <strong>SMX</strong> Basic <strong>Module</strong>s 29.10.2009 Page 76 of 183
The modules of a group can be exported into a *.fgr file. An exported group can be<br />
imported into ano<strong>the</strong>r group frame. This enables <strong>the</strong> creation of a library with predefined<br />
function groups, which can <strong>the</strong>n be imported into new projects.<br />
Note:<br />
The function library should only be considered a editing aid, but does not relieve <strong>the</strong><br />
user from <strong>the</strong> necessity of validating <strong>the</strong> group elements used in <strong>the</strong> application.<br />
The switch "Disable permanently" is a special export feature. If this option is set, <strong>the</strong><br />
group can no longer be modified after it has been imported.<br />
Please note:<br />
If this option remains set and <strong>the</strong> dialog is quit with OK, <strong>the</strong> group is disabled within<br />
<strong>the</strong> logic diagram and <strong>the</strong> dialog element "Disable group management" is<br />
permanently hidden.<br />
It is highly recommended to make a backup copy of <strong>the</strong> still enabled function group.<br />
After <strong>the</strong> option "Disable permanently" has been set, <strong>the</strong> structure of <strong>the</strong> function<br />
group can no longer be changed!<br />
Importing a function group<br />
A function group file can only by imported using an already inserted group frame. For<br />
this purpose start <strong>the</strong> group editor and start <strong>the</strong> function "Import group..."<br />
Note: <strong>Module</strong>s already available in <strong>the</strong> group, will be deleted.<br />
The import process includes <strong>the</strong> verification of <strong>the</strong> sensor configuration and <strong>the</strong> still<br />
existing resources in <strong>the</strong> logic diagram. The group can only be imported if all<br />
resources needed <strong>for</strong> <strong>the</strong> modules are available. The necessary sensor settings must<br />
be checked, particularly in case of position dependent monitoring modules.<br />
If a resource is no longer available, this is indicated by an error message and <strong>the</strong><br />
import is not possible.<br />
<strong>Programming</strong> <strong>Manual</strong> – <strong>SMX</strong> Basic <strong>Module</strong>s 29.10.2009 Page 77 of 183
The Safety Functions<br />
The safety functions are an essential functionality of <strong>the</strong> <strong>SMX</strong>-system. Pre-defined<br />
functions <strong>for</strong>:<br />
- speed monitoring<br />
- position detection<br />
- monitoring of limits and target positions<br />
- functional emergency p monitoring<br />
- standstill monitoring<br />
- direction monitoring<br />
- function monitoring of external shut-down devices<br />
- rest functions<br />
are available.<br />
The functionality <strong>for</strong> monitoring position, speed and shut-down is only activated<br />
after successful encoder configuration in <strong>the</strong> terminal diagram. For each<br />
monitoring functionality a limited number of modules is available. If <strong>the</strong>se are used<br />
up, <strong>the</strong> menu entry <strong>for</strong> <strong>the</strong> corresponding function block is disabled.<br />
Function name acc. to EN 61800–5–2<br />
SLS - Safe Limited Speed 8<br />
Number of<br />
modules<br />
SOS - Safe Operational Stop<br />
SDI = Safe Direction Indication<br />
1 per axis<br />
1 per axis<br />
SSX = Safe Stop 1/2 4<br />
SLI = Safe Limited Increment<br />
1 per axis<br />
SCA = Safe Cam 16<br />
SEL = Safe Emergency Limit<br />
1 per axis<br />
SLP = Safe Limited Position 2<br />
ECS – Encoder Supervisor<br />
1 per axis<br />
SAC = Safe Analog Control 8<br />
EMU – Emergency Monitoring Unit 2<br />
PDM – Position Deviation Mode<br />
1 per axis<br />
Note: If no position monitoring is activated in <strong>the</strong> encoder configuration, <strong>the</strong><br />
dependent control elements are disabled in <strong>the</strong> dialogs.<br />
<strong>Programming</strong> <strong>Manual</strong> – <strong>SMX</strong> Basic <strong>Module</strong>s 29.10.2009 Page 78 of 183
Position and Speed Sensors<br />
Selection of encoder type and measuring section as well as <strong>the</strong> parameterization of<br />
both sensors <strong>for</strong> position and speed detection takes place via <strong>the</strong> "Sensor Interface"<br />
input mask.<br />
Note:<br />
The parameterization of <strong>the</strong> sensors must always be defined by starting with one<br />
of <strong>the</strong> two connected signal sources. For <strong>the</strong> second sensor possibly available<br />
transmission ratios of gearboxes or similar system components must be taken<br />
into consideration.<br />
<strong>Programming</strong> <strong>Manual</strong> – <strong>SMX</strong> Basic <strong>Module</strong>s 29.10.2009 Page 79 of 183
Parameterization of <strong>the</strong> measuring section<br />
The following options and inputs are possible in <strong>the</strong> field "Parameters of measuring<br />
section"<br />
Linear:<br />
Rotational:<br />
Activating position<br />
processing:<br />
Measuring length:<br />
Maximum speed:<br />
The measuring section has a linear characteristic. The<br />
unit <strong>for</strong> <strong>the</strong> position in this case is "mm" and <strong>the</strong> speed<br />
can be given ei<strong>the</strong>r in "mm/sec" or in "m/sec".<br />
The measuring section has a rotational characteristic, i.e.<br />
<strong>the</strong> movement is a rotation. The position is processed in<br />
"mgrd" or in "revolutions", <strong>the</strong> speed in "mgrd/sec",<br />
"revolutions/sec" or in "revolutions/min".<br />
Processing of an absolute measuring section. This<br />
functionality is only available <strong>for</strong> selection if an absolute<br />
sensor has been parameterized be<strong>for</strong>ehand!<br />
With position processing activated all position related<br />
monitoring functions are enabled.<br />
Specification of <strong>the</strong> max. measuring length <strong>for</strong> <strong>the</strong><br />
position in mm, m or mgrd, rev. With position processing<br />
activated, <strong>the</strong> application must always maintained within<br />
<strong>the</strong> limits of <strong>the</strong> set measuring length. Each actual<br />
position outside <strong>the</strong> defined measuring length causes an<br />
alarm of <strong>the</strong> <strong>SMX</strong> axis.<br />
Specification of <strong>the</strong> max. speed of <strong>the</strong> reference axis<br />
given in <strong>the</strong> currently selected unit.<br />
The permissible maximum speed describes <strong>the</strong> highest<br />
speed that can possibly be reached with <strong>the</strong> current<br />
technological system configuration. Here one should<br />
enter <strong>the</strong> max. value that may possibly be reached by <strong>the</strong><br />
axis to be monitored. This may, under certain<br />
circumstances, only refer to a <strong>the</strong>oretical maximum<br />
speed of <strong>the</strong> actual application. The parameterized value<br />
does not refer to <strong>the</strong> safety-related shut-down (e.g. shutdown<br />
via SLS), but to <strong>the</strong> reliability, i.e. consistency of<br />
encoders or consistency of <strong>the</strong> mechanical situation.<br />
Exceeding this value triggers an alarm with shut-down<br />
and error / alarm status. This is no planned shut-down<br />
<strong>Programming</strong> <strong>Manual</strong> – <strong>SMX</strong> Basic <strong>Module</strong>s 29.10.2009 Page 80 of 183
ecause of safety-relevant speeding, but <strong>the</strong> reliability of<br />
<strong>the</strong> encoders or <strong>the</strong> mechanical situation is in doubt<br />
(encoder fault, electric power converter fault,...), because<br />
this speed can normally not be achieved under drive<br />
technological aspects.<br />
Should this occur, <strong>the</strong> <strong>SMX</strong>-module will change into<br />
alarm state and switch off all outPorts.<br />
This means, that <strong>the</strong> "maximum speed" must always be<br />
higher than <strong>the</strong> shut-down speed of a safety function. It<br />
serves <strong>the</strong> purpose of detecting a fault on <strong>the</strong> safe axis<br />
by means of measuring systems.<br />
The value that is entered into this field, at <strong>the</strong> same time<br />
changes <strong>the</strong> dimensioning of <strong>the</strong> encoder consistency in<br />
regard to <strong>the</strong> "Increment shut-down threshold" and <strong>the</strong><br />
"Speed shut-down threshold". A higher maximum speed<br />
permits higher shut-down thresholds between <strong>the</strong><br />
encoders. The maximum value should <strong>the</strong>re<strong>for</strong>e not be<br />
chosen too high, as o<strong>the</strong>rwise <strong>the</strong> shut-down thresholds<br />
could be to high <strong>for</strong> <strong>the</strong> reliability of <strong>the</strong> sensors amongst<br />
each o<strong>the</strong>r. The "Info field sensors" value table shows<br />
<strong>the</strong>se calculated limiting values <strong>for</strong> <strong>the</strong> variables V_max,<br />
V_min.<br />
Shut-down thresholds<br />
Speed filter:<br />
The shut-down threshold defines <strong>the</strong> tolerable<br />
speed/position deviation between <strong>the</strong> two detection<br />
channels / encoder channels. It may be dependent on<br />
<strong>the</strong> arrangement of <strong>the</strong> sensors and <strong>the</strong> maximum<br />
mechanical play (e.g. gearbox and spring rate) between<br />
<strong>the</strong> two detection locations. The lowest possible value, at<br />
which monitoring is not yet triggered in normal operation,<br />
should be chosen, under due consideration of <strong>the</strong><br />
dynamic processes (e.g. load/play in gearbox).<br />
Average filter covering <strong>the</strong> detected speed values of <strong>the</strong><br />
encoder to dampen peak speeds in case of low<br />
resolution or variance of <strong>the</strong> connected sensor With <strong>the</strong><br />
filter switched on <strong>the</strong> specified response time of <strong>the</strong><br />
overall system will increase by <strong>the</strong> set time. The filter has<br />
an effect on <strong>the</strong> speed related parameters of <strong>the</strong><br />
monitoring modules.<br />
<strong>Programming</strong> <strong>Manual</strong> – <strong>SMX</strong> Basic <strong>Module</strong>s 29.10.2009 Page 81 of 183
Note:<br />
- Determining <strong>the</strong> characteristic of <strong>the</strong> measuring length as linear or rotational<br />
generally influences all position and speed inputs in <strong>the</strong> o<strong>the</strong>r input masks of<br />
<strong>the</strong> monitoring functions. It generally changes <strong>the</strong> input from mm, m or mm/s,<br />
m/s to mgrd, rev or mgrd/s, rev/s or rev/min and vice versa.<br />
- The specification of max. measuring length and max. speed is mandatory. A<br />
missing or incorrect entry can cause undesired responding of <strong>the</strong> monitoring<br />
functions.<br />
- In general sensor 1 has <strong>the</strong> function of a process sensor and sensor 2 acts as<br />
a reference sensor. For <strong>the</strong> combination of absolute/incremental sensor <strong>the</strong><br />
absolute system is always used as process sensor. If sensors with different<br />
resolutions are used, <strong>the</strong> sensor with <strong>the</strong> higher resolution should be<br />
configured as process sensor.<br />
Sensor 1 or Sensor 2<br />
These two option and input fields are used to parameterize <strong>the</strong> sensors.<br />
The following options and inputs are possible:<br />
Encoder type<br />
Selection of function type of sensor:<br />
None<br />
No sensor connected<br />
Incremental<br />
Incremental encoder<br />
SIN / COS<br />
SineCosine encoder Absolute<br />
<strong>Programming</strong> <strong>Manual</strong> – <strong>SMX</strong> Basic <strong>Module</strong>s 29.10.2009 Page 82 of 183
Absolute<br />
Absolute value encoder<br />
Selecting an absolute value encoder enables fur<strong>the</strong>r parameters:<br />
Data <strong>for</strong>mat<br />
SSI binary<br />
Serial Synchronous Interface in binary encoding<br />
SSI-GrayCode<br />
Serial Synchronous Interface in GrayCode encoding<br />
SSI-WCS<br />
Way Coding System (Manufacturer Pepperl & Fuchs)<br />
By choosing this file <strong>for</strong>mat <strong>the</strong> data width is a fixed Offset<br />
Relative offset in relation to <strong>the</strong> specified sensor position<br />
Proxi Switch 1Z<br />
1-channel incremental counting signal<br />
Proxi Switch 2Z 90°<br />
2-channel incremental counting signal with 90-degree phase<br />
Direction of rotation<br />
Selection of sensor counting direction<br />
Resolution<br />
Encoder resolution referring to <strong>the</strong> measuring axis in <strong>the</strong> pre-defined context (linear<br />
or rotational)<br />
Note: For position monitoring at least one of <strong>the</strong> two sensors must be designed as<br />
absolute encoder. If none of <strong>the</strong> two sensors is of <strong>the</strong> "Absolute" type, <strong>the</strong> position<br />
input fields in all o<strong>the</strong>r input masks of <strong>the</strong> monitoring function are inactive.<br />
With <strong>the</strong> "Incremental" type an impulse multiplication takes place inside <strong>the</strong> device.<br />
The resolution of <strong>the</strong> sensor must always be entered into <strong>the</strong> "Resolution" field as<br />
pulses per revolution (PPR) The multiplication depends on <strong>the</strong> set sensor<br />
configuration and runs internally automatically. Fur<strong>the</strong>r in<strong>for</strong>mation can be found in<br />
<strong>the</strong> installation manual.<br />
<strong>Programming</strong> <strong>Manual</strong> – <strong>SMX</strong> Basic <strong>Module</strong>s 29.10.2009 Page 83 of 183
Sensor info field<br />
After successful parameterization an in<strong>for</strong> field with various selection and result data<br />
related to <strong>the</strong> currently used sensors can be displayed by simply clicking on <strong>the</strong><br />
button "Sensor Info Field".<br />
Axle area<br />
Column name<br />
Class-ID<br />
General flags<br />
Modes<br />
Axis CFG ID<br />
Measuring length<br />
PosFactor<br />
FactorSpeed<br />
MaxSpeed<br />
Shut-down thresh.<br />
pos.<br />
Shut-down thresh.<br />
speed<br />
Unit<br />
Meaning<br />
Unambiguous ID of axis configuration<br />
Reserved <strong>for</strong> internal processing<br />
Reserved <strong>for</strong> internal processing<br />
Reserved <strong>for</strong> internal processing<br />
Measuring length of position processing<br />
Internal multiplication factor <strong>for</strong> position<br />
Internal multiplication factor <strong>for</strong> speed<br />
Maximum standardized speed<br />
Shut-down threshold value incremental in system units<br />
Shut-down threshold value speed in system units<br />
Reserved <strong>for</strong> internal processing<br />
Area sensor<br />
Column name Meaning<br />
Class-ID<br />
Reserved <strong>for</strong> internal processing<br />
General flags Reserved <strong>for</strong> internal processing<br />
Modes<br />
Reserved <strong>for</strong> internal processing<br />
EXT-Modes Reserved <strong>for</strong> internal processing<br />
V_Standardization Standardization value <strong>for</strong> speed<br />
(internal calculation value)<br />
PosStandardization Standardization value <strong>for</strong> position (internal calculation value)<br />
ShiftvalPos Interger exponent <strong>for</strong> basis 2.<br />
Internal calculation value <strong>for</strong> position standardization.<br />
ShiftvalSpeed Interger exponent <strong>for</strong> basis 2.<br />
Internal calculation value <strong>for</strong> speed standardization.<br />
Offset<br />
Corresponds with <strong>the</strong> input field Offset in <strong>the</strong> sensor interface<br />
Resolution<br />
Corresponds with <strong>the</strong> input field Resolution in <strong>the</strong> sensor<br />
interface<br />
FilterTime<br />
Reserved <strong>for</strong> internal processing<br />
Data width<br />
Input field <strong>for</strong> data width in sensor interface<br />
Cycle time<br />
Cycle time of <strong>the</strong> <strong>SMX</strong>-module<br />
V_max<br />
Maximum value <strong>for</strong> speed in <strong>the</strong> monitoring dialogs. Defined<br />
via "Maxium speed encoder dialog" x factor 1.5<br />
V_MinUsed Internal minimum speed <strong>for</strong> standardization calculation<br />
V_min<br />
Minimum value <strong>for</strong> speed in <strong>the</strong> monitoring dialogs.<br />
Measuring length Defined measuring length.<br />
Pos_MinUsed<br />
Pos_min<br />
Minimum internal position <strong>for</strong> standardization calculation<br />
Minimum internal position <strong>for</strong> parameterization of monitoring<br />
dialogs<br />
<strong>Programming</strong> <strong>Manual</strong> – <strong>SMX</strong> Basic <strong>Module</strong>s 29.10.2009 Page 84 of 183
Note:<br />
The displayed values serve <strong>the</strong> purpose of technical support of <strong>the</strong> encoder<br />
configuration and are used of <strong>the</strong> standardization calculation in <strong>the</strong> <strong>SMX</strong>-module!<br />
<strong>Programming</strong> <strong>Manual</strong> – <strong>SMX</strong> Basic <strong>Module</strong>s 29.10.2009 Page 85 of 183
Determination of <strong>the</strong> Resolution with Regard to Different<br />
Characterized Measuring Lengths:<br />
Rotational measuring length<br />
i layshaft assembly<br />
ENCODER<br />
Motor axis<br />
Encoder<br />
i gearbox<br />
Encoder<br />
i layshaft assembly<br />
i measuring gearbox<br />
Reference axis Input values Resolution related to measuring length<br />
Feed axis Encoder 1:<br />
(process axis) Resolution Gb 1<br />
i measuring<br />
gearbox<br />
i layshaft assembly<br />
Encoder 2:<br />
Resolution Gb 2<br />
i gearbox<br />
i layshaft assembly<br />
<strong>for</strong> drive<br />
Motor axis Encoder 1:<br />
Resolution Gb 1<br />
i measuring<br />
gearbox<br />
i layshaft assembly<br />
measuring gear<br />
i gearbox<br />
i layshaft assembly<br />
A_Gb1 in<br />
[steps/rev]<br />
I_MG<br />
I_VG<br />
A_Gb2 in<br />
[steps/rev]<br />
I_G<br />
I_VA<br />
A_Gb1 in<br />
[steps/rev]<br />
I_MG<br />
I_VG<br />
D_MR in<br />
[mm]<br />
I_G<br />
I_VA<br />
Gb 1 I _ MG I _ VG A_<br />
Gb1<br />
Gb 2 I _ G I _ VA A_<br />
Gb2<br />
Gb1<br />
I _ MG I _ VG A_<br />
Gb1<br />
I _ G I _ VA<br />
<strong>Programming</strong> <strong>Manual</strong> – <strong>SMX</strong> Basic <strong>Module</strong>s 29.10.2009 Page 86 of 183
Input example 1<br />
In a manufacturing device <strong>the</strong> speed of certain manual processes is to be monitored<br />
<strong>for</strong> a safe reduced value, as well as standstill and movement direction. The<br />
movement to be actively monitored is a rotary movement. The drive works with an<br />
electric motor with integrated motor feedback system and intermediate gear.<br />
Selecting <strong>the</strong> module<br />
Selecting <strong>the</strong> encoder type<br />
No monitoring of positions requested -> Absolute encoders are not required, speed<br />
detection by means of incremental encoders is quite sufficient.<br />
Determination of <strong>the</strong> measuring length<br />
The axis of rotation of <strong>the</strong> manufacturing device is selected as reference axis. The<br />
following parameters are selected:<br />
Rotational<br />
Measuring length unknown<br />
Reference axis is rotational axis => designation = mgrd<br />
Determination of parameters <strong>for</strong> Sensor1<br />
Sensor 1 is directly connected with <strong>the</strong> output axis of <strong>the</strong> gearbox = load axis A<br />
sensor with <strong>the</strong> data: Pulse generator A/B-track, 5000 pulses/revolution is used.<br />
The following parameters are selected:<br />
Encoder type incremental<br />
Resolution:<br />
Sensor 1:<br />
Resolution Gb 1<br />
i measuring gearbox<br />
i layshaft assembly<br />
5000 [steps/rev]<br />
1<br />
1<br />
Gb 1 I _ MG I _ VG A_<br />
Gb1<br />
1 1<br />
5000<br />
5000;<br />
Determination of parameters <strong>for</strong> Sensor2<br />
The existing motor feedback system is used as sensor 2. The motor is connected to<br />
<strong>the</strong> rotational axis of <strong>the</strong> manufacturing device by means of an intermediate gear.<br />
The sensor interface is connected to <strong>the</strong> pulse outPorts of <strong>the</strong> power converter. The<br />
sensor data are as follows: Hiperface, 1024 I/rev. According to <strong>the</strong> data sheet of <strong>the</strong><br />
power converter manufacturer <strong>the</strong> sine/cosine tracks of <strong>the</strong> Hiperface encoder are<br />
output in <strong>the</strong> fom of pulses -> emulated encoder on <strong>the</strong> pulse outPort of <strong>the</strong> power<br />
converter = pulse generator, A/B-track, 1024 I/rev. The following parameters are<br />
selected:<br />
Encoder type incremental<br />
Resolution:<br />
Gb2<br />
I _ G I _ VA A_<br />
Gb2<br />
Sensor 2:<br />
Resolution Gb 2<br />
i gearbox<br />
i layshaft assembly <strong>for</strong> drive<br />
1024 350 1<br />
35840<br />
1024 [steps/rev]<br />
350<br />
1<br />
<strong>Programming</strong> <strong>Manual</strong> – <strong>SMX</strong> Basic <strong>Module</strong>s 29.10.2009 Page 87 of 183
Specification of max. speed<br />
The max. speed of <strong>the</strong> output axis is derived from <strong>the</strong> max. motor speed. In rev./s<br />
related to <strong>the</strong> load axis and with Nmax = 1500 rev./min it is<br />
(1500 [rev./min] / 60 [s] ) / 350 = 0,<br />
Converted to mgrd/s this results in 0.07142 [1/s] * 360 *10³ [mgrd] = 25 714 [mgrd/s]<br />
Input of max. deviation<br />
The empirical measurement reveals a maximum difference between both detection<br />
points of 80 mgrd. A value of 100 mgrd is chosen.<br />
<strong>Programming</strong> <strong>Manual</strong> – <strong>SMX</strong> Basic <strong>Module</strong>s 29.10.2009 Page 88 of 183
Linear measuring length<br />
Ø of drive gear<br />
Encoder<br />
Motor axis<br />
i layshaft assembly<br />
Ø measuring<br />
gear<br />
i layshaft<br />
assembly<br />
i gearbox<br />
Encoder<br />
i measuring gearbox<br />
Reference axis Input values Resolution related to measuring<br />
length<br />
Feed axis<br />
(process axis)<br />
Sensor1:<br />
Resolution Gb 1<br />
i measuring<br />
gearbox<br />
i layshaft assembly<br />
measuring gear<br />
Sensor 2:<br />
Resolution Gb 2<br />
i gearbox<br />
i layshaft assembly<br />
<strong>for</strong> drive<br />
drive gear<br />
A_Gb1 in<br />
[steps/rev]<br />
I_MG<br />
I_VG<br />
D_MR in<br />
[mm]<br />
A_Gb2 in<br />
[steps/rev]<br />
I_G,<br />
I_VA,<br />
D_AR in [mm]<br />
1000<br />
Gb 1 I _ MG I _ VG A_<br />
Gb1<br />
D _ MR<br />
1000<br />
Gb 2 I _ G I _ VA A_<br />
Gb2<br />
D _ AR<br />
Motor axis Sensor 1:<br />
Resolution Gb 1<br />
i measuring<br />
gearbox<br />
i layshaft assembly<br />
measuring gear<br />
i gearbox<br />
i layshaft assembly<br />
<strong>for</strong> drive<br />
drive gear<br />
A_Gb1 in<br />
[steps/rev]<br />
I_MG<br />
I_VG<br />
D_MR in<br />
[mm]<br />
I_G<br />
I_VA<br />
D_AR in [mm]<br />
Gb1<br />
1000<br />
I _ MG I _ VG A _ Gb1<br />
D _ MR<br />
1000<br />
I _ G I _ VA<br />
D _ AR<br />
<strong>Programming</strong> <strong>Manual</strong> – <strong>SMX</strong> Basic <strong>Module</strong>s 29.10.2009 Page 89 of 183
Input example 2<br />
On a manufacturing machine access to <strong>the</strong> working area is to be enabled at certain<br />
positions of <strong>the</strong> main feed axis <strong>for</strong> manual feeding or setup work. The drive remains<br />
active in this position and is only monitored <strong>for</strong> standstill. The limits of <strong>the</strong> working<br />
stroke are variable and are to be monitored electronically in safety-relevant mode, as<br />
a replacement of <strong>the</strong> mechanical safety limit switch. The movement to be actively<br />
monitored is a linear movement. An absolute encoder is positively connected with<br />
this main drive axis of <strong>the</strong> linear length measuring system. The drive works with an<br />
electric motor with integrated motor feedback system and intermediate gear. The<br />
output shaft of <strong>the</strong> intermediate gear is connected with a drive gear 31.83 mm (=<br />
100 mm circumference).<br />
Selecting <strong>the</strong> module<br />
Selecting <strong>the</strong> encoder type<br />
Monitoring of positions is requested -> Absolute encoder required, <strong>for</strong> <strong>the</strong> second<br />
encoder an incremental detection + reference switch is sufficient.<br />
Determination of <strong>the</strong> measuring length parameters<br />
The main axis of <strong>the</strong> machine is selected as reference axis. The following parameters<br />
are selected:<br />
Linear<br />
Measuring length = 600 mm<br />
Reference axis is rotational axis => designation = mm<br />
Determination of parameters <strong>for</strong> sensor 1<br />
Sensor 1 is directly connected to <strong>the</strong> drive axis. A sensor with <strong>the</strong> data: Absolute<br />
encoder SSI, 4096 steps/rev. is used.<br />
The following parameters are selected:<br />
Encoder type absolute<br />
Data <strong>for</strong>mat SSI<br />
Resolution:<br />
Sensor 1:<br />
Resolution Gb 1<br />
i measuring gearbox<br />
i layshaft assembly<br />
drive gear<br />
4096 [steps/rev]<br />
1<br />
1<br />
31.83<br />
1000<br />
Gb 1 I _ MG I _ VG A_<br />
Gb1<br />
D _ MR<br />
1000<br />
31,83<br />
1 1<br />
4096<br />
40960<br />
Determination of parameters <strong>for</strong> sensor 2<br />
The existing motor feedback system is used as sensor 2. The motor is connected<br />
with <strong>the</strong> drive gear via an intermediate gearbox. The ratio of <strong>the</strong> gearbox is 4.51<br />
times <strong>the</strong> Ø of <strong>the</strong> drive gear 31.831 mm.<br />
The sensor interface is connected to <strong>the</strong> pulse outPorts of <strong>the</strong> power converter. The<br />
sensor data are as follows: Hiperface, 1024 I/rev. According to <strong>the</strong> data sheet of <strong>the</strong><br />
<strong>Programming</strong> <strong>Manual</strong> – <strong>SMX</strong> Basic <strong>Module</strong>s 29.10.2009 Page 90 of 183
power converter manufacturer <strong>the</strong> sine/cosine tracks of <strong>the</strong> Hiperface encoder are<br />
output in <strong>the</strong> fom of pulses -> emulated encoder on <strong>the</strong> pulse outPort of <strong>the</strong> power<br />
converter = pulse generator, A/B-track, 1024 I/rev.<br />
The following parameters are selected:<br />
Encoder type incremental<br />
Resolution:<br />
Sensor 1:<br />
Resolution Gb 2<br />
i gearbox<br />
i layshaft assembly<br />
drive gear<br />
1024 [steps/rev]<br />
4.51<br />
1<br />
31.83<br />
1000<br />
Gb 2 I _ G I _ AV A_<br />
Gb2<br />
D _ AR<br />
1000<br />
31,83<br />
4,51 1 1024<br />
46182;<br />
Specification of max. speed<br />
The max. speed of <strong>the</strong> output axis is derived from <strong>the</strong> max. motor speed. In rev./s<br />
related to <strong>the</strong> load axis and with Nmax = 1500 rev./min it is<br />
(1500 [rev/min] / 60 [s] ) * 0.012 [m] = 0.3 [m/s] = 300 [mm/s].<br />
Input of max. deviation<br />
The empirical measurement reveals a maximum difference on
<strong>Programming</strong> <strong>Manual</strong> – <strong>SMX</strong> Basic <strong>Module</strong>s 29.10.2009 Page 92 of 183
The Sensor Info Field shows <strong>the</strong> following result entries:<br />
These can be switched to <strong>the</strong> second axis by cloicking on <strong>the</strong> "Axis Change" button.<br />
<strong>Programming</strong> <strong>Manual</strong> – <strong>SMX</strong> Basic <strong>Module</strong>s 29.10.2009 Page 93 of 183
Safety <strong>Module</strong>s<br />
The monitoring functions are calculated within <strong>the</strong> cycle time of <strong>the</strong> <strong>SMX</strong>-system and<br />
deliver a 1-bit result at <strong>the</strong> outPort. The result can be interconnected with logic<br />
operators, all <strong>the</strong> way to an outPort.<br />
Example <strong>for</strong> a logic linkage of monitoring functions.<br />
Axis: 1<br />
Axis: 1<br />
Axis: 1<br />
<strong>Programming</strong> <strong>Manual</strong> – <strong>SMX</strong> Basic <strong>Module</strong>s 29.10.2009 Page 94 of 183
SEL (Safe Emergency Limit)<br />
Monitoring of <strong>the</strong> maximum movement range<br />
Number: 2<br />
Access-ID:<br />
Axis assignment:<br />
Function:<br />
InPort:<br />
RESET-function:<br />
Identification of function element<br />
maximum 1 function per axis<br />
Monitoring of <strong>the</strong> permissible speed related to <strong>the</strong> relative<br />
distance to <strong>the</strong> maximum limit of <strong>the</strong> movement or adjustment<br />
range. This function replaces <strong>the</strong> conventional safety limit<br />
switches!<br />
Standardized position sigbnal X from <strong>the</strong> encoder interface<br />
The violation of <strong>the</strong> permissible monitoring range is saved and<br />
requires a RESET acknowledgement. This occurs alternatively via:<br />
• RESET function in <strong>the</strong> group of inPort elements<br />
• Function key on <strong>the</strong> front side of a basic module<br />
Description of function:<br />
Calculation of actual speed V using position signal X<br />
Determination of <strong>the</strong> stopping distance related to <strong>the</strong> current status of<br />
acceleration and speed<br />
=> Cyclic determination of <strong>the</strong> Stop_Distanz Akt. = f (V, a) with a = acceleration<br />
Comparison: Pos Akt. + Stop_Distanz Akt. < Ziel_Pos + Overtravel<br />
A trapezoidal or S-shaped speed profile serves as basis <strong>for</strong> <strong>the</strong> calculation. For a<br />
trapezoidal speed profile <strong>the</strong> limit curve is <strong>the</strong> result of <strong>the</strong> parameterized<br />
acceleration, whereas an S-shaped speed profile additionally uses <strong>the</strong> change in<br />
acceleration <strong>for</strong> <strong>the</strong> calculation.<br />
Trapezoidal speed profile:<br />
V<br />
V0<br />
BX<br />
BX<br />
X1<br />
X2<br />
X<br />
X1 = Min. position<br />
X2 = Max. position<br />
V0 = Maximum speed <strong>for</strong> ( X1 + BX ) < X < ( X2 – BX )<br />
F= Type of speed profile (trapezoidal or S-shaped)<br />
<strong>Programming</strong> <strong>Manual</strong> – <strong>SMX</strong> Basic <strong>Module</strong>s 29.10.2009 Page 95 of 183
Trapezoidal<br />
BX = Braking/approaching range<br />
S-shaped<br />
AM= Maximum acceleration<br />
DA = Type of acceleration<br />
S-shaped speed profile<br />
Position course<br />
Speed<br />
Acceleration with<br />
da/dt = const<br />
Actual speed<br />
at time T<br />
= Stopping distance<br />
related to <strong>the</strong> actual<br />
speed at time T<br />
T Aktuell<br />
<strong>Programming</strong> <strong>Manual</strong> – <strong>SMX</strong> Basic <strong>Module</strong>s 29.10.2009 Page 96 of 183
OutPort function<br />
Range<br />
X < X1<br />
X > X2<br />
X >= X1<br />
X = (X2 – BX)<br />
X = X1<br />
X = Limit curve<br />
X >= (X2 – BX)<br />
X = Limit curve<br />
OR<br />
AND<br />
AND<br />
AND<br />
AND<br />
AND<br />
AND<br />
AND<br />
AND<br />
HI LO<br />
X<br />
X<br />
X<br />
X<br />
X<br />
Limit curve = Speed profile derived from <strong>the</strong> actual parameterization<br />
Parameters:<br />
Activate permanently<br />
The monitoring function is permanently active and has no inPort connector.<br />
<strong>Programming</strong> <strong>Manual</strong> – <strong>SMX</strong> Basic <strong>Module</strong>s 29.10.2009 Page 97 of 183
Lower limit position X1<br />
Lower limit position<br />
Upper limit position X2<br />
Upper limit position<br />
Curve type linear<br />
Linear calculation method <strong>for</strong> <strong>the</strong> stopping distance with respect to <strong>the</strong> limit position<br />
Curve type = linear<br />
Curve type S-shaped<br />
Square calculation method <strong>for</strong> <strong>the</strong> stopping distance with respect to <strong>the</strong> limit position<br />
Curve type = square<br />
Max. acceleration<br />
Max. acceleration value within BX<br />
Max. change in acceleration<br />
Max. value of acceleration change within BX<br />
Input example 1<br />
On a manufacturing machine access to <strong>the</strong> working area is to be enabled at certain<br />
positions of <strong>the</strong> main feed axis <strong>for</strong> manual feeding or setup work. The drive remains<br />
active in this position and is only monitored <strong>for</strong> standstill. The limits of <strong>the</strong> working<br />
stroke are variable and are to be monitored electronically in safety-relevant mode, as<br />
a replacement of <strong>the</strong> mechanical safety limit switch. The movement to be actively<br />
monitored is a linear movement. An absolute encoder is positively connected with<br />
<strong>Programming</strong> <strong>Manual</strong> – <strong>SMX</strong> Basic <strong>Module</strong>s 29.10.2009 Page 98 of 183
this main drive axis of <strong>the</strong> linear length measuring system. The drive works with an<br />
electric motor with integrated motor feedback system and intermediate gear.<br />
1. Limit position<br />
The reference zero point of <strong>the</strong> main drive axis is located in <strong>the</strong> top dead centre The<br />
mechanical trailing distance subordinate is = X1 = -5mm.<br />
The lower end position is at 600mm + 5 mm safety limit.<br />
=> X2 = 605mm<br />
2. Form of speed selection<br />
The drive/position controller uses a ramp limitation (jolt limitation) <strong>for</strong> <strong>the</strong> acceleration<br />
with resultant S-slip of <strong>the</strong> speed, in order to minimize deviations and processing<br />
marks => Select S-<strong>for</strong>m option<br />
3. Limit value selection<br />
All o<strong>the</strong>r limit values are taken from <strong>the</strong> machine parameterization.<br />
Maximum acceleration = 1000 mm/s²<br />
Maximum change of acceleration = 3000 mm/s³<br />
<strong>Programming</strong> <strong>Manual</strong> – <strong>SMX</strong> Basic <strong>Module</strong>s 29.10.2009 Page 99 of 183
SLP = (Safe Limited Position)<br />
GOTO monitoring<br />
Number: 2<br />
Access-ID:<br />
Axis assignment:<br />
Function:<br />
InPort:<br />
RESET-function:<br />
Identification of function element<br />
maximum 1 function per axis<br />
Monitoring of <strong>the</strong> permissible speed related to <strong>the</strong> relative<br />
distance to a parameterized Teach-In recorded target position.<br />
Standardized position sigbnal X from <strong>the</strong> encoder interface<br />
The violation of <strong>the</strong> permissible monitoring range is saved and<br />
requires a RESET acknowledgement. This occurs alternatively<br />
via:<br />
• RESET function in <strong>the</strong> group of inPort elements<br />
• Function key on <strong>the</strong> front side of a basic module<br />
Description of function:<br />
Calculation of actual speed V using position signal X<br />
Determination of <strong>the</strong> stopping distance related to <strong>the</strong> current status of<br />
acceleration and speed<br />
=> Cyclic determination of <strong>the</strong> Stop_Distanz Akt. = f (V, a) with a = acceleration<br />
Comparison: Pos Akt. + Stop_Distanz Akt. < Ziel_Pos + Overtravel<br />
<strong>Programming</strong> <strong>Manual</strong> – <strong>SMX</strong> Basic <strong>Module</strong>s 29.10.2009 Page 100 of 183
Parameters:<br />
Target position<br />
Absolute position value of target position<br />
Curve type linear<br />
Linear calculation method <strong>for</strong> <strong>the</strong> stopping distance with respect to <strong>the</strong> target position<br />
Curve type S-shaped<br />
Square calculation method <strong>for</strong> <strong>the</strong> stopping distance with respect to <strong>the</strong> target<br />
position<br />
Max. acceleration<br />
Max. acceleration value within BX<br />
Max. change in acceleration<br />
Max. value of acceleration change within BX<br />
Recording <strong>the</strong> target position using Teach-In<br />
The "Teach-In" option can be used to have <strong>the</strong> target position recorded by <strong>the</strong> <strong>SMX</strong>system<br />
without <strong>the</strong> need of manual subsequent parameterization. This requires <strong>the</strong><br />
following steps:<br />
<strong>Programming</strong> <strong>Manual</strong> – <strong>SMX</strong> Basic <strong>Module</strong>s 29.10.2009 Page 101 of 183
Activating <strong>the</strong> switch "Teach-In" changes <strong>the</strong> input field "Target position" to<br />
"Position tolerance". At same time <strong>the</strong> input dialog increases by <strong>the</strong> SOSfunctionality.<br />
Recording a position using <strong>the</strong> "Teach-In" option can only take place at<br />
standstill and with <strong>the</strong> SOS-function activated.<br />
Recording a position requires <strong>the</strong> two signals "SET" and "QUIT". These<br />
appear when activating <strong>the</strong> TEACH-IN option as inPort connector of <strong>the</strong><br />
functional module.<br />
The QuUIT signal can only be directly connected with an inPort module<br />
Time characteristic of <strong>the</strong> SET/QUIT process:<br />
QUIT<br />
SET<br />
SOS_Enable<br />
Take-over<br />
Übernahme<br />
position<br />
Position<br />
Save position<br />
Position<br />
speichern<br />
k k+1 k+2 k+3 k+4<br />
Verarbeitungszyklen<br />
Processing cycles<br />
The sequence is time monitored and triggers an ALARM if <strong>the</strong> expectations<br />
are exceeded.<br />
The maximum time slot is 3 seconds !<br />
Position tolerance<br />
Tolerance window of <strong>the</strong> accepted Teach-In value<br />
Note:<br />
When using <strong>the</strong> Teach-In function, <strong>the</strong> monitoring threshold is extended<br />
by <strong>the</strong> value of <strong>the</strong> position tolerance. Without <strong>the</strong> Teach-In functionality<br />
<strong>the</strong> value of <strong>the</strong> position tolerance is zero.<br />
Parameters of <strong>the</strong> SOS-dialog:<br />
See SOS-function<br />
<strong>Programming</strong> <strong>Manual</strong> – <strong>SMX</strong> Basic <strong>Module</strong>s 29.10.2009 Page 102 of 183
SCA (Safe Cam)<br />
Monitoring of position range with rotational speed/speed monitoring<br />
Number: 16<br />
Access-ID:<br />
Axis allocation:<br />
Function:<br />
InPort:<br />
RESET-function:<br />
Identification of function element<br />
any<br />
Monitoring of a parameterizable position range with allocated<br />
minimum and maximum limits. Additional monitoring of <strong>the</strong><br />
maximum rotational speed/speed in <strong>the</strong> permissible range.<br />
Standardized position and speed signal X and V from encoder<br />
interface<br />
Violation of <strong>the</strong> permissible monitoring range is not saved. No<br />
RESET acknowledgement required.<br />
Description of function:<br />
Comparison of actual position with <strong>the</strong> parameterized range limits<br />
Comparison of actual speed with <strong>the</strong> parameterized range limit<br />
Comparison of actual acceleration with <strong>the</strong> parameterized range limit<br />
Monitoring of <strong>the</strong> position limits using a ramp function<br />
Direction dependent release<br />
Permanent activation of <strong>the</strong> module<br />
V<br />
V0<br />
X1<br />
X2<br />
X<br />
OutPort function<br />
Range HI LO<br />
X < X1 OR X<br />
X > X2<br />
X >= X1 AND<br />
X = X1 AND<br />
X = V0<br />
<strong>Programming</strong> <strong>Manual</strong> – <strong>SMX</strong> Basic <strong>Module</strong>s 29.10.2009 Page 103 of 183
Ranges can be defined as overlapping and nested.<br />
Parameters:<br />
Control button <strong>for</strong> basic settings<br />
Activate permanently<br />
The monitoring function is permanently active and has no inPort connector.<br />
Lower limit position X1<br />
Lower limit position<br />
Upper limit position X2<br />
Upper limit position<br />
<strong>Programming</strong> <strong>Manual</strong> – <strong>SMX</strong> Basic <strong>Module</strong>s 29.10.2009 Page 104 of 183
Speed threshold<br />
Maximum permissible speed in <strong>the</strong> parameterized position range<br />
Max. acceleration<br />
Maximum permissible acceleration in <strong>the</strong> parameterized position range<br />
Extended monitoring<br />
Direction dependent release<br />
Enables <strong>the</strong> activation of downstream functional modules in dependence on <strong>the</strong><br />
direction. This functionality can only be utilized without speed and acceleration<br />
monitoring.<br />
Position signal rising:<br />
Functional module delivers <strong>the</strong> output value = "1" <strong>for</strong> a rising position signal<br />
<strong>Programming</strong> <strong>Manual</strong> – <strong>SMX</strong> Basic <strong>Module</strong>s 29.10.2009 Page 105 of 183
Position signal falling:<br />
Functional module delivers <strong>the</strong> output value = "0" <strong>for</strong> a falling position signal<br />
Activation speed direction release<br />
The evaluation of <strong>the</strong> direction dependent release only takes place from <strong>the</strong> specified<br />
limit. Below this speed threshold <strong>the</strong> output value is = 0;<br />
Travel curve monitoring<br />
Monitoring of speed at <strong>the</strong> limits using <strong>the</strong> monitoring characteristics parameterized in<br />
SEL or SLP.This switch can only be activated with <strong>the</strong> SLP or SEL function block<br />
inserted.<br />
Fault distance monitoring<br />
This additional functionality enables filtering of peak speeds in case of irregular travel<br />
operation (speed peaks in signal).<br />
Fur<strong>the</strong>r in<strong>for</strong>mation see SLS-function.<br />
Attention:<br />
When using this function, <strong>the</strong> response behaviour of <strong>the</strong> application will change. In<br />
this case strictly follow <strong>the</strong> explanations in <strong>the</strong> installation manual.<br />
Input example:<br />
On a manufacturing machine access to <strong>the</strong> working area is to be enabled at certain<br />
positions of <strong>the</strong> main feed axis <strong>for</strong> manual feeding or setup work. The drive remains<br />
active in this position and is only monitored <strong>for</strong> standstill. The limits of <strong>the</strong> working<br />
stroke are variable and are to be monitored electronically in safety-relevant mode, as<br />
a replacement of <strong>the</strong> mechanical safety limit switch. The movement to be actively<br />
monitored is a linear movement. An absolute encoder is positively connected with<br />
this main drive axis of <strong>the</strong> linear length measuring system. The main axis serves as<br />
reference axis <strong>for</strong> <strong>the</strong> <strong>SMX</strong>-module.<br />
1. Selecting <strong>the</strong> range<br />
Position monitoring is to be used to monitor <strong>the</strong> position of <strong>the</strong> main axis in top zero<br />
position. Top zero position also serves as reference zero position in <strong>the</strong> length<br />
measurement of <strong>the</strong> feed axis. If <strong>the</strong> range is recognized, a protective device is<br />
released <strong>for</strong> opening.<br />
Range limit X1 = top position = 0mm<br />
Range limit X2 = lower tolerance limit <strong>for</strong> position = 2 mm<br />
Speed = tolerated speed to maintain position= 3 mm/s<br />
Acceleration = tolerated acceleration to maintain position= 5 mm/s<br />
<strong>Programming</strong> <strong>Manual</strong> – <strong>SMX</strong> Basic <strong>Module</strong>s 29.10.2009 Page 106 of 183
SSX (Safe Stop 1/ Safe Stop 2)<br />
Function monitoring <strong>for</strong> emergency stop<br />
Number: 4<br />
Access-ID:<br />
Axis allocation:<br />
Function:<br />
InPort:<br />
RESET-function:<br />
Identification of function element<br />
any<br />
Monitoring of an EMERGENCY STOP function<br />
Standardized position signal X from <strong>the</strong> encoder interface<br />
The violation of <strong>the</strong> permissible monitoring range is saved and<br />
requires a RESET acknowledgement. This occurs alternatively<br />
via:<br />
• RESET function in <strong>the</strong> group of inPort elements<br />
• Function key on <strong>the</strong> front side of a basic module<br />
Description of function:<br />
Monitoring <strong>the</strong> sequence of a controlled EMERGENCY STOP by comparing <strong>the</strong><br />
speed drop with a parameterizable monitoring curve over <strong>the</strong> course of time. The<br />
monitoring curve is a result of latency, max. speed distance to <strong>the</strong> limit curve, as well<br />
as <strong>the</strong>ir characteristic, calculated on <strong>the</strong> basis of acceleration and acceleration<br />
change. After activating <strong>the</strong> monitoring function, <strong>the</strong> course of <strong>the</strong> limit curve is<br />
calculated on <strong>the</strong> basis of <strong>the</strong> current speed.<br />
V<br />
V0<br />
BX<br />
BX<br />
X1<br />
X2<br />
Trapezoidal course of speed<br />
X<br />
<strong>Programming</strong> <strong>Manual</strong> – <strong>SMX</strong> Basic <strong>Module</strong>s 29.10.2009 Page 107 of 183
Expected course of speed<br />
Monitoring limit curve<br />
speed detected when<br />
activating <strong>the</strong> function<br />
adapted monitoring<br />
limit curve<br />
Monitoring limit curves with S-shaped course of speed<br />
OutPort function<br />
Range HI LO<br />
T < T Latency<br />
X<br />
T > T Latency AND X<br />
V < V Limit curve<br />
T > T Latency AND X<br />
V > V Limit curve<br />
Each function block can be parameterized to stop category 1 or 2. In stop category 2<br />
<strong>the</strong> SOS-function is automatically activated after <strong>the</strong> expected standstill.<br />
Reset characteristic:<br />
The violation of <strong>the</strong> permissible monitoring range is saved and requires a RESET<br />
functionality. This occurs alternatively via:<br />
"Alarm Reset" module<br />
Function key on <strong>the</strong> front side of a basic module<br />
<strong>Programming</strong> <strong>Manual</strong> – <strong>SMX</strong> Basic <strong>Module</strong>s 29.10.2009 Page 108 of 183
Parameters:<br />
Stop category 1<br />
This option realizes monitoring of <strong>the</strong> controlled EMERGENCY STOP acc. to EN<br />
60604. According to <strong>the</strong> normative definition <strong>the</strong> energy supply should here be<br />
disconnected after <strong>the</strong> drive has come to a halt. This is supported by a transition of<br />
<strong>the</strong> SSX-function output value from "1" to "0".<br />
Stop category 2 (SOS after expected standstill)<br />
This option realizes monitoring of <strong>the</strong> controlled EMERGENCY STOP acc. to EN<br />
60604. After <strong>the</strong> ramp monitoring has expired, <strong>the</strong> drive is stopped without<br />
disconnection from <strong>the</strong> energy supply (Safe Operational Stop = Standstill). For this<br />
reason <strong>the</strong> output value remains art "1" after <strong>the</strong> SSX-limit curve has expired.<br />
If no SOS-module has yet been defined in <strong>the</strong> logic diagram, <strong>the</strong> SSX-dialog is<br />
extended by this function. All parameters required <strong>for</strong> <strong>the</strong> SOS-function, can thus be<br />
entered immediately. If an SOS-element is inserted into <strong>the</strong> logic diagram at a later<br />
date, <strong>the</strong> dialog in <strong>the</strong> SSX-mask is omitted.<br />
<strong>Programming</strong> <strong>Manual</strong> – <strong>SMX</strong> Basic <strong>Module</strong>s 29.10.2009 Page 109 of 183
Note:<br />
If <strong>the</strong> SSX-function is used in connection with SOS, <strong>the</strong> following circuitry must be<br />
used. If standstill is detected, <strong>the</strong> operating system will automatically activate <strong>the</strong><br />
SOS-monitoring.<br />
Axis: 1<br />
Axis: 1<br />
Curve type linear<br />
Linear curve <strong>for</strong> <strong>the</strong> stop sequence<br />
Actual speed<br />
Curve <strong>for</strong>m = constant<br />
Monitoring limit<br />
curve<br />
Latency<br />
Speed threshold<br />
* determined on basis of actual speed and configured<br />
acceleration<br />
<strong>Programming</strong> <strong>Manual</strong> – <strong>SMX</strong> Basic <strong>Module</strong>s 29.10.2009 Page 110 of 183
Curve type S-shaped<br />
Square monitoring curve <strong>for</strong> <strong>the</strong> stop sequence<br />
Curve <strong>for</strong>m = square<br />
Actual speed<br />
Monitoring limit<br />
curve<br />
Latency<br />
Speed threshold<br />
* determined on basis of actual speed and configured<br />
acceleration<br />
Standard latency<br />
Latency until <strong>the</strong> occurrence of active deceleration<br />
Max. speed (speed threshold)<br />
Relative speed over <strong>the</strong> calculated limit curve.<br />
Max. acceleration<br />
Default acceleration value to calculate <strong>the</strong> limit curve.<br />
Max. acceleration change<br />
Default acceleration change value to calculate <strong>the</strong> limit curve.<br />
Axis assignment<br />
Input of axis assignment.<br />
Input example:<br />
On a manufacturing machine access to <strong>the</strong> working area is to be enabled at certain<br />
positions of <strong>the</strong> main feed axis <strong>for</strong> manual feeding or setup work. The drive remains<br />
active in this position and is only monitored <strong>for</strong> standstill. The limits of <strong>the</strong> working<br />
stroke are variable and are to be monitored electronically in safety-relevant mode, as<br />
a replacement of <strong>the</strong> mechanical safety limit switch. The movement to be actively<br />
monitored is a linear movement. An absolute encoder is positively connected with<br />
this main drive axis of <strong>the</strong> linear length measuring system. The drive works with an<br />
electric motor with integrated motor feedback system and intermediate gear.<br />
1. Selecting <strong>the</strong> stop category<br />
In order to keep times of standstill and restart as short as possible, <strong>the</strong> stop category<br />
2 acc. to DIN 60604-1 (controlled stop with drive subsequently actively controlled to<br />
V=0) is to be used => Selection stop category 2<br />
<strong>Programming</strong> <strong>Manual</strong> – <strong>SMX</strong> Basic <strong>Module</strong>s 29.10.2009 Page 111 of 183
2. Form of speed selection<br />
The drive/position controller uses a ramp limitation (jolt limitation) <strong>for</strong> <strong>the</strong> acceleration<br />
with resultant S-slip of <strong>the</strong> speed, in order to minimize deviations and processing<br />
marks => Select S-slip option<br />
3. Limit value selection<br />
For <strong>the</strong> purpose of monitoring one must enter <strong>the</strong> worst-case latency starting with <strong>the</strong><br />
occurrence of <strong>the</strong> Emergency Stop event, until <strong>the</strong> start of <strong>the</strong> braking process, which<br />
is executed with <strong>the</strong> standard control. The program sequence time of <strong>the</strong> standard<br />
control results in: Latency = cycle time*2 = 50 ms<br />
All o<strong>the</strong>r limit values are taken from <strong>the</strong> machine parameterization.<br />
Maximum feed speed = 300 mm/s²<br />
Maximum acceleration = 1000 mm/s²<br />
Maximum change of acceleration = 3000 mm/s³<br />
SLI (Safe Limited Increment)<br />
Monitoring of <strong>the</strong> max. step measurement<br />
Number: 2<br />
Access-ID:<br />
Axis assignment:<br />
Function:<br />
InPort:<br />
RESET-function:<br />
Identification of function element<br />
maximum 1 function per axis<br />
Monitoring of <strong>the</strong> max. permitted step measurement<br />
Standardized position / speed signal V and X from encoder<br />
interface. Direction indication LEFT/RIGHT<br />
The violation of <strong>the</strong> permissible monitoring range is saved and<br />
requires a RESET acknowledgement. This occurs alternatively via:<br />
• RESET function in <strong>the</strong> group of inPort elements<br />
• Function key on <strong>the</strong> front side of a basic module<br />
Description of function:<br />
Monitoring of <strong>the</strong> max. permitted step measurement = relative travel range <strong>for</strong><br />
uninterrupted travelling in jog mode.<br />
Calculation of <strong>the</strong> current sense of rotation RX on basis of position / speed<br />
signal X<br />
Determination of <strong>the</strong> relative travel after <strong>the</strong> start of <strong>the</strong> movement.<br />
Monitoring <strong>for</strong> compliance with <strong>the</strong> predetermined direction and <strong>the</strong> max.<br />
relative travel<br />
<strong>Programming</strong> <strong>Manual</strong> – <strong>SMX</strong> Basic <strong>Module</strong>s 29.10.2009 Page 112 of 183
OutPort function<br />
Range HI LO<br />
V < 0<br />
AND<br />
DIRECTIONMARKER = LEFT AND X<br />
relative travel < max. step measurement<br />
V >= 0<br />
AND<br />
DIRECTION MARKER = RIGHT AND X<br />
relative travel < max. step measurement<br />
V < 0<br />
AND<br />
(DIRECTION MARKER = RIGHT OR X<br />
relative travel > max. step measurement<br />
V > 0<br />
AND<br />
(DIRECTIONMARKER = LEFT OR AND X<br />
relative travel > max. step measurement<br />
Parameters:<br />
Step measurement<br />
Maximum relative travel after activating <strong>the</strong> monitoring function<br />
XI threshold<br />
Tolerance threshold <strong>for</strong> monitoring <strong>the</strong> travel in opposite direction<br />
Axis assignment<br />
Input of axis assignment.<br />
<strong>Programming</strong> <strong>Manual</strong> – <strong>SMX</strong> Basic <strong>Module</strong>s 29.10.2009 Page 113 of 183
Activation example:<br />
Axis: 1<br />
Input example:<br />
The max. travel in <strong>the</strong> material feed system of a manufacturing facility is to be safely<br />
monitored in jog mode. According to <strong>the</strong> risk analysis this travel is max. 50 mm. A<br />
faulty travel in opposite direction is to be monitored.<br />
1. Step measurement<br />
The relative travel (only incremental encoder present) is monitored => input of <strong>the</strong><br />
max. permissible travel acc. to risk analysis with tolerance = 55 mm<br />
2. Travel direction monitoring<br />
Tolerable travel in opposite direction (=creeping motion of drive) = 1 mm/s<br />
3. Monitoring inPort<br />
The monitoring module has two inPorts to specify <strong>the</strong> direction. An active direction<br />
signal activates <strong>the</strong> monitoring function.<br />
Note:<br />
Both input signals "1" are detected as non-permitted condition, causing an alarm<br />
message.<br />
<strong>Programming</strong> <strong>Manual</strong> – <strong>SMX</strong> Basic <strong>Module</strong>s 29.10.2009 Page 114 of 183
SDI (Safe Direction Indication)<br />
Direction detection<br />
Number: 2<br />
Access-ID:<br />
Axis assignment:<br />
Function:<br />
InPort:<br />
RESET-function:<br />
Identification of function element<br />
maximum 1 function per axis<br />
Monitoring <strong>the</strong> pre-defined sense of rotation / direction of<br />
movement<br />
Standardized position / speed signal X from encoder interface.<br />
Direction marker LEFT/RIGHT<br />
The violation of <strong>the</strong> permissible monitoring range is saved and<br />
requires a RESET acknowledgement. This occurs alternatively<br />
via:<br />
• RESET function in <strong>the</strong> group of inPort elements<br />
• Function key on <strong>the</strong> front side of a basic module<br />
Description of function:<br />
OutPort function<br />
Range HI LO<br />
V < 0<br />
AND<br />
DIRECTIONMARKER = LEFT<br />
X<br />
V >= 0<br />
AND<br />
DIRECTION MARKER = RIGHT X<br />
V < 0<br />
AND<br />
DIRECTION MARKER = RIGHT<br />
X<br />
V > 0<br />
AND<br />
DIRECTIONMARKER = LEFT<br />
X<br />
<strong>Programming</strong> <strong>Manual</strong> – <strong>SMX</strong> Basic <strong>Module</strong>s 29.10.2009 Page 115 of 183
Parameters:<br />
Maximum<br />
Tolerance threshold <strong>for</strong> position or speed in opposite direction<br />
Axis assignment<br />
Input of axis assignment.<br />
Activation example:<br />
Axis: 1<br />
Input example:<br />
In a manufacturing device <strong>the</strong> speed of certain manual processes is to be monitored<br />
<strong>for</strong> a safe reduced value, as well as standstill and movement direction. The<br />
movement to be actively monitored is a rotary movement. The drive works with an<br />
electric motor with integrated motor feedback system and intermediate gear.<br />
<strong>Programming</strong> <strong>Manual</strong> – <strong>SMX</strong> Basic <strong>Module</strong>s 29.10.2009 Page 116 of 183
1. InPort <strong>for</strong> monitoring function<br />
Monitoring of speed (only incremental encoder present)<br />
=> Speed<br />
2. Speed monitoring<br />
Tolerable speed in opposite direction (=Creeping of<br />
drive) from machine parameter = 1 mm/s<br />
Monitoring inPort<br />
The monitoring module has two inPorts to specify <strong>the</strong> direction. An active direction<br />
signal activates <strong>the</strong> monitoring function.<br />
Note:<br />
Both input signals "1" are detected as non-permitted condition, causing an alarm<br />
message.<br />
SLS (Safe Limited Speed)<br />
Monitoring of a minimum speed<br />
Number: 8<br />
Access-ID:<br />
Axis allocation:<br />
Function:<br />
InPort:<br />
RESET-function:<br />
Identification of function element<br />
any<br />
Monitoring of a minimum speed<br />
Standardized position signal X from <strong>the</strong> encoder interface<br />
The violation of <strong>the</strong> permissible monitoring range is saved and<br />
requires a RESET acknowledgement. This occurs alternatively<br />
via:<br />
• RESET function in <strong>the</strong> group of inPort elements<br />
• Function key on <strong>the</strong> front side of a basic module<br />
Description of function:<br />
Monitoring <strong>the</strong> maximum speed or rotational speed of a drive.<br />
Calculation of <strong>the</strong> current speed V on basis of position or digital speed signal X<br />
Comparison of <strong>the</strong> actual speed with <strong>the</strong> parameterized speed threshold<br />
Monitoring of a speed transition from fast to slow.<br />
<strong>Programming</strong> <strong>Manual</strong> – <strong>SMX</strong> Basic <strong>Module</strong>s 29.10.2009 Page 117 of 183
V<br />
Description of function:<br />
V0<br />
X<br />
OutPort function<br />
Range HI LO<br />
V < V0 X<br />
V >= V0<br />
X<br />
<strong>Programming</strong> <strong>Manual</strong> – <strong>SMX</strong> Basic <strong>Module</strong>s 29.10.2009 Page 118 of 183
Parameters:<br />
Activate permanently<br />
The monitoring function is permanently active and has no inPort connector.<br />
Speed tolerance switch<br />
To activate speed monitoring<br />
Use fast channel<br />
The "Fast Channel" option can be used to achieve a shorter response time of <strong>the</strong><br />
system. The two semi-conductor outPorts can alternatively be chosen in combination<br />
as shut-down channel.<br />
Attention: Response time see installation manual !<br />
Speed threshold<br />
Specification of maximum speed, alternatively max. rotational speed.<br />
Max. acceleration<br />
Specification of <strong>the</strong> max. acceleration<br />
<strong>Programming</strong> <strong>Manual</strong> – <strong>SMX</strong> Basic <strong>Module</strong>s 29.10.2009 Page 119 of 183
Ramp monitoring<br />
This option monitors <strong>the</strong> transition of speed from fast to slow by using an SSXfunctionality.<br />
The selected SSX-element must be available in <strong>the</strong> logic diagram.<br />
Fault distance monitoring<br />
This additional functionality enables filtering of peak speeds in case of irregular travel<br />
operation (speed peaks in signal).<br />
The path integer is calculated on basis of <strong>the</strong> difference between <strong>the</strong> current speed<br />
and <strong>the</strong> parameterized speed monitoring value and compared with <strong>the</strong> entered value.<br />
If <strong>the</strong> entered value is exceeded <strong>the</strong> monitoring function is triggered.<br />
The function can only be activated if <strong>the</strong> acceleration monitoring function is switched<br />
off.<br />
<strong>Programming</strong> <strong>Manual</strong> – <strong>SMX</strong> Basic <strong>Module</strong>s 29.10.2009 Page 120 of 183
Example of fault distance monitoring:<br />
The graph shows an example <strong>for</strong> fault distance monitoring. A drive exceeds <strong>the</strong><br />
threshold "vlimit", which is parameterized in <strong>the</strong> SLS-function. By exceeding this<br />
value, <strong>the</strong> speed above <strong>the</strong> threshold is integrated (= akku_norm). If <strong>the</strong> current<br />
speed drops below <strong>the</strong> threshold, <strong>the</strong> integer will also decrease down below <strong>the</strong><br />
limitation. During <strong>the</strong> continuing process <strong>the</strong> speed will rise again and remain above<br />
<strong>the</strong> parameterized threshold. As a consequence <strong>the</strong> integer will also increase again,<br />
triggering an alarm when it exceeds <strong>the</strong> fault distance (= integrated speed<br />
proportion). The course of <strong>the</strong> fault integrator can be visualized with <strong>the</strong> SCOPEfunction.<br />
v<br />
vlimit<br />
overspeed_distance<br />
t<br />
akku_norm<br />
Alarm<br />
t<br />
Attention:<br />
When using this function, <strong>the</strong> response behaviour of <strong>the</strong> application will change. In<br />
this case strictly follow <strong>the</strong> explanations in <strong>the</strong> installation manual.<br />
Input examples:<br />
In a manufacturing device <strong>the</strong> speed of certain manual processes is to be monitored<br />
<strong>for</strong> a safe reduced value, as well as standstill and movement direction. The<br />
movement to be actively monitored is a rotary movement. The drive works with an<br />
electric motor with integrated motor feedback system and intermediate gear.<br />
1. Speed monitoring<br />
The safely reduced speed in manual mode is to be monitored => speed monitoring<br />
active with max. value from machine parameter = 50<br />
2. Acceleration monitoring<br />
The safely reduced acceleration in manual mode is to be monitored => acceleration<br />
monitoring active with max. value from machine parameter = 100<br />
<strong>Programming</strong> <strong>Manual</strong> – <strong>SMX</strong> Basic <strong>Module</strong>s 29.10.2009 Page 121 of 183
3. Ramp monitoring<br />
Speed monitoring and ramp monitoring acc. to SSX must be activated. In this case<br />
<strong>the</strong> SSX used must already be inserted or configured in <strong>the</strong> project. The transition<br />
from a fast to a slower (= parameter max. speed) speed can now be monitored (see<br />
graph).<br />
Expected course of speed<br />
Monitoring limit curve<br />
Latency<br />
When activating <strong>the</strong> SLS, <strong>the</strong> parameterized SSX is automatically activated via <strong>the</strong><br />
SLS. The SSX monitors <strong>the</strong> ramp course of <strong>the</strong> speed. If <strong>the</strong> actual speed is lower<br />
than <strong>the</strong> SLS threshold, <strong>the</strong> SLS will take over <strong>the</strong> fur<strong>the</strong>r monitoring, until <strong>the</strong> SLS is<br />
deactivated again.<br />
The ramp course can be diagnosed with <strong>the</strong> SCOPE monitor as a diagnostic<br />
function.<br />
Notes:<br />
• If <strong>the</strong> SSX used is activated during "SLS ramp monitoring" (i.e. normal<br />
EMERGENCY STOP function via SSX-enable), <strong>the</strong> parameterized SSXconnection<br />
is always prioritized.<br />
• The SSX-function is always activated by <strong>the</strong> SLS, if <strong>the</strong> current speed is<br />
higher than <strong>the</strong> SLS-threshold.<br />
• The SLS threshold must be higher than 0!<br />
• If <strong>the</strong> calculated speed profile is exceeded when changing <strong>the</strong> speed from<br />
fast to slow, this is saved in both monitoring functions SLS and SSX.<br />
• If several SLS-functions with ramp monitoring are activated, <strong>the</strong> lowest<br />
parameterized SLS-threshold value is used as threshold value <strong>for</strong> <strong>the</strong> SSXramp.<br />
<strong>Programming</strong> <strong>Manual</strong> – <strong>SMX</strong> Basic <strong>Module</strong>s 29.10.2009 Page 122 of 183
SOS (Safe Operating Stop)<br />
Standstill monitoring<br />
Number: 2<br />
Access-ID:<br />
Axis assignment:<br />
Function:<br />
InPort:<br />
RESET-function:<br />
Identification of function element<br />
maximum 1 function per axis<br />
Standstill monitoring<br />
Standardized position / speed signal V and X from encoder<br />
interface.<br />
The violation of <strong>the</strong> permissible monitoring range is saved and<br />
requires a RESET acknowledgement. This occurs alternatively<br />
via:<br />
• RESET function in <strong>the</strong> group of inPort elements<br />
Description of function:<br />
Standstill monitoring of drive at <strong>the</strong> current position with drive enabled and<br />
possibly activated position controller.<br />
Calculation of <strong>the</strong> current speed V on basis of position or digital speed signal X<br />
Comparison of <strong>the</strong> actual speed with <strong>the</strong> parameterized monitoring slot<br />
V<br />
-DX<br />
X0<br />
DX<br />
X<br />
OutPort function<br />
Range<br />
X > ( X0 – DX ) AND<br />
X < ( X0 + DX )<br />
X = (X0 + DX )<br />
HI LO<br />
X<br />
X<br />
X<br />
<strong>Programming</strong> <strong>Manual</strong> – <strong>SMX</strong> Basic <strong>Module</strong>s 29.10.2009 Page 123 of 183
Type of monitoring<br />
Determination of <strong>the</strong> monitoring type <strong>for</strong> standstill to a minimum speed threshold or a<br />
position slot<br />
Maximum<br />
Minimum speed or a permissible relative deviation from <strong>the</strong> actual position at <strong>the</strong> time<br />
when <strong>the</strong> SOS-functionality is activated.<br />
Use fast channel<br />
The "Fast Channel" option can be used to achieve a shorter response time of <strong>the</strong><br />
system. The two semi-conductor outPorts can alternatively be chosen in combination<br />
as shut-down channel.<br />
Attention: Response time see installation manual !<br />
Acceleration monitoring<br />
Optional maximum value <strong>for</strong> acceleration monitoring during an active SOS-function.<br />
<strong>Programming</strong> <strong>Manual</strong> – <strong>SMX</strong> Basic <strong>Module</strong>s 29.10.2009 Page 124 of 183
Input example 1<br />
In a manufacturing device <strong>the</strong> speed of certain manual processes is to be monitored<br />
<strong>for</strong> a safe reduced value, as well as standstill and movement direction. The<br />
movement to be actively monitored is a rotary movement. The drive works with an<br />
electric motor with integrated motor feedback system and intermediate gear.<br />
1. Selecting <strong>the</strong> type<br />
Only <strong>the</strong> speed is monitored (e.g. by means of incremental encoder) => speed<br />
monitoring<br />
2. Speed monitoring<br />
Specification of <strong>the</strong> tolerable speed monitoring value<br />
Input example 2<br />
On a manufacturing machine access to <strong>the</strong> working area is to be enabled at certain<br />
positions of <strong>the</strong> main feed axis <strong>for</strong> manual feeding or setup work. The drive remains<br />
active in this position and is only monitored <strong>for</strong> standstill. The limits of <strong>the</strong> working<br />
stroke are variable and are to be monitored electronically in safety-relevant mode, as<br />
a replacement of <strong>the</strong> mechanical safety limit switch. The movement to be actively<br />
monitored is a linear movement. An absolute encoder is positively connected with<br />
this main drive axis of <strong>the</strong> linear length measuring system. The drive works with an<br />
electric motor with integrated motor feedback system and intermediate gear.<br />
1. Selecting <strong>the</strong> type<br />
The position is monitored (absolute encoder available) => position monitoring<br />
2. Position monitoring<br />
Specification of <strong>the</strong> tolerable position monitoring value<br />
<strong>Programming</strong> <strong>Manual</strong> – <strong>SMX</strong> Basic <strong>Module</strong>s 29.10.2009 Page 125 of 183
SAC (Safe Analog Control)<br />
Monitoring of an analog input signal<br />
Number: 8<br />
Access-ID:<br />
Axis allocation:<br />
Function:<br />
InPort:<br />
RESET-function:<br />
Identification of function element<br />
none<br />
Monitoring of an analog threshold value<br />
Standardized input signals Uin1 and Uin2<br />
The violation of <strong>the</strong> permissible monitoring range is saved and<br />
requires a RESET acknowledgement. This occurs alternatively<br />
via:<br />
• RESET function in <strong>the</strong> group of inPort elements<br />
Description of function:<br />
Umax<br />
Umin<br />
Uin<br />
OutPort function<br />
Range HI LO<br />
Uin > Umin<br />
X<br />
Uin < Umax X<br />
Uin = Umax<br />
X<br />
<strong>Programming</strong> <strong>Manual</strong> – <strong>SMX</strong> Basic <strong>Module</strong>s 29.10.2009 Page 126 of 183
Parameters:<br />
Activate permanently<br />
The monitoring function is permanently active and has no inPort connector.<br />
Lower limit<br />
Minimum value - threshold<br />
Upper limit<br />
Maximum value - threshold<br />
Hysteresis<br />
Hysteresis <strong>for</strong> threshold values<br />
Source<br />
Adjustable analog signal source<br />
Analog signal 1<br />
Ain1 is made up of input signals fro sensor1 and sensor2 of <strong>the</strong> interface.<br />
Analog signal 2<br />
Ain2 is made up of input signals fro sensor3 and sensor4 of <strong>the</strong> interface.<br />
Filtered values of analog signals Ain1 and Ain2<br />
Add Ain1 and Ain2<br />
<strong>Programming</strong> <strong>Manual</strong> – <strong>SMX</strong> Basic <strong>Module</strong>s 29.10.2009 Page 127 of 183
Attention:<br />
When using filter functions <strong>the</strong> response times specified in <strong>the</strong> installation manual<br />
must be taken into account !<br />
PDM (Position Deviation Muting)<br />
Temporal hiding of <strong>the</strong> 2-channel sensor evaluation in case of encoder position<br />
deviation or an encoder "RESET"<br />
Number: 2<br />
Access-ID:<br />
Axis assignment:<br />
Function:<br />
Identification of function element<br />
maximum 1 function per axis<br />
Hiding (muting) <strong>the</strong> encoder diagnostics<br />
Note:<br />
This function may have a considerable effect on <strong>the</strong> safety of an<br />
application. One must make absolutely sure that <strong>the</strong> use of <strong>the</strong> PDMfunction<br />
will not cause any situations that may adversely affect safety!<br />
Description of function:<br />
• <strong>Automatic</strong> activation in case of an alarm<br />
Switching off <strong>the</strong> encoder diagnostics <strong>for</strong> an existing A3303/A3304<br />
Autom. adjustment of encoder data (in case of Incr./SSI Configr.)<br />
The encoder diagnostics is suppressed over <strong>the</strong> parameterized activation<br />
period<br />
<strong>Programming</strong> <strong>Manual</strong> – <strong>SMX</strong> Basic <strong>Module</strong>s 29.10.2009 Page 128 of 183
InPort:<br />
The PDM-function should be activated by means of a safety directed button or a<br />
similar facility.<br />
In normal condition <strong>the</strong> activation signal <strong>for</strong> <strong>the</strong> PDM-function is "1". The inPort is<br />
time monitored and needs to execute an edge change from "1" to "0" and from "0" to<br />
"1" within two seconds. Only <strong>the</strong>n is <strong>the</strong> PDM-function available.<br />
Making behaviour<br />
InPort<br />
Output<br />
Activation period<br />
OutPort<br />
In deactivated condition this function sends <strong>the</strong> result "0" and in activated condition a<br />
"1" to <strong>the</strong> process image.<br />
Parameters:<br />
<strong>Automatic</strong> activation in case of alarm A3303/A3304<br />
Suppression of <strong>the</strong> plausibility test <strong>for</strong> speed and position over <strong>the</strong> duration of <strong>the</strong><br />
activation time from a fault A3303/A3304.<br />
<strong>Programming</strong> <strong>Manual</strong> – <strong>SMX</strong> Basic <strong>Module</strong>s 29.10.2009 Page 129 of 183
Application example: e.g. lifting plat<strong>for</strong>m with 2 encoder systems<br />
A lifting plat<strong>for</strong>m is equipped with two drive systems and assigned encoder systems<br />
(both SSI-encoders). The encoders are connected with <strong>the</strong> <strong>SMX</strong>-module and monitor<br />
<strong>the</strong> horizontal position of <strong>the</strong> plat<strong>for</strong>m. If <strong>the</strong> plat<strong>for</strong>ms drifts to a slanted position<br />
(position deviation of encoders) <strong>the</strong> alarm triggered by this condition can not be reset.<br />
By activating this PDM-function <strong>the</strong> user is able to bring <strong>the</strong> plat<strong>for</strong>m back to<br />
horizontal position.<br />
Notes:<br />
• Perhaps a speed fault (A3301/A3302) is first detected in case of an<br />
encoder deviation. After resetting <strong>the</strong> fault with <strong>the</strong> drive at standstill <strong>the</strong><br />
position deviation fault A3303/A3304 is <strong>the</strong>n displayed.<br />
• When activating this function <strong>the</strong> encoder monitoring is switched off <strong>for</strong> <strong>the</strong><br />
configured period of time. In this case <strong>the</strong> user must ensure that <strong>the</strong> moved<br />
drive does not pose any danger to persons or property.<br />
<strong>Automatic</strong> adjustment of encoder data<br />
Suppression of <strong>the</strong> plausibility test <strong>for</strong> speed and position over <strong>the</strong> duration of <strong>the</strong><br />
activation time without any fur<strong>the</strong>r pre-conditions.<br />
Application example: Compensation of position drifting in a friction wheel application<br />
A drive system is equipped with a position encoder with friction wheel drive. After<br />
several operation cycles a difference in <strong>for</strong>m of an incremental feedback occurs<br />
between absolute encoder and second channel. The absolute encoder needs to be<br />
reset at a defined position, but <strong>the</strong> drive system is to remain active (= RUN) during<br />
that time. Resetting <strong>the</strong> encoder during operation would possibly result in high speed<br />
or acceleration values, which would cause a shut-down, even though <strong>the</strong> drive is<br />
already at rest at <strong>the</strong> time of <strong>the</strong> encoder preset.<br />
Notes:<br />
• The user needs to ensure that <strong>the</strong> drive is at standstill when <strong>the</strong> encoder is<br />
preset.<br />
• In a "Preset" <strong>the</strong> encoder can only be set to a value range 0 < x < measuring<br />
length!<br />
Activation period<br />
Time in milli-seconds after which <strong>the</strong> suppression is automatically removed.<br />
Input range: 100ms … 25s<br />
Note: Once <strong>the</strong> monitoring function can be temporarily deactivated with <strong>the</strong><br />
help of this function, particular attention must be paid when it is used!<br />
PDM-representation in <strong>the</strong> terminal diagram<br />
<strong>Programming</strong> <strong>Manual</strong> – <strong>SMX</strong> Basic <strong>Module</strong>s 29.10.2009 Page 130 of 183
ECS (Encoder Supervisor)<br />
User defined evaluation of encoder status.<br />
Number: 2<br />
Access-ID:<br />
Axis assignment:<br />
Function:<br />
RESET-function:<br />
Identification of function element<br />
maximum 1 function per axis<br />
Evaluation of <strong>the</strong> encoder status using <strong>the</strong> PLC-function<br />
no RESET required<br />
Note:<br />
This function may have a considerable effect on <strong>the</strong> safety of an<br />
application. One must make absolutely sure that <strong>the</strong> use of <strong>the</strong> ECSfunction<br />
will not cause any situations that may adversely affect safety!<br />
Description of function:<br />
The detection of safe speed and position is based on a multitude of measures and<br />
various fault reactions in <strong>the</strong> <strong>for</strong>m of alarm messages. Without <strong>the</strong> use of an ECS–<br />
element <strong>the</strong> operating system will switch <strong>the</strong> <strong>SMX</strong>-system to status RUN ALARM<br />
when a speed/position fault is detected. All outPorts will be blocked immediately.<br />
Inserting an ECS-element into <strong>the</strong> logic diagram suppresses this state change and<br />
<strong>the</strong> operating system remains in RUN condition. The PLC-program now needs to use<br />
<strong>the</strong> status of <strong>the</strong> ECS-element to trigger <strong>the</strong> required measures to avoid dangerous<br />
conditions in <strong>the</strong> application. Alarm messages of <strong>the</strong> encoder interface with identical<br />
reference number are identified with <strong>the</strong> prefix "E".<br />
<strong>Programming</strong> <strong>Manual</strong> – <strong>SMX</strong> Basic <strong>Module</strong>s 29.10.2009 Page 131 of 183
Example <strong>for</strong> <strong>the</strong> use of <strong>the</strong> ECS-function:<br />
Enable<br />
emergenc<br />
y travel<br />
Drive<br />
Encoder<br />
monitorin<br />
g<br />
Axis: 1<br />
<strong>Programming</strong> <strong>Manual</strong> – <strong>SMX</strong> Basic <strong>Module</strong>s 29.10.2009 Page 132 of 183
I/O <strong>Module</strong> Extension <strong>SMX</strong>31<br />
Equipment selection<br />
In <strong>the</strong> Compact series <strong>SMX</strong> a basic module can be combined with up to two I/Oextensions.<br />
This is only possible when opening a new equipment diagram. This<br />
option is used to extend <strong>the</strong> available inPort/outPorts.<br />
Management of additional inPorts/outPorts<br />
Each <strong>SMX</strong>31 extends <strong>the</strong> number of available I/Os as follows:<br />
12 digital inPorts<br />
2 auxiliary outPorts<br />
10 I/O that can be configured as inPorts or outPorts<br />
Note:<br />
I/Os can only be used as inPort or outPort once and have a common terminal<br />
to <strong>the</strong> outside!<br />
Selection of inPorts and outPorts<br />
By using an <strong>SMX</strong>31 module you increase <strong>the</strong> number of available inPort/outPort<br />
elements.<br />
<strong>Programming</strong> <strong>Manual</strong> – <strong>SMX</strong> Basic <strong>Module</strong>s 29.10.2009 Page 133 of 183
Identification of inPorts:<br />
E0.1 .. E0.14 Digital inPort basic unit<br />
E1.1 .. E1.12 Digital inPort <strong>SMX</strong>31 – unit 1<br />
EAE1.1 .. EAE1.10 Digital <strong>SMX</strong>31 I/O used as inPort – unit 1<br />
E2.1 .. E2.12 Digital inPort <strong>SMX</strong>31 – unit 2<br />
EAE2.1 .. EAE2.10 Digital <strong>SMX</strong>31 I/O used as inPort – unit 2<br />
Identification of outPorts:<br />
A0.1 .. A.0.2 Digital standard outPort basic unit<br />
A1.1 .. A1.2 Digital standard outPort <strong>SMX</strong>31 – unit 1<br />
A2.1 .. A2.2 Digital standard outport <strong>SMX</strong>31 – unit 2<br />
EAA1.1 .. EAA1.10 Digital <strong>SMX</strong>31 I/O used as outPort – unit 1<br />
EAA2.1 .. EAA2.10 Digital <strong>SMX</strong>31 I/O used as outPort – unit 2<br />
AK01 .. AK0.2 Relay outPort basic unit<br />
AD0.0_P .. AD0.1_M Digital HI/LO outPort basic unit<br />
Input of Logic Address <strong>for</strong> Communication<br />
The allocation of addresses to <strong>the</strong> physical unit in <strong>the</strong> logic diagram takes place via<br />
<strong>the</strong> logic address. This is entered in <strong>the</strong> multiple equipment configuration dialog.<br />
The dialog is invoked by double-clicking on <strong>the</strong> signal list (blue selected in <strong>the</strong><br />
illustration).<br />
<strong>Programming</strong> <strong>Manual</strong> – <strong>SMX</strong> Basic <strong>Module</strong>s 29.10.2009 Page 134 of 183
The following dialog appears<br />
Parameters<br />
Logic address <strong>SMX</strong>31 unit 1 or 2<br />
Input of logic address <strong>for</strong> extension unit 1 or 2. This address must correspond with<br />
<strong>the</strong> address deposited in <strong>the</strong> module.<br />
OutPorts group 1 or 2<br />
The digital I/O outPorts of <strong>the</strong> module <strong>SMX</strong>31 can ei<strong>the</strong>r be used as standard or as<br />
safety outPorts.<br />
Note:<br />
The term safety outPort in any case refers to <strong>the</strong> classification as a safe<br />
function <strong>for</strong> application up to Pl e acc. to EN ISO 13849-1 or SIL3 acc. to EN<br />
61508. Follow <strong>the</strong> explanations in <strong>the</strong> installation manual <strong>for</strong> classifying <strong>the</strong><br />
outPorts.<br />
Standard outPorts are not permitted <strong>for</strong> safety related duties and can only be<br />
used <strong>for</strong> functional tasks. The EMU-function is not available <strong>for</strong> standard<br />
outPorts.<br />
<strong>Programming</strong> <strong>Manual</strong> – <strong>SMX</strong> Basic <strong>Module</strong>s 29.10.2009 Page 135 of 183
Appendix Process Image<br />
Introduction<br />
The <strong>SMX</strong>-system is able to execute interpreter code saved in <strong>the</strong> module with PLCfunctionality<br />
in real-time.<br />
With an external, not safety related PLC-editor ( SafePLC) a program can be created<br />
in function block representation as specified in IEC 61131, compiled and saved in <strong>the</strong><br />
<strong>for</strong>mat <strong>SMX</strong>AWL . The same program adds <strong>the</strong> <strong>SMX</strong>AWL - instructions to <strong>the</strong><br />
configuration data and transmits <strong>the</strong> data to <strong>the</strong> module <strong>SMX</strong>10/11/12/12A.<br />
PLC – Editor ( SafePLC )<br />
External PC,<br />
operating system<br />
Windows XP<br />
<strong>SMX</strong> AWL<br />
<strong>SMX</strong><br />
Interpreter System A<br />
Interpreter System B<br />
Evidence of <strong>the</strong> correct assignment of inPorts and outPorts must be provided by <strong>the</strong><br />
user within <strong>the</strong> scope of a safety documentation (validation report).<br />
<strong>Programming</strong> <strong>Manual</strong> – <strong>SMX</strong> Basic <strong>Module</strong>s 29.10.2009 Page 136 of 183
The <strong>SMX</strong> AWL-CODE is executed by both systems in each cycle. For this purpose<br />
<strong>the</strong> input variables used in <strong>the</strong> program are linked in compliance with <strong>the</strong> interpreter<br />
code. The result of <strong>the</strong> interpreter run is obtained by:<br />
setting/deleting one or several variables in <strong>the</strong> initial process image<br />
enabling/disabling monitoring functions<br />
setting/deleting outPorts<br />
setting/deleting markers<br />
starting and stopping timers<br />
The AWL-code generated by <strong>the</strong> compiler must be verified within <strong>the</strong> validation<br />
process. Exceptions are <strong>the</strong> so-called MACRO-functions, which are internally 2-<br />
channel tested by <strong>the</strong> <strong>SMX</strong>-system. In <strong>the</strong> MACRO-function only <strong>the</strong> connection of<br />
inPorts must be verified. MACRO-functions refer e.g. to two-hand operation.<br />
Description of Function Elements<br />
The following description is required <strong>for</strong> executing <strong>the</strong> application validation.<br />
PLC – Commands<br />
The following list contains all commands used within <strong>the</strong> <strong>SMX</strong>-system:<br />
Operator Operand Description<br />
LD<br />
all inPort and outPort Equates current result with operand<br />
operands<br />
LD NOT all inPort and outPort<br />
operands<br />
Equates current result with operand and<br />
inverts <strong>the</strong> operand<br />
ST only outPort operands Saves current result to operand address<br />
AND<br />
all inPort and outPort Boolean AND<br />
operands<br />
AND NOT all inPort and outPort Negated Boolean AND<br />
operands<br />
OR<br />
all inPort and outPort Boolean OR<br />
operands<br />
OR NOT all inPort and outPort Negated Boolean OR<br />
operands<br />
XOR<br />
all inPort and outPort Boolean Exclusive OR<br />
operands<br />
NOT<br />
all inPort and outPort Inverts <strong>the</strong> accumulator value<br />
operands<br />
SET MARKER PLC_MARKER in output Sets marker<br />
image<br />
RESET PLC_MARKER in output Resets marker<br />
MARKER image<br />
SET<br />
all inPort and outPort Sets operand to 1<br />
operands<br />
RESET all inPort and outPort<br />
operands<br />
Sets operand to 0<br />
<strong>Programming</strong> <strong>Manual</strong> – <strong>SMX</strong> Basic <strong>Module</strong>s 29.10.2009 Page 137 of 183
MACRO_INFO Description of macro<br />
element<br />
MACRO_CRC CRC <strong>the</strong> previous macro<br />
field<br />
Operand field:<br />
2 byte <strong>for</strong> macro identification<br />
Operand field:<br />
1. Operand:<br />
CRC_LO ( 8 Bit )<br />
2. Operand:<br />
CRC_HI ( 8 Bit )<br />
INFO Info field Operand field:<br />
1. Operand:<br />
reserved free !<br />
2. Operand:<br />
reserved free !<br />
Designation of safety functions<br />
The designation of safety functions are as follows:<br />
Function<br />
Function name acc. to EN 61800–5–2 or <strong>SMX</strong> - designation<br />
SLS Safe Limited Speed<br />
SOS Safe Operational Stop<br />
SDI Safe Direction Indication<br />
SSX Safe Stop 1 or 2<br />
SLI Safe Limited Increment<br />
SCA Safe Cam<br />
SEL Safe Emergency Limit<br />
SLP Safe Limited Position<br />
SEC Safe external circuit<br />
PDM Position Deviation Muting ( <strong>SMX</strong>-function )<br />
ECS Encoder Monitoring Status ( <strong>SMX</strong>-function )<br />
<strong>Programming</strong> <strong>Manual</strong> – <strong>SMX</strong> Basic <strong>Module</strong>s 29.10.2009 Page 138 of 183
Input variables in logic diagram<br />
Note:<br />
The output values of <strong>the</strong> monitoring functions must be considered as<br />
inputs in <strong>the</strong> process image!<br />
Index PAE-variable Bit Pos. Bit-variable Description<br />
1 Config_ID 0x3001 fixed<br />
2 DriveBASE 0<br />
1<br />
2<br />
3<br />
4<br />
5<br />
0 .. 2 always "1"<br />
3 Reset monitoring functions<br />
4 ECS result axis 1<br />
5 ECS result axis 2<br />
3 DriveSLI 0 SLI.0<br />
Results SLI<br />
1 SLI.1<br />
4 EA2_In8 0 .. 7 EA2.1 .. EA2.8 Extension inPorts<br />
5 DriveEMU 0 EMU.1<br />
Results EMU<br />
1 EMU.2<br />
6 DriveSCA 0 .. 7 SCA.1 .. SCA.8 Results SCA<br />
0 .. 7<br />
7 DriveSSX 0<br />
1<br />
2<br />
3<br />
8 DriveSOS 0<br />
1<br />
9 DriveSLP 0<br />
1<br />
10 DriveSEL 0<br />
1<br />
SCA.9 .. SCA.16<br />
SSX.1<br />
SSX.2<br />
SSX.3<br />
SSX.4<br />
Results SSX<br />
SOS.1<br />
Results SOS<br />
SOS.2<br />
SLP.1<br />
Results SLP<br />
SLP.2<br />
SEL.1<br />
Results SEL<br />
SEL.2<br />
11 DriveSLS 0 .. 7 SLS.1 .. SLS.8 Results SLS<br />
12 DriveSDI 0 SDI.1<br />
Results SDI<br />
1 SDI.2<br />
13 DriveSAC 0 .. 7 SAC.1 .. SAC.8 Results SAC<br />
14 DriveSF 0 PDM_EN.1 Results PDM<br />
1 PDM_EN.2<br />
15 DI8 0 .. 7 E0.1 .. E0.8 Hardware inPorts basic group 1 ..<br />
8<br />
16 DI16 0 .. 7 E0.9 .. E0.16 Hardware inPorts basic group 9 ..<br />
16<br />
17 DI24 0 .. 7 E1.1 .. E1.8 Hardware inPorts <strong>SMX</strong>31<br />
Extension with log. address 1<br />
inPorts 1 – 8<br />
18 DI32 0 .. 7 E1.9 .. E1.12 Hardware inPorts <strong>SMX</strong>31<br />
Extension with log. address 1<br />
inPorts 9 – 12 and extension with<br />
log. address 2 inPorts 9 - 12<br />
19 PLCTimer16 0 .. 7 PLCT.9 .. PLCT.16 Results PLC Timer<br />
20 Reserve1 Reserve<br />
21 StartTimer 0 .. 1<br />
2 .. 3<br />
4 .. 5<br />
6 .. 7<br />
MET.1<br />
MET.2<br />
MET.3<br />
MET.4<br />
OutPort start element with time<br />
<strong>Programming</strong> <strong>Manual</strong> – <strong>SMX</strong> Basic <strong>Module</strong>s 29.10.2009 Page 139 of 183
22 Outp2HandTimer 0 MEZ.1 OutPort two-hand with time<br />
23 Start element 0 MES.1 OutPort starts element<br />
24 Start-up Test 0 MEA.1<br />
OutPort start-up test<br />
1 MEA.2<br />
25 PLC Timer 0 .. 7 PLCT.1 .. PLCT.8 Results PLC_Timer<br />
26 DriveTTS 0<br />
1<br />
2<br />
3<br />
EAE2.7<br />
EAE2.8<br />
EAE2.9<br />
EAE2.10<br />
27 AIn1 Analog inPort 1<br />
28 AIn2 Analog inPort 2<br />
29 AIn3 Analog inPort 3<br />
30 AIn4 Analog inPort 4<br />
31 SysACC Axis1 SysAcc[0] current system acceleration axis 1<br />
32 SysACC Axis2 SysAcc[1] current system acceleration axis 2<br />
33 Limit20Axis1 Limit20[0] Limit <strong>for</strong> GOTO monitoring axis 1<br />
34 Limit20Axcis2 Limit20[1] Limit <strong>for</strong> GOTO monitoring axis 2<br />
35 Pos20Axis1 Position20[0] Current position axis 1<br />
36 Pos20Axis2 Position20[1] Current position axis 2<br />
37 BG20Axis1 BG20[0] Range limit axis 1<br />
38 BG20Axis2 BG20[1] Range limit axis 2<br />
39 StopDistAxis1 StopDistanz20[0] Current stop distance axis 1<br />
40 StopDistAxis2 StopDistanz20[1] Current stop distance axis 2<br />
41 SysSpeed Axis1 SysSpeed[0] Current speed axis 1<br />
42 SysSpeed Axis2 SysSpeed[1] Current speed axis 2<br />
43 AnalogAdder Analog adder<br />
44 EA_IN8 0 .. 7 EAE1.1 .. EAE1.8 Extension inPorts <strong>SMX</strong>31 with log.<br />
address 1<br />
45 EA_IN16 0 .. 7 EAE1.9 .. EAE1.10<br />
EAE2.1 .. EAE2.6<br />
46 Start element Timer2 0<br />
1<br />
2<br />
3<br />
47 EMU 31 1 1 0<br />
1<br />
2<br />
3<br />
4<br />
5<br />
6<br />
7<br />
48 EMU 31 1 1 0<br />
1<br />
49 EMU 31 1 2 0<br />
1<br />
2<br />
3<br />
4<br />
5<br />
6<br />
7<br />
MET.5<br />
MET.6<br />
MET.7<br />
MET.8<br />
EMU31_1.1<br />
EMU31_1.2<br />
EMU31_1.3<br />
EMU31_1.4<br />
EMU31_1.5<br />
EMU31_1.6<br />
EMU31_1.7<br />
EMU31_1.8<br />
EMU31_1.9<br />
EMU31_1.10<br />
EMU31_2.1<br />
EMU31_2.2<br />
EMU31_2.3<br />
EMU31_2.4<br />
EMU31_2.5<br />
EMU31_2.6<br />
EMU31_2.7<br />
EMU31_2.8<br />
Log. address 1<br />
Log. address 1<br />
Log. address 2<br />
Log. address 2<br />
OutPort start element with time<br />
EMU results <strong>SMX</strong>31 with log.<br />
address 1<br />
EMU results <strong>SMX</strong>31 with log.<br />
address 1<br />
EMU results <strong>SMX</strong>31 with log.<br />
address 2<br />
<strong>Programming</strong> <strong>Manual</strong> – <strong>SMX</strong> Basic <strong>Module</strong>s 29.10.2009 Page 140 of 183
50 EMU 31 1 2 0<br />
1<br />
EMU31_2.9<br />
EMU31_2.10<br />
EMU results <strong>SMX</strong>31 with log.<br />
address 2<br />
51 Reserve3 PAE Reserve<br />
52 Reserve Reserve<br />
53 Reserve Reserve<br />
54 Reserve 2_0 PAE Reserve<br />
55 Reserve 2_1 PAE Reserve<br />
56 Reserve 2_2 PAE Reserve<br />
57 Reserve 2_3 PAE Reserve<br />
58 Reserve 2_4 PAE Reserve<br />
59 Reserve 2_5 PAE Reserve<br />
<strong>Programming</strong> <strong>Manual</strong> – <strong>SMX</strong> Basic <strong>Module</strong>s 29.10.2009 Page 141 of 183
PLC Processing<br />
PLC - Syntax<br />
The PLC-program is CRC-protected and part of <strong>the</strong> <strong>SMX</strong> configuration data. Each<br />
PLC-command is identically structured as follows:<br />
Syntax of list entry:<br />
Size of list entry = 4 byte<br />
Byte index 0 1 2 3<br />
Assignment PLC –<br />
Byte-Address Bit-Address Downcount<br />
Command Operand<br />
0..255<br />
Comment:<br />
Downcount = (number of AWL-commands) – (line number of list entries - 1)<br />
At 256 <strong>the</strong> counter jumps back to 0.<br />
<strong>Programming</strong> <strong>Manual</strong> – <strong>SMX</strong> Basic <strong>Module</strong>s 29.10.2009 Page 142 of 183
PLC – Commands<br />
Operator Operand OPCODE Description<br />
LD<br />
all inPort and<br />
outPort operands<br />
02 Equates current result with<br />
operand<br />
LD NOT all inPort and<br />
outPort operands<br />
04 Equates current result with<br />
operand and inverts <strong>the</strong> operand<br />
ST<br />
only outPort<br />
operands<br />
06 Saves current result to operand<br />
address<br />
AND<br />
all inPort and 08 Boolean AND<br />
outPort operands<br />
AND NOT all inPort and 10 Negated Boolean AND<br />
outPort operands<br />
OR<br />
all inPort and 12 Boolean OR<br />
outPort operands<br />
OR NOT all inPort and 14 Negated Boolean OR<br />
outPort operands<br />
XOR<br />
all inPort and 16 Boolean Exclusive OR<br />
outPort operands<br />
NOT<br />
all inPort and 18 Inverts <strong>the</strong> accumulator value<br />
outPort operands<br />
SET MARKER PLC_MARKER in 20 Sets marker<br />
output image<br />
RESET PLC_MARKER in 22 Resets marker<br />
MARKER output image<br />
SET<br />
all inPort and 24 Sets operand to 1<br />
outPort operands<br />
RESET all inPort and 26 Sets operand to 0<br />
outPort operands<br />
MACRO_INFO Description of<br />
macro element<br />
28 Operand field:<br />
2 byte <strong>for</strong> macro identification<br />
MACRO_CRC CRC <strong>the</strong> previous<br />
macro field<br />
30 Operand field:<br />
1. Operand:<br />
CRC_LO ( 8 Bit )<br />
2. Operand:<br />
CRC_HI ( 8 Bit )<br />
INFO Info field 32 Operand field:<br />
1. Operand:<br />
reserved free !<br />
2. Operand:<br />
reserved free !<br />
<strong>Programming</strong> <strong>Manual</strong> – <strong>SMX</strong> Basic <strong>Module</strong>s 29.10.2009 Page 143 of 183
PLC – Elements (I/O)<br />
The PLC inPort and outPort elements are defined in <strong>the</strong> document "TS-37350-340-02<br />
Switch Types PLC"!<br />
InPort elements<br />
I/O<br />
Type<br />
ESwitch_1O 1<br />
ESwitch_1S 2<br />
ESwitch_2O 3<br />
ESwitch_2OT 4<br />
ESwitch_1S1O 5<br />
ESwitch_1S1OT 6<br />
ESwitch_2S2O 7<br />
ESwitch_2S2OT 8<br />
ESwitch_3O 9<br />
ESwitch_3OT 10<br />
TwoHand_2O<br />
n/a<br />
TwoHand_2S<br />
n/a<br />
Mode_1S1O 13<br />
Mode_3Switch 14<br />
OutPort elements<br />
I/O<br />
Type<br />
DO.0_P 1<br />
DO.0_M 1<br />
DO.1_P 1<br />
DO.1_M 1<br />
DO.2_P 1<br />
DO.2_M 1<br />
<strong>Programming</strong> <strong>Manual</strong> – <strong>SMX</strong> Basic <strong>Module</strong>s 29.10.2009 Page 144 of 183
PLC - Output variables<br />
Output variables <strong>for</strong> <strong>the</strong> PLC-system are identified by:<br />
Affiliation to <strong>the</strong> system image of <strong>the</strong> <strong>SMX</strong>-system<br />
<strong>the</strong> unambiguously determined address (byte index in system image, bit index in<br />
entry of system image).<br />
PAEOFFS = Size of segment PAE = 96<br />
by <strong>the</strong> 1-bit value of <strong>the</strong> input variable (TRUE or FALSE)<br />
Syntax and addressing:<br />
Index PAE-variable Bit Pos. Bit-variable Description<br />
1 Config_ID 0x3002 fixed<br />
2 DriveBASE 0<br />
1<br />
2<br />
3<br />
4<br />
DRB_STAT.1 = ESTOP<br />
external DRB_STAT.2 =<br />
RUNNING<br />
DRB_STAT.3 = LOCK<br />
DRB_STAT.4 = RESET<br />
5<br />
3 DriveSLI 0 SLI_EN.1<br />
Activation SLI<br />
1 SLI_EN.2<br />
4 DriveEMU 0 EMU_EN.1<br />
Activation EMU<br />
1 EMU_EN.2<br />
5 DriveSCA 0 .. 7 SCA_EN.1 .. SCA_EN.8 Activation SCA<br />
SCA_EN.9 ..<br />
0 .. 7 SCA_EN.16<br />
6 DriveSSX 0 SSX_EN.1<br />
Activation SSX<br />
1 SSX_EN.2<br />
2 SSX_EN.3<br />
3 SSX_EN.4<br />
7 DriveSOS 0 SOS_EN.1<br />
Activation SOS<br />
1 SOS_EN.2<br />
8 DriveSLP 0 SLP_EN.1<br />
Activation SLP<br />
1 SLP_EN.2<br />
9 DriveSEL 0 SEL_EN.1<br />
ActivationSEL<br />
1 SEL_EN.2<br />
10 DriveSLS 0 .. 7 SLS_EN.1 .. SLS_EN.8 Activation SLS<br />
11 DriveSDI 0 SDI_EN.1<br />
Activation SDI<br />
1 SDI_EN.2<br />
12 DriveSAC 0 .. 7 SAC_EN.1 .. SAC_EN.8 Activation SAC<br />
13 DriveSummary 0 PDM_EN.1<br />
Activation PDM<br />
1 PDM_EN.2<br />
14 DO8 0<br />
1<br />
2<br />
3<br />
4<br />
5<br />
6<br />
7<br />
DO.0_P<br />
DO.0_M<br />
DO.1_P<br />
DO.1_M<br />
K.1<br />
K.2<br />
EAA1.9<br />
EAA1.10<br />
Semi-conductor outPort<br />
HISIDE1<br />
Semi-conductor outPort<br />
LOSIDE1<br />
Semi-conductor outPort<br />
HISIDE2<br />
Semi-conductor outPort<br />
LOSIDE2<br />
Relay K1<br />
Relay K2<br />
Semi-conductor outPort<br />
<strong>SMX</strong>31 log. addr 1<br />
Semi-conductor outPort<br />
<strong>SMX</strong>31 log. addr 1<br />
<strong>Programming</strong> <strong>Manual</strong> – <strong>SMX</strong> Basic <strong>Module</strong>s 29.10.2009 Page 145 of 183
15 HW_Output 0<br />
1<br />
2<br />
3<br />
4<br />
5<br />
6<br />
7<br />
A0.1_O<br />
A0.2_O<br />
A1.1_O<br />
A1.2_O<br />
A2.1_O<br />
A2.2_O<br />
EAA2.9<br />
EAA2.10<br />
16 PLC_Marker 0 .. 7 M.1 .. M.8<br />
18 PLCTimer_EN 0 .. 7 PLCT_EN.1 ..<br />
PLCT_EN.8<br />
19 – 64 MX8 MX16 MX 24 ..<br />
MX368<br />
Each<br />
0 .. 7<br />
MX.1 .. MX.368<br />
Auxiliary outPorts <strong>SMX</strong><br />
Auxiliary outPorts <strong>SMX</strong><br />
Auxiliary outPort <strong>SMX</strong>31 log.<br />
addr 1<br />
Auxiliary outPort <strong>SMX</strong>31 log.<br />
addr 1<br />
Auxiliary outPort <strong>SMX</strong>31 log.<br />
addr 2<br />
Auxiliary outPort <strong>SMX</strong>31 log.<br />
addr 2<br />
PLC_MX Marker<br />
65 Diag 17_24 0 .. 7 Diagnostic Bit 16 .. 23<br />
66 Diag25_32 0 .. 7 Diagnostic Bit 24 .. 31<br />
67 EnableEingangTimer 0<br />
1<br />
2<br />
3<br />
4<br />
5<br />
6<br />
7<br />
META_EN.1<br />
METB_EN.1<br />
META_EN.2<br />
METB_EN.2<br />
META_EN.3<br />
METB_EN.3<br />
META_EN.4<br />
METB_EN.4<br />
Activation of inPort element<br />
with time monitoring<br />
68 EnableEingangZweih<br />
andTimer<br />
0 .. 2 MEZ_EN.1 .. MEZ_EN.3 Activation of two-hand<br />
button<br />
69 EnableStartelement 0 MES_EN.1<br />
Activation of start element<br />
1 MES_EN.2<br />
70 EnableAnlauftest<br />
71 EAA1_8 0 .. 7 EAA1.1 .. EAA1.8 Extension outPort <strong>SMX</strong>31<br />
log. addr 1<br />
72 EAA2_8 0 .. 7 EAA2.1 .. EAA2.8 Extension outPort <strong>SMX</strong>31<br />
log. addr 2<br />
73 Diag_1_16 Diagnostic Bit 0 .. 15<br />
74 Diag_33_40 Diagnostic Bit 30..39<br />
75 Diag_41_48 Diagnostic Bit 40..47<br />
76 Diag_49_56 Diagnostic Bit 48..55<br />
77 EnableEingangTimer2 0<br />
1<br />
2<br />
3<br />
4<br />
5<br />
6<br />
7<br />
META_EN.5<br />
METB_EN.5<br />
META_EN.6<br />
METB_EN.6<br />
META_EN.7<br />
METB_EN.7<br />
META_EN.8<br />
METB_EN.8<br />
78 Reserve1 Reserve<br />
79 Reserve2 Reserve<br />
80 Reserve3 Reserve<br />
81 Reserve4 Reserve<br />
82 Reserve5 Reserve<br />
83 Reserve6 Reserve<br />
84 Reserve7 Reserve<br />
85 Reserve8 Reserve<br />
86 Reserve9 Reserve<br />
87 Reserve10 Reserve<br />
88 Reserve11 Reserve<br />
89 Reserve12 Reserve<br />
Activation of inPort element<br />
with time monitoring<br />
<strong>Programming</strong> <strong>Manual</strong> – <strong>SMX</strong> Basic <strong>Module</strong>s 29.10.2009 Page 146 of 183
PLC - Processing elements<br />
Number = 8<br />
PLC-markers can be set and reset with <strong>the</strong> commands "S" or "R". PLC-marjkers are<br />
part of <strong>the</strong> process outPort image "OutPorts". The user can only address markers<br />
through <strong>the</strong> macro "RS-Flipflop".<br />
PLC - Timer<br />
The runtime system of PLC-processing holds a total of 8 PLC-timers available. These<br />
have <strong>the</strong> following properties:<br />
Generation of time events 1…31.999.992ms<br />
Downwards counter limited to ZERO, starts from configured initial value (part of<br />
configuration data)<br />
In <strong>the</strong> system image <strong>the</strong> timers only occupy 2 bits <strong>for</strong> EN<strong>AB</strong>LE and RESULT<br />
(TRUE = timer elapsed, i.e. internal value at ZERO). Start of timer by setting<br />
EN<strong>AB</strong>LE. EN<strong>AB</strong>LE = FALSE resets <strong>the</strong> timer to <strong>the</strong> initial value (initial value =<br />
FALSE).<br />
EN<strong>AB</strong>LE Timer value Initial value Activity<br />
FALSE Initial value on<br />
FALSE Counter inactive<br />
configuration<br />
TRUE 1 ... < INITIAL VALUE FALSE Counter active<br />
TRUE ZERO TRUE Counter inactive<br />
PLC-Timer - EN<strong>AB</strong>LE can only be started or disabled with <strong>the</strong> command "ST".<br />
Release and status of timers are part of <strong>the</strong> process image. The initial values of <strong>the</strong><br />
timers are saved in <strong>the</strong> configuration data in <strong>the</strong> PLC segment.<br />
PLC - Processing list<br />
he PLC-instruction list consists of a header and a linear list of single PLCinstructions,<br />
consisting of operator and operands, in <strong>the</strong> <strong>for</strong>mat specified under 2.2.1.<br />
Contents Index Contents Description<br />
Header 0 ID_PLC Identification of <strong>the</strong> PLC-list<br />
2 CRC CRC over <strong>the</strong> structure<br />
4 Date1 Date of creation/change<br />
6 Date2<br />
8 PLC_Len Number of AWL-instructions<br />
10 free<br />
12 free<br />
14 free<br />
<strong>Programming</strong> <strong>Manual</strong> – <strong>SMX</strong> Basic <strong>Module</strong>s 29.10.2009 Page 147 of 183
PLC-Timer 16 Timer 1 Time events from 1 Tcyc to<br />
.....<br />
44 Timer 8<br />
3.999.999 Tcyc<br />
Each timer occupies 4 bytes<br />
Reserve 48 free<br />
50 free<br />
52 free<br />
AWL –<br />
List<br />
54 free<br />
56 Instruction 1 AWL acc. to <strong>for</strong>mat section<br />
.....<br />
2.2.1)<br />
48 +<br />
Instruction no.<br />
(PLC_Len*4) –4 PLC_Len<br />
Reserve 1056 free<br />
1058 free<br />
Assignment of resources<br />
Element In Out Qty.<br />
MX<br />
IN/OUT<br />
Process<br />
image<br />
PLC-Code<br />
AND2 2 1 1 0 LD x1.y1<br />
AND x2.y2<br />
ST MX.z<br />
AND5 5 1 1 0 LD x1.y1<br />
AND x2.y2<br />
AND x3.y3<br />
AND x4.y4<br />
AND x5.y5<br />
ST MX.z<br />
Qty.<br />
IL<br />
OR2 .. OR5 Analog AND 3 … 6<br />
XOR 2 Analog AND 3<br />
NOT 1 1 1 0 LD x1,y1<br />
NOT<br />
ST MX.z<br />
3<br />
RS-Flipflop 2 1 0 Output = 1 LD x1.y1 (source S)<br />
S M.z<br />
LD x2.y2 (source R)<br />
R M.z<br />
Timer 1 1 0 Output = 1 Timer enable :<br />
LD x1.y1<br />
ST PLCT_EN.z<br />
Monitoring<br />
functions<br />
Semi-conductor<br />
outPort<br />
Single<br />
Semi-conductor<br />
outPort<br />
Redundant<br />
1 1 0 Output = 1 Monitoring function enable :<br />
LD x1.y1<br />
ST uuu_EN.z<br />
1 1 0 Output = 1 LD x1.y1<br />
ST DO.x_y<br />
1 2 0 Output = 2 LD x1.y1<br />
ST DO.x_P<br />
ST DO.x_M<br />
Processing of inPort elements see document TS-37330-340-02 PLC switch types!<br />
3<br />
…<br />
6<br />
4<br />
2<br />
2<br />
2<br />
3<br />
<strong>Programming</strong> <strong>Manual</strong> – <strong>SMX</strong> Basic <strong>Module</strong>s 29.10.2009 Page 148 of 183
APPENDIX Encoder Combinations<br />
Version:<br />
<strong>SMX</strong> 11 / <strong>SMX</strong> 12 in 2-axis operation<br />
Type Encoder A Encoder B Disabled Configu Entry Info field<br />
Type<br />
Pulse Enable Type Pulse Enable Modes rable Fault<br />
Pl<br />
multiple direction<br />
multip<br />
le<br />
direction<br />
axis exclusion/com<br />
ment<br />
0 NC 0 No NC 0 No all 1 and 2 B<br />
1 Incremental 2 No NC 2 No ZSC,<br />
DMC,<br />
ELC, OLC,<br />
PSC(positi<br />
on),JSS<br />
1 and 2 Fault exclusion<br />
mech. shaft<br />
breakage,<br />
positive encoder<br />
shaft connection<br />
required.<br />
d<br />
2 SINCOS 4 Yes NC 4 No ELC, OLC,<br />
PSC(positi<br />
on)<br />
3 Incremental 2 Yes Proxi sw.<br />
1 count.<br />
inp.<br />
4 SINCOS 4 Yes Proxi sw.<br />
1 count.<br />
inp.<br />
5 Incremental 4 Yes Proxi sw.<br />
2 count.<br />
inp. w. 90°<br />
- signal<br />
6 SINCOS 4 Yes HTL/incre<br />
mental<br />
7 SSI 1 Yes Proxi sw.<br />
1 count.<br />
inp.<br />
8 SSI 1 Yes Proxi sw.<br />
2 count.<br />
inp. w. 90°<br />
9 Proxi sw.<br />
1 count. inp.<br />
10 Proxi sw.<br />
2 count. inp. w.<br />
90° - signal<br />
11 Proxi sw.<br />
2 count. inp. w.<br />
90° - signal<br />
12 HTL/incrementa<br />
l<br />
13 Proxi sw.<br />
1 count. inp.<br />
14 Proxi sw.<br />
2 count. inp. w.<br />
90° - signal<br />
- signal<br />
1 No Proxi sw.<br />
1 count.<br />
inp.<br />
4 Yes Proxi sw.<br />
2 count.<br />
inp. w. 90°<br />
- signal<br />
4 Yes Increment<br />
al<br />
1 No ZSC,DMC,<br />
JSS,ELC,<br />
OLC,<br />
PSC(positi<br />
on)<br />
1 No ELC, OLC,<br />
PSC(positi<br />
on)<br />
4 Yes ELC, OLC,<br />
PSC(positi<br />
on)<br />
1 and 2 Fault exclusion<br />
mech. shaft<br />
breakage,<br />
positive encoder<br />
shaft connection<br />
required.<br />
d<br />
1 and 2 e<br />
1 and 2 (not<br />
implemented in<br />
phase 1)<br />
e<br />
1 e<br />
4 Yes ELC, OLC,<br />
PSC(positi<br />
on)<br />
1 e<br />
1 No 1 (not<br />
d<br />
implemented in<br />
phase 1)<br />
4 Yes 1 e<br />
1 No ZSC,<br />
DMC,<br />
ELC,<br />
OLC,JSS,<br />
PSC(positi<br />
on)<br />
4 Yes ELC, OLC,<br />
PSC(positi<br />
on)<br />
4 Yes ELC, OLC,<br />
PSC(positi<br />
on)<br />
4 Yes SINCOS 4 Yes ELC, OLC,<br />
PSC(positi<br />
on)<br />
1 d<br />
1 d<br />
2 e<br />
2 e<br />
1 No SSI 1 Yes 2 (not<br />
implemented in<br />
phase 1)<br />
4 Yes SSI 1 Yes 2 e<br />
d<br />
<strong>Programming</strong> <strong>Manual</strong> – <strong>SMX</strong> Basic <strong>Module</strong>s 29.10.2009 Page 149 of 183
Version:<br />
<strong>SMX</strong> 12 in single axis operation<br />
Type Encoder A Encoder B Disabled Configur Entry Info field<br />
Type Pulse Enable Type Pulse Enable Modes able axis Fault Pl<br />
multiple direction<br />
multiple direction<br />
exclusion/<br />
comment<br />
32 Incremental 4 Yes Incremental 4 Yes ELC, OLC, 1 e<br />
PSC(position)<br />
33 SINCOS 4 Yes Incremental 4 Yes ELC, OLC, 1 e<br />
PSC(position)<br />
34 SINCOS 4 Yes SINCOS 4 Yes ELC, OLC, 1 e<br />
PSC(position)<br />
35 Incremental 4 Yes SSI 1 Yes 1 e<br />
36 SINCOS 4 Yes SSI 1 Yes 1 e<br />
37 SSI 1 Yes SSI 1 Yes 1 e<br />
Fault types <strong>SMX</strong><br />
The <strong>SMX</strong> generally differentiates between two types of faults as per assignment<br />
below:<br />
Fault type<br />
Fatal Error<br />
Alarm<br />
ECS-Alarm<br />
Description<br />
Severe exceptional error caused by<br />
<strong>the</strong> program run in <strong>the</strong> <strong>SMX</strong>. Cyclic<br />
program sequence is no longer<br />
possible <strong>for</strong> safety related reasons.<br />
The last active process is <strong>the</strong><br />
operation of <strong>the</strong> 7-segment display by<br />
system A. System B is in stop mode.<br />
Functional fault, caused by an<br />
external process. Both system<br />
continue to run cyclically and serve<br />
all requests from <strong>the</strong> communication<br />
interfaces. Sensing of <strong>the</strong> external<br />
process is also maintained.<br />
When using <strong>the</strong> ECS function in <strong>the</strong><br />
programming desktop, <strong>the</strong> encoder<br />
alarm messages are marked "E"<br />
instead of "A".<br />
Effect on <strong>the</strong><br />
system<br />
All outputs are<br />
switched off!<br />
All outputs are<br />
switched off!<br />
ECS function<br />
block delivers<br />
"0" as a result.<br />
Reset condition<br />
Reset possible by<br />
switching <strong>the</strong><br />
<strong>SMX</strong>(POR) off/on.<br />
Reset via<br />
parameterizable<br />
inPort<br />
Reset via<br />
parameterizable<br />
inPort<br />
Recognizing faults system, A and system B:<br />
System A: odd-numbered<br />
System B: even numbered<br />
<strong>Programming</strong> <strong>Manual</strong> – <strong>SMX</strong> Basic <strong>Module</strong>s 29.10.2009 Page 150 of 183
Display of Fault Types<br />
There are two possible ways of displaying <strong>the</strong> fault number<br />
<strong>SMX</strong>.. without expansion modules<br />
F,A or E __ __ __ __<br />
Fault number<br />
<strong>SMX</strong>.. with expansion modules<br />
F,A or E __ __ __ __ __<br />
1) Fault number<br />
Note 1)<br />
0: Base module<br />
1: Expansion module with logic address 1<br />
2: Expansion module with logic address 2<br />
<strong>Programming</strong> <strong>Manual</strong> – <strong>SMX</strong> Basic <strong>Module</strong>s 29.10.2009 Page 151 of 183
Alarm list <strong>SMX</strong><br />
Alarm code A 2101 / A 2102<br />
Alarm message Timeout receive message <strong>SMX</strong>31 (address 1)<br />
Cause<br />
Message from expansion module not received in time<br />
Remedy<br />
Check connection to expansion module<br />
Alarm code A 2105 / A 2106<br />
Alarm message CRC fault transmission message <strong>SMX</strong>31 (address 1)<br />
Cause<br />
Transmission message faulty<br />
Remedy<br />
Check configuration of <strong>SMX</strong>31 serial number<br />
Alarm code A 2107 / A 2108<br />
Alarm message<br />
Cause<br />
Remedy<br />
CRC fault transmission message<br />
Transmission message faulty<br />
Check configuration of <strong>SMX</strong>31 serial number<br />
Check connection to expansion module<br />
Alarm code A 2109 / A 2110<br />
Alarm message<br />
Cause<br />
Remedy<br />
Alarm code A 2111<br />
CRC fault receive message<br />
Receive message faulty<br />
Check configuration of <strong>SMX</strong>31 serial number<br />
Check connection to expansion module<br />
Alarm message Timeout communication with expansion module <strong>SMX</strong>31 (address 1)<br />
Cause<br />
Installation of expansion module faulty<br />
Remedy<br />
Check connection to expansion module<br />
Alarm code A 2113<br />
Alarm message<br />
Cause<br />
Remedy<br />
Expansion module <strong>SMX</strong>31 (address 1) present, but not configured<br />
Faulty configuration<br />
Check configuration<br />
Alarm code A 2121 / A 2122<br />
Alarm message Timeout receive message <strong>SMX</strong>31 (address 2)<br />
Cause<br />
Message from expansion module not received in time<br />
Remedy<br />
Check connection to expansion module<br />
Alarm code A 2125 / A 2126<br />
Alarm message CRC fault transmission message <strong>SMX</strong>31 (address 2)<br />
Cause<br />
Transmission message faulty<br />
Remedy<br />
Check configuration of <strong>SMX</strong>31 serial number<br />
<strong>Programming</strong> <strong>Manual</strong> – <strong>SMX</strong> Basic <strong>Module</strong>s 29.10.2009 Page 152 of 183
Alarm code A 2131<br />
Alarm message Timeout communication with expansion module <strong>SMX</strong>31 (address 2)<br />
Cause<br />
Installation of expansion module faulty<br />
Remedy<br />
Check connection to expansion module<br />
Alarm code A 2133<br />
Alarm message<br />
Cause<br />
Remedy<br />
Expansion module <strong>SMX</strong>31 (address 2) present, but not configured<br />
Faulty configuration<br />
Check configuration<br />
Alarm code A 3031 / A 3032<br />
Alarm message<br />
Cause<br />
Remedy<br />
Pulse1 plausibility fault on expansion inlet EAEx.1<br />
Configured Pulse1 voltage not applied to this input.<br />
Check <strong>the</strong> configuration of <strong>the</strong> digital input acc. to planning and<br />
circuit diagram<br />
Check wiring<br />
Alarm code A 3033 / A 3034<br />
Alarm message<br />
Cause<br />
Remedy<br />
Pulse2 plausibility fault on expansion inlet EAEx.1<br />
Configured Pulse2 voltage not applied to this input.<br />
Check <strong>the</strong> configuration of <strong>the</strong> digital input acc. to planning and<br />
circuit diagram<br />
Check wiring<br />
Alarm code A 3035 / A 3036<br />
Alarm message<br />
Cause<br />
Remedy<br />
Faulty 24V signal on EAEx.1<br />
No permanent 24V voltage applied to this input<br />
Check <strong>the</strong> voltage on <strong>the</strong> digital input!<br />
Check wiring<br />
Check whe<strong>the</strong>r Pulse1 or Pulse2 is applied<br />
Alarm code A 3037 / A 3038<br />
Alarm message<br />
Cause<br />
Remedy<br />
Pulse1 plausibility fault on expansion inlet EAEx.2<br />
Configured Pulse1 voltage not applied to this input.<br />
Check <strong>the</strong> configuration of <strong>the</strong> digital input acc. to planning and<br />
circuit diagram<br />
Check wiring<br />
<strong>Programming</strong> <strong>Manual</strong> – <strong>SMX</strong> Basic <strong>Module</strong>s 29.10.2009 Page 153 of 183
Alarm code A 3039 / A 3040<br />
Alarm message<br />
Cause<br />
Remedy<br />
Pulse2 plausibility fault on expansion inlet EAEx.2<br />
Configured Pulse2 voltage not applied to this input.<br />
Check <strong>the</strong> configuration of <strong>the</strong> digital input acc. to planning and<br />
circuit diagram<br />
Check wiring<br />
Alarm code A 3041 / A 3042<br />
Alarm message<br />
Cause<br />
Remedy<br />
Faulty 24V signal on EAEx.2<br />
No permanent 24V voltage applied to this input<br />
Check <strong>the</strong> voltage on <strong>the</strong> digital input!<br />
Check wiring<br />
Check whe<strong>the</strong>r Pulse1 or Pulse2 is applied<br />
Alarm code A 3043 / A 3044<br />
Alarm message<br />
Cause<br />
Remedy<br />
Pulse1 plausibility fault on expansion inlet EAEx.3<br />
Configured Pulse1 voltage not applied to this input.<br />
Check <strong>the</strong> configuration of <strong>the</strong> digital input acc. to planning and<br />
circuit diagram<br />
Check wiring<br />
Alarm code A 3045 / A 3046<br />
Alarm message<br />
Cause<br />
Remedy<br />
Pulse2 plausibility fault on expansion inlet EAEx.3<br />
Configured Pulse2 voltage not applied to this input.<br />
Check <strong>the</strong> configuration of <strong>the</strong> digital input acc. to planning and<br />
circuit diagram<br />
Check wiring<br />
Alarm code A 3047 / A 3048<br />
Alarm message<br />
Cause<br />
Remedy<br />
Faulty 24V signal on EAEx.3<br />
No permanent 24V voltage applied to this input<br />
Check <strong>the</strong> voltage on <strong>the</strong> digital input!<br />
Check wiring<br />
Check whe<strong>the</strong>r Pulse1 or Pulse2 is applied<br />
Alarm code A 3049 / A 3050<br />
Alarm message<br />
Cause<br />
Remedy<br />
Pulse1 plausibility fault on expansion inlet EAEx.4<br />
Configured Pulse1 voltage not applied to this input.<br />
Check <strong>the</strong> configuration of <strong>the</strong> digital input acc. to planning and<br />
circuit diagram<br />
Check wiring<br />
Alarm code A 3051 / A 3052<br />
Alarm message<br />
Cause<br />
Remedy<br />
Pulse2 plausibility fault on expansion inlet EAEx.4<br />
Configured Pulse2 voltage not applied to this input.<br />
Check <strong>the</strong> configuration of <strong>the</strong> digital input acc. to planning and<br />
circuit diagram<br />
Check wiring<br />
<strong>Programming</strong> <strong>Manual</strong> – <strong>SMX</strong> Basic <strong>Module</strong>s 29.10.2009 Page 154 of 183
Alarm code A 3053 / A 3054<br />
Alarm message<br />
Cause<br />
Remedy<br />
Faulty 24V signal on EAEx.4<br />
No permanent 24V voltage applied to this input<br />
Check <strong>the</strong> voltage on <strong>the</strong> digital input!<br />
Check wiring<br />
Check whe<strong>the</strong>r Pulse1 or Pulse2 is applied<br />
Alarm code A 3055 / A 3056<br />
Alarm message<br />
Cause<br />
Remedy<br />
Pulse1 plausibility fault on expansion inlet EAEx.5<br />
Configured Pulse1 voltage not applied to this input.<br />
Check <strong>the</strong> configuration of <strong>the</strong> digital input acc. to planning and<br />
circuit diagram<br />
Check wiring<br />
Alarm code A 3057 / A 3058<br />
Alarm message<br />
Cause<br />
Remedy<br />
Pulse2 plausibility fault on expansion inlet EAEx.5<br />
Configured Pulse2 voltage not applied to this input.<br />
Check <strong>the</strong> configuration of <strong>the</strong> digital input acc. to planning and<br />
circuit diagram<br />
Check wiring<br />
Alarm code A 3059 / A 3060<br />
Alarm message<br />
Cause<br />
Remedy<br />
Faulty 24V signal on EAEx.5<br />
No permanent 24V voltage applied to this input<br />
Check <strong>the</strong> voltage on <strong>the</strong> digital input!<br />
Check wiring<br />
Check whe<strong>the</strong>r Pulse1 or Pulse2 is applied<br />
Alarm code A 3061 / A 3062<br />
Alarm message<br />
Cause<br />
Remedy<br />
Pulse1 plausibility fault on expansion inlet EAEx.6<br />
Configured Pulse1 voltage not applied to this input.<br />
Check <strong>the</strong> configuration of <strong>the</strong> digital input acc. to planning and<br />
circuit diagram<br />
Check wiring<br />
Alarm code A 3063 / A 3064<br />
Alarm message<br />
Cause<br />
Remedy<br />
Pulse2 plausibility fault on expansion inlet EAEx.6<br />
Configured Pulse2 voltage not applied to this input.<br />
Check <strong>the</strong> configuration of <strong>the</strong> digital input acc. to planning and<br />
circuit diagram<br />
Check wiring<br />
Alarm code A 3065 / A 3066<br />
Alarm message<br />
Cause<br />
Remedy<br />
Pulse1 plausibility fault on expansion inlet EAEx.7<br />
Configured Pulse1 voltage not applied to this input.<br />
Check <strong>the</strong> configuration of <strong>the</strong> digital input acc. to planning and<br />
circuit diagram<br />
Check wiring<br />
<strong>Programming</strong> <strong>Manual</strong> – <strong>SMX</strong> Basic <strong>Module</strong>s 29.10.2009 Page 155 of 183
Alarm code A 3067 / A 3068<br />
Alarm message<br />
Cause<br />
Remedy<br />
Pulse1 plausibility fault on expansion inlet EAEx.7<br />
Configured Pulse1 voltage not applied to this input.<br />
Check <strong>the</strong> configuration of <strong>the</strong> digital input acc. to planning and<br />
circuit diagram<br />
Check wiring<br />
Alarm code A 3069 / A 3070<br />
Alarm message<br />
Cause<br />
Remedy<br />
Pulse2 plausibility fault on expansion inlet EAEx.7<br />
Configured Pulse2 voltage not applied to this input.<br />
Check <strong>the</strong> configuration of <strong>the</strong> digital input acc. to planning and<br />
circuit diagram<br />
Check wiring<br />
Alarm code A 3071 / A 3072<br />
Alarm message<br />
Cause<br />
Remedy<br />
Faulty 24V signal on EAEx.7<br />
No permanent 24V voltage applied to this input<br />
Check <strong>the</strong> voltage on <strong>the</strong> digital input!<br />
Check wiring<br />
Check whe<strong>the</strong>r Pulse1 or Pulse2 is applied<br />
Alarm code A 3073 / A 3074<br />
Alarm message<br />
Cause<br />
Remedy<br />
Pulse1 plausibility fault on expansion inlet EAEx.8<br />
Configured Pulse2 voltage not applied to this input.<br />
Check <strong>the</strong> configuration of <strong>the</strong> digital input acc. to planning and<br />
circuit diagram<br />
Check wiring<br />
Alarm code A 3075 / A 3076<br />
Alarm message<br />
Cause<br />
Remedy<br />
Pulse2 plausibility fault on expansion inlet EAEx.8<br />
Configured Pulse2 voltage not applied to this input.<br />
Check <strong>the</strong> configuration of <strong>the</strong> digital input acc. to planning and<br />
circuit diagram<br />
Check wiring<br />
Alarm code A 3077 / A 3078<br />
Alarm message<br />
Cause<br />
Remedy<br />
Faulty 24V signal on EAEx.8<br />
No permanent 24V voltage applied to this input<br />
Check <strong>the</strong> voltage on <strong>the</strong> digital input!<br />
Check wiring<br />
Check whe<strong>the</strong>r Pulse1 or Pulse2 is applied<br />
Alarm code A 3079 / A 3080<br />
Alarm message<br />
Cause<br />
Remedy<br />
Pulse1 plausibility fault on expansion inlet EAEx.9<br />
Configured Pulse2 voltage not applied to this input.<br />
Check <strong>the</strong> configuration of <strong>the</strong> digital input acc. to planning and<br />
circuit diagram<br />
Check wiring<br />
<strong>Programming</strong> <strong>Manual</strong> – <strong>SMX</strong> Basic <strong>Module</strong>s 29.10.2009 Page 156 of 183
Alarm code A 3081 / A 3082<br />
Alarm message<br />
Cause<br />
Remedy<br />
Pulse2 plausibility fault on expansion inlet EAEx.9<br />
Configured Pulse2 voltage not applied to this input.<br />
Check <strong>the</strong> configuration of <strong>the</strong> digital input acc. to planning and<br />
circuit diagram<br />
Check wiring<br />
Alarm code A 3083 / A 3084<br />
Alarm message<br />
Cause<br />
Remedy<br />
Faulty 24V signal on EAEx.9<br />
No permanent 24V voltage applied to this input<br />
Check <strong>the</strong> voltage on <strong>the</strong> digital input!<br />
Check wiring<br />
Check whe<strong>the</strong>r Pulse1 or Pulse2 is applied<br />
Alarm code A 3085 / A 3086<br />
Alarm message<br />
Cause<br />
Remedy<br />
Pulse1 plausibility fault on expansion inlet EAEx.10<br />
Configured Pulse2 voltage not applied to this input.<br />
Check <strong>the</strong> configuration of <strong>the</strong> digital input acc. to planning and<br />
circuit diagram<br />
Check wiring<br />
Alarm code A 3087 / A 3088<br />
Alarm message<br />
Cause<br />
Remedy<br />
Pulse2 plausibility fault on expansion inlet EAEx.10<br />
Configured Pulse2 voltage not applied to this input.<br />
Check <strong>the</strong> configuration of <strong>the</strong> digital input acc. to planning and<br />
circuit diagram<br />
Check wiring<br />
Alarm code A 3089 / A 3090<br />
Alarm message<br />
Cause<br />
Remedy<br />
Faulty 24V signal on EAEx.10<br />
No permanent 24V voltage applied to this input<br />
Check <strong>the</strong> voltage on <strong>the</strong> digital input!<br />
Check wiring<br />
Check whe<strong>the</strong>r Pulse1 or Pulse2 is applied<br />
Alarm code A 3101 / A 3102<br />
Alarm message<br />
Cause<br />
Remedy<br />
Pulse1 plausibility fault on input DI1<br />
Configured Pulse1 voltage not applied to this input.<br />
Check <strong>the</strong> configuration of <strong>the</strong> digital input acc. to planning and<br />
circuit diagram<br />
Check wiring<br />
Alarm code A 3103 / A 3104<br />
Alarm message<br />
Cause<br />
Remedy<br />
Pulse1 plausibility fault on input DI2<br />
Configured Pulse1 voltage not applied to this input.<br />
Check <strong>the</strong> configuration of <strong>the</strong> digital input acc. to planning and<br />
circuit diagram<br />
Check wiring<br />
<strong>Programming</strong> <strong>Manual</strong> – <strong>SMX</strong> Basic <strong>Module</strong>s 29.10.2009 Page 157 of 183
Alarm code A 3105 / A 3106<br />
Alarm message<br />
Cause<br />
Remedy<br />
Pulse1 plausibility fault on input DI3<br />
Configured Pulse1 voltage not applied to this input.<br />
Check <strong>the</strong> configuration of <strong>the</strong> digital input acc. to planning and<br />
circuit diagram<br />
Check wiring<br />
Alarm code A 3107 / A 3108<br />
Alarm message<br />
Cause<br />
Remedy<br />
Pulse1 plausibility fault on input DI4<br />
Configured Pulse1 voltage not applied to this input.<br />
Check <strong>the</strong> configuration of <strong>the</strong> digital input acc. to planning and<br />
circuit diagram<br />
Check wiring<br />
Alarm code A 3109 / A 3110<br />
Alarm message<br />
Cause<br />
Remedy<br />
Pulse1 plausibility fault on input DI5<br />
Configured Pulse1 voltage not applied to this input.<br />
Check <strong>the</strong> configuration of <strong>the</strong> digital input acc. to planning and<br />
circuit diagram<br />
Check wiring<br />
Alarm code A 3111 / A 3112<br />
Alarm message<br />
Cause<br />
Remedy<br />
Pulse1 plausibility fault on input DI6<br />
Configured Pulse1 voltage not applied to this input.<br />
Check <strong>the</strong> configuration of <strong>the</strong> digital input acc. to planning and<br />
circuit diagram<br />
Check wiring<br />
Alarm code A 3113 / A 3114<br />
Alarm message<br />
Cause<br />
Remedy<br />
Pulse1 plausibility fault on input DI7<br />
Configured Pulse1 voltage not applied to this input.<br />
Check <strong>the</strong> configuration of <strong>the</strong> digital input acc. to planning and<br />
circuit diagram<br />
Check wiring<br />
Alarm code<br />
A 3115 / A 3116<br />
Alarm message<br />
Cause<br />
Remedy<br />
Pulse1 plausibility fault on input DI8<br />
Configured Pulse1 voltage not applied to this input.<br />
Check <strong>the</strong> configuration of <strong>the</strong> digital input acc. to planning and<br />
circuit diagram<br />
Check wiring<br />
Alarm code<br />
A 3117 / A 3118<br />
Alarm message<br />
Cause<br />
Pulse2 plausibility fault on input DI1<br />
No Pulse2 voltage applied to this input<br />
<strong>Programming</strong> <strong>Manual</strong> – <strong>SMX</strong> Basic <strong>Module</strong>s 29.10.2009 Page 158 of 183
Remedy<br />
Check <strong>the</strong> configuration of <strong>the</strong> digital input acc. to planning and<br />
circuit diagram<br />
Check wiring<br />
Alarm code A 3119 / A 3120<br />
Alarm message<br />
Cause<br />
Remedy<br />
Pulse2 plausibility fault on input DI2<br />
No Pulse2 voltage applied to this input<br />
Check <strong>the</strong> configuration of <strong>the</strong> digital input acc. to planning and<br />
circuit diagram<br />
Check wiring<br />
Alarm code<br />
A 3121 / A 3122<br />
Alarm message<br />
Cause<br />
Remedy<br />
Pulse2 plausibility fault on input DI3<br />
No Pulse2 voltage applied to this input<br />
Check <strong>the</strong> configuration of <strong>the</strong> digital input acc. to planning and<br />
circuit diagram<br />
Check wiring<br />
Alarm code<br />
A 3123 / A 3124<br />
Alarm message<br />
Cause<br />
Remedy<br />
Pulse2 plausibility fault on input DI4<br />
No Pulse2 voltage applied to this input<br />
Check <strong>the</strong> configuration of <strong>the</strong> digital input acc. to planning and<br />
circuit diagram<br />
Check wiring<br />
Alarm code<br />
A 3125 / A 3126<br />
Alarm message<br />
Cause<br />
Remedy<br />
Pulse2 plausibility fault on input DI5<br />
No Pulse2 voltage applied to this input<br />
Check <strong>the</strong> configuration of <strong>the</strong> digital input acc. to planning and<br />
circuit diagram<br />
Check wiring<br />
Alarm code<br />
A 3127 / A 3128<br />
Alarm message<br />
Cause<br />
Remedy<br />
Pulse2 plausibility fault on input DI6<br />
No Pulse2 voltage applied to this input<br />
Check <strong>the</strong> configuration of <strong>the</strong> digital input acc. to planning and<br />
circuit diagram<br />
Check wiring<br />
Alarm code<br />
A 3129 / A 3130<br />
Alarm message<br />
Cause<br />
Pulse2 plausibility fault on input DI7<br />
No Pulse2 voltage applied to this input<br />
<strong>Programming</strong> <strong>Manual</strong> – <strong>SMX</strong> Basic <strong>Module</strong>s 29.10.2009 Page 159 of 183
Remedy<br />
Check <strong>the</strong> configuration of <strong>the</strong> digital input acc. to planning and<br />
circuit diagram<br />
Check wiring<br />
Alarm code<br />
A 3131 / A 3132<br />
Alarm message<br />
Cause<br />
Remedy<br />
Pulse2 plausibility fault on input DI8<br />
No Pulse2 voltage applied to this input<br />
Check <strong>the</strong> configuration of <strong>the</strong> digital input acc. to planning and<br />
circuit diagram<br />
Check wiring<br />
Alarm code<br />
A 3133 / A 3134<br />
Alarm message<br />
Cause<br />
Remedy<br />
Pulse1 plausibility fault on input DI9<br />
Configured Pulse1 voltage not applied to this input.<br />
Check <strong>the</strong> configuration of <strong>the</strong> digital input acc. to planning and<br />
circuit diagram<br />
Check wiring<br />
Alarm code<br />
A 3135 / A 3136<br />
Alarm message<br />
Cause<br />
Remedy<br />
Pulse1 plausibility fault on input DI10<br />
Configured Pulse1 voltage not applied to this input.<br />
Check <strong>the</strong> configuration of <strong>the</strong> digital input acc. to planning and<br />
circuit diagram<br />
Check wiring<br />
Alarm code<br />
A 3137 / A 3138<br />
Alarm message<br />
Cause<br />
Remedy<br />
Pulse1 plausibility fault on input DI11<br />
Configured Pulse1 voltage not applied to this input.<br />
Check <strong>the</strong> configuration of <strong>the</strong> digital input acc. to planning and<br />
circuit diagram<br />
Check wiring<br />
Alarm code<br />
A 3139 / A 3140<br />
Alarm message<br />
Cause<br />
Remedy<br />
Pulse1 plausibility fault on input DI12<br />
Configured Pulse1 voltage not applied to this input.<br />
Check <strong>the</strong> configuration of <strong>the</strong> digital input acc. to planning and<br />
circuit diagram<br />
Check wiring<br />
Alarm code<br />
A 3141 / A 3142<br />
Alarm message<br />
Cause<br />
Pulse1 plausibility fault on input DI13<br />
Configured Pulse1 voltage not applied to this input.<br />
<strong>Programming</strong> <strong>Manual</strong> – <strong>SMX</strong> Basic <strong>Module</strong>s 29.10.2009 Page 160 of 183
Remedy<br />
Check <strong>the</strong> configuration of <strong>the</strong> digital input acc. to planning and<br />
circuit diagram<br />
Check wiring<br />
Alarm code<br />
A 3143 / A 3144<br />
Alarm message<br />
Cause<br />
Remedy<br />
Pulse1 plausibility fault on input DI14<br />
Configured Pulse1 voltage not applied to this input.<br />
Check <strong>the</strong> configuration of <strong>the</strong> digital input acc. to planning and<br />
circuit diagram<br />
Check wiring<br />
Alarm code<br />
A 3147 / A 3148<br />
Alarm message<br />
Cause<br />
Remedy<br />
Pulse2 plausibility fault on input DI9<br />
Configured Pulse2 voltage not applied to this input.<br />
Check <strong>the</strong> configuration of <strong>the</strong> digital input DI9 acc. to planning<br />
and circuit diagram<br />
Check wiring<br />
Alarm code<br />
A 3149 / A 3150<br />
Alarm message<br />
Cause<br />
Remedy<br />
Pulse2 plausibility fault on input DI10<br />
Configured Pulse2 voltage not applied to this input.<br />
Check <strong>the</strong> configuration of <strong>the</strong> digital input DI10 acc. to planning<br />
and circuit diagram<br />
Check wiring<br />
Alarm code<br />
A 3151 / A 3152<br />
Alarm message<br />
Cause<br />
Remedy<br />
Pulse2 plausibility fault on input DI11<br />
Configured Pulse2 voltage not applied to this input.<br />
Check <strong>the</strong> configuration of <strong>the</strong> digital input DI11 acc. to planning<br />
and circuit diagram<br />
Check wiring<br />
Alarm code<br />
A 3153 / A 3154<br />
Alarm message<br />
Cause<br />
Remedy<br />
Pulse2 plausibility fault on input DI12<br />
Configured Pulse2 voltage not applied to this input.<br />
Check <strong>the</strong> configuration of <strong>the</strong> digital input acc. to planning and<br />
circuit diagram<br />
Check wiring<br />
Alarm code<br />
A 3155 / A 3156<br />
Alarm message<br />
Cause<br />
Pulse2 plausibility fault on input DI13<br />
Configured Pulse2 voltage not applied to this input.<br />
<strong>Programming</strong> <strong>Manual</strong> – <strong>SMX</strong> Basic <strong>Module</strong>s 29.10.2009 Page 161 of 183
Remedy<br />
Check <strong>the</strong> configuration of <strong>the</strong> digital input acc. to planning and<br />
circuit diagram<br />
Check wiring<br />
Alarm code<br />
A 3157 / A 3158<br />
Alarm message<br />
Cause<br />
Remedy<br />
Pulse2 plausibility fault on input DI14<br />
Configured Pulse2 voltage not applied to this input.<br />
Check <strong>the</strong> configuration of <strong>the</strong> digital input acc. to planning and<br />
circuit diagram<br />
Check wiring<br />
Alarm code<br />
A 3159 / A 3160<br />
Alarm message<br />
Cause<br />
Remedy<br />
Faulty 24V signal on DI1<br />
No permanent 24V voltage applied to this input<br />
Check <strong>the</strong> voltage on <strong>the</strong> digital input!<br />
Check wiring<br />
Check whe<strong>the</strong>r Pulse1 or Pulse2 is applied<br />
Alarm code<br />
A 3161 / A 3162<br />
Alarm message<br />
Cause<br />
Remedy<br />
Faulty 24V signal on DI2<br />
No permanent 24V voltage applied to this input<br />
Check <strong>the</strong> voltage on <strong>the</strong> digital input!<br />
Check wiring<br />
Check whe<strong>the</strong>r Pulse1 or Pulse2 is applied<br />
Alarm code<br />
A 3163 / A 3164<br />
Alarm message<br />
Cause<br />
Remedy<br />
Faulty 24V signal on DI3<br />
No permanent 24V voltage applied to this input<br />
Check <strong>the</strong> voltage on <strong>the</strong> digital input!<br />
Check wiring<br />
Check whe<strong>the</strong>r Pulse1 or Pulse2 is applied<br />
Alarm code<br />
A 3165 / A 3166<br />
Alarm message<br />
Cause<br />
Remedy<br />
Faulty 24V signal on DI4<br />
No permanent 24V voltage applied to this input<br />
Check <strong>the</strong> voltage on <strong>the</strong> digital input!<br />
Check wiring<br />
Check whe<strong>the</strong>r Pulse1 or Pulse2 is applied<br />
Alarm code<br />
A 3167 / A 3168<br />
Alarm message<br />
Cause<br />
Faulty 24V signal on DI5<br />
No permanent 24V voltage applied to this input<br />
<strong>Programming</strong> <strong>Manual</strong> – <strong>SMX</strong> Basic <strong>Module</strong>s 29.10.2009 Page 162 of 183
Remedy<br />
Check <strong>the</strong> voltage on <strong>the</strong> digital input!<br />
Check wiring<br />
Check whe<strong>the</strong>r Pulse1 or Pulse2 is applied<br />
Alarm code<br />
A 3169 / A 3170<br />
Alarm message<br />
Cause<br />
Remedy<br />
Faulty 24V signal on DI6<br />
No permanent 24V voltage applied to this input<br />
Check <strong>the</strong> voltage on <strong>the</strong> digital input!<br />
Check wiring<br />
Check whe<strong>the</strong>r Pulse1 or Pulse2 is applied<br />
Alarm code<br />
A 3171 / A 3172<br />
Alarm message<br />
Cause<br />
Remedy<br />
Faulty 24V signal on DI7<br />
No permanent 24V voltage applied to this input<br />
Check <strong>the</strong> voltage on <strong>the</strong> digital input!<br />
Check wiring<br />
Check whe<strong>the</strong>r Pulse1 or Pulse2 is applied<br />
Alarm code<br />
A 3173 / A 3174<br />
Alarm message<br />
Cause<br />
Remedy<br />
Faulty 24V signal on DI8<br />
No permanent 24V voltage applied to this input<br />
Check <strong>the</strong> voltage on <strong>the</strong> digital input!<br />
Check wiring<br />
Check whe<strong>the</strong>r Pulse1 or Pulse2 is applied<br />
Alarm code<br />
A 3175 / A 3176<br />
Alarm message<br />
Cause<br />
Remedy<br />
Faulty 24V signal on DI9<br />
No permanent 24V voltage applied to this input<br />
Check <strong>the</strong> voltage on <strong>the</strong> digital input!<br />
Check wiring<br />
Check whe<strong>the</strong>r Pulse1 or Pulse2 is applied<br />
Alarm code<br />
A 3177 / A 3178<br />
Alarm message<br />
Cause<br />
Remedy<br />
Faulty 24V signal on DI10<br />
No permanent 24V voltage applied to this input<br />
Check <strong>the</strong> voltage on <strong>the</strong> digital input!<br />
Check wiring<br />
Check whe<strong>the</strong>r Pulse1 or Pulse2 is applied<br />
Alarm code<br />
A 3179 / A 3180<br />
Alarm message<br />
Cause<br />
Faulty 24V signal on DI11<br />
No permanent 24V voltage applied to this input<br />
<strong>Programming</strong> <strong>Manual</strong> – <strong>SMX</strong> Basic <strong>Module</strong>s 29.10.2009 Page 163 of 183
Remedy<br />
Check <strong>the</strong> voltage on <strong>the</strong> digital input!<br />
Check wiring<br />
Check whe<strong>the</strong>r Pulse1 or Pulse2 is applied<br />
Alarm code<br />
A 3181 / A 3182<br />
Alarm message<br />
Cause<br />
Remedy<br />
Faulty 24V signal on DI12<br />
No permanent 24V voltage applied to this input<br />
Check <strong>the</strong> voltage on <strong>the</strong> digital input!<br />
Check wiring<br />
Check whe<strong>the</strong>r Pulse1 or Pulse2 is applied<br />
Alarm code<br />
A 3183 / A 3184<br />
Alarm message<br />
Cause<br />
Remedy<br />
Faulty 24V signal on DI13<br />
No permanent 24V voltage applied to this input<br />
Check <strong>the</strong> voltage on <strong>the</strong> digital input!<br />
Check wiring<br />
Check whe<strong>the</strong>r Pulse1 or Pulse2 is applied<br />
Alarm code<br />
A 3185 / A 3186<br />
Alarm message<br />
Cause<br />
Remedy<br />
Faulty 24V signal on DI14<br />
No permanent 24V voltage applied to this input<br />
Check <strong>the</strong> voltage on <strong>the</strong> digital input!<br />
Check wiring<br />
Check whe<strong>the</strong>r Pulse1 or Pulse2 is applied<br />
Alarm code<br />
A 3191 / A 3192<br />
Alarm message<br />
Cause<br />
Remedy<br />
Short-circuit fault digital inPorts<br />
Short circuit between <strong>the</strong> digital inPorts within a module<br />
Consult <strong>the</strong> manufacturer<br />
Alarm code<br />
A 3197 / A 3198<br />
Alarm message<br />
Cause<br />
Remedy<br />
Faulty OSSD input test<br />
OSSD test faulty<br />
24V check <strong>the</strong> input voltage on all OSSD inputs<br />
Alarm code A 3209 / A 3210<br />
Fault message<br />
Cause<br />
Remedy<br />
Encoder supply voltage X31 faulty.<br />
Encoder supply voltage does not comply with configured<br />
threshold<br />
Component fault in module<br />
Check configuration!<br />
Check encoder supply voltage<br />
Switch device off/on.<br />
<strong>Programming</strong> <strong>Manual</strong> – <strong>SMX</strong> Basic <strong>Module</strong>s 29.10.2009 Page 164 of 183
Alarm code A 3213 / A 3214<br />
Fault message<br />
Cause<br />
Remedy<br />
Encoder supply voltage X32 faulty.<br />
Encoder supply voltage does not comply with configured<br />
threshold<br />
Component fault in module<br />
Check configuration!<br />
Check encoder supply voltage<br />
Switch device off/on.<br />
Alarm code A 3225 / A 3226<br />
Fault message<br />
Cause<br />
Remedy<br />
Deviation Ain1 to AIn2 too big<br />
Different voltages on both inputs<br />
configured threshold too low<br />
Check voltages on Ain1!<br />
Check configuration of threshold/input filter<br />
Switch device off/on.<br />
Alarm code A 3227 / A 3228<br />
Fault message<br />
Cause<br />
Remedy<br />
Deviation Ain3 to AIn4 too big<br />
Different voltages on both inputs<br />
configured threshold too low<br />
Check voltages on Ain1!<br />
Check configuration of threshold/input filter<br />
Switch device off/on.<br />
Alarm code A 3229 / A 3230<br />
Fault message<br />
Cause<br />
Remedy<br />
Plausibility test <strong>for</strong> encoder voltage faulty<br />
Encoder voltage value<br />
Check encoder voltage supply<br />
Check wiring of encoder voltage supply<br />
Alarm code A 3231 / A 3232<br />
Fault message<br />
Cause<br />
Remedy<br />
Plausibility test <strong>for</strong> analog inputs faulty<br />
Fault in analog input signal<br />
Check connection of analog inputs<br />
Analog input voltage out of range<br />
Alarm code A 3233 / A 3234<br />
Fault message<br />
Cause<br />
Remedy<br />
Open-circuit monitoring AIN1 has triggered<br />
Open-circuit monitoring activated (< 1000mV)<br />
Check configuration of activation/sensor<br />
Check sensor connection<br />
Alarm code A 3235 / A 3236<br />
Fault message<br />
Cause<br />
Remedy<br />
Open-circuit monitoring AIN2 has triggered<br />
Open-circuit monitoring activated (< 1000mV)<br />
Check configuration of activation/sensor<br />
<strong>Programming</strong> <strong>Manual</strong> – <strong>SMX</strong> Basic <strong>Module</strong>s 29.10.2009 Page 165 of 183
Check sensor connection<br />
Alarm code<br />
A 3301 / A 3302<br />
Alarm message Plausibility fault speed sensing axis 1<br />
The difference between <strong>the</strong> two speed sensors is higher than <strong>the</strong><br />
Cause<br />
configured speed shut-down threshold<br />
Check <strong>the</strong> <strong>the</strong>ory of <strong>the</strong> distance once again using <strong>the</strong> data set in <strong>the</strong><br />
encoder configuration<br />
Remedy<br />
Check <strong>the</strong> speed sensor<br />
Use <strong>the</strong> SCOPE function to adjust superimposable speed signals<br />
Alarm code A 3303 / A 3304<br />
Alarm message Plausibility fault position sensing axis 1<br />
The difference between <strong>the</strong> two position sensors is higher than <strong>the</strong><br />
Cause<br />
configured incremental shut-down threshold<br />
Check <strong>the</strong> <strong>the</strong>ory of <strong>the</strong> distance using <strong>the</strong> configured data or <strong>the</strong><br />
sensor setting<br />
Check <strong>the</strong> position signal<br />
Remedy<br />
Are all signals correctly connected to <strong>the</strong> 9-pole encoder plug?<br />
Check <strong>the</strong> encoder plug <strong>for</strong> correct wiring.<br />
If proximity switches are used, <strong>the</strong>se are correctly connected.<br />
Use <strong>the</strong> SCOPE function to adjust superimposable position signals<br />
Alarm code<br />
A 3307 / A 3308<br />
Alarm message Plausibility fault position range axis 1<br />
Cause<br />
The current position is outside <strong>the</strong> configured measuring length<br />
Check <strong>the</strong> <strong>the</strong>ory of <strong>the</strong> distance using <strong>the</strong> configured data or <strong>the</strong><br />
sensor setting<br />
Remedy<br />
Check <strong>the</strong> position signal, if necessary correct <strong>the</strong> offset<br />
Use <strong>the</strong> SCOPE function to read out <strong>the</strong> position and to set into<br />
relation to configured values<br />
Alarm code A 3309 / A 3310<br />
Alarm message Plausibility fault because of faulty speed axis 1<br />
Cause<br />
The current speed is outside <strong>the</strong> configured maximum speed<br />
The drive moves outside <strong>the</strong> permissible and configured speed range<br />
Remedy<br />
Check configuration<br />
Use <strong>the</strong> SCOPE function to analyse <strong>the</strong> course of speed<br />
Alarm code<br />
A 3311 / A 3312<br />
Alarm message Configuration fault: Acceleration axis 1<br />
Cause<br />
The current acceleration is outside <strong>the</strong> configured acceleration range<br />
The drive has exceeded <strong>the</strong> permissible acceleration range<br />
Remedy<br />
Check <strong>the</strong> configuration of maximum speed<br />
Use <strong>the</strong> SCOPE function to analyse <strong>the</strong> course of speed/acceleration<br />
<strong>Programming</strong> <strong>Manual</strong> – <strong>SMX</strong> Basic <strong>Module</strong>s 29.10.2009 Page 166 of 183
Alarm code A 3313 / A 3314<br />
Fault message<br />
Cause<br />
Remedy<br />
SSI sensor fault<br />
Encoder step change SSI-value within a cycle too big<br />
Check encoder wiring<br />
Check encoder configuration<br />
Alarm code<br />
A 3321 / A 3322<br />
Alarm message Plausibility fault speed sensing axis 2<br />
The difference between <strong>the</strong> two speed sensors is higher than <strong>the</strong><br />
Cause<br />
configured speed shut-down threshold<br />
Check <strong>the</strong> <strong>the</strong>ory of <strong>the</strong> distance once again using <strong>the</strong> data set in <strong>the</strong><br />
encoder configuration<br />
Remedy<br />
Check <strong>the</strong> speed sensor<br />
Use <strong>the</strong> SCOPE function to adjust superimposable speed signals<br />
Alarm code A 3323 / A 3324<br />
Alarm message Plausibility fault position sensing axis 2<br />
The difference between <strong>the</strong> two position sensors is higher than <strong>the</strong><br />
Cause<br />
configured incremental shut-down threshold<br />
Check <strong>the</strong> <strong>the</strong>ory of <strong>the</strong> distance using <strong>the</strong> configured data or <strong>the</strong><br />
sensor setting<br />
Check <strong>the</strong> position signal<br />
Remedy<br />
Are all signals correctly connected to <strong>the</strong> 9-pole encoder plug?<br />
Check <strong>the</strong> encoder plug <strong>for</strong> correct wiring.<br />
If proximity switches are used, <strong>the</strong>se are correctly connected.<br />
Use <strong>the</strong> SCOPE function to adjust superimposable position signals<br />
Alarm code<br />
A 3327 / A 3328<br />
Alarm message Plausibility fault position range axis 2<br />
Cause<br />
The current position is outside <strong>the</strong> configured measuring length<br />
Check <strong>the</strong> <strong>the</strong>ory of <strong>the</strong> distance using <strong>the</strong> configured data or <strong>the</strong><br />
sensor setting<br />
Remedy<br />
Check <strong>the</strong> position signal, if necessary correct <strong>the</strong> offset<br />
Use <strong>the</strong> SCOPE function to read out <strong>the</strong> position and to set into<br />
relation to configured values<br />
Alarm code A 3329 / A 3330<br />
Alarm message Plausibility fault because of faulty speed axis 2<br />
Cause<br />
The current speed is outside <strong>the</strong> configured maximum speed<br />
The drive moves outside <strong>the</strong> permissible and configured speed range<br />
Remedy<br />
Check configuration<br />
Use <strong>the</strong> SCOPE function to analyse <strong>the</strong> course of speed<br />
Alarm code<br />
A 3331 / A 3332<br />
Alarm message Configuration fault: Acceleration axis 2<br />
Cause<br />
The current acceleration is outside <strong>the</strong> configured acceleration range<br />
<strong>Programming</strong> <strong>Manual</strong> – <strong>SMX</strong> Basic <strong>Module</strong>s 29.10.2009 Page 167 of 183
Remedy<br />
The drive has exceeded <strong>the</strong> permissible acceleration range<br />
Check <strong>the</strong> configuration of maximum speed<br />
Use <strong>the</strong> SCOPE function to analyse <strong>the</strong> course of speed/acceleration<br />
Alarm code<br />
A 3333 / A 3334<br />
Alarm message<br />
Cause<br />
Remedy<br />
Plausibility fault of SinCos encoder<br />
Wrong encoder type connected<br />
Check configuration<br />
Check encoder assignment<br />
Alarm code<br />
A 3407 / A 3408<br />
Alarm message<br />
Cause<br />
Remedy<br />
Difference level RS485Treiber1 fault INC_B or SSI_CLK faulty<br />
No encoder connection<br />
Wrong encoder type connected<br />
Check encoder connection<br />
Check encoder wiring<br />
Alarm code<br />
A 3409 / A 3410<br />
Alarm message<br />
Cause<br />
Remedy<br />
Difference level RS485Treiber2 fault INC_A or SSI_DATA faulty<br />
No encoder connection<br />
Wrong encoder type connected<br />
Check encoder connection<br />
Check encoder wiring<br />
Alarm code A 3411 / A 3412<br />
Fault message<br />
Cause<br />
Remedy<br />
Fault Sine/Cosine plausibility X31<br />
Plausibility monitoring of individual tracks faulty<br />
Check encoder wiring<br />
Sine- to Cosine- track must be linear<br />
Alarm code A 3413 / A 3414<br />
Fault message<br />
Cause<br />
Remedy<br />
Fault Sine/Cosine plausibility X32<br />
Plausibility monitoring of individual tracks faulty<br />
Check encoder wiring<br />
Sine- to Cosine- track must be linear<br />
Alarm code A 3505 / A 3506<br />
Fault message Read head fault WCS encoder system axis 1<br />
Cause<br />
WCS read head has detected a fault<br />
Remedy<br />
Read out fault types from WCS encoder system<br />
Alarm code A 3507 / A 3508<br />
Fault message Read head fault WCS encoder system axis 1<br />
<strong>Programming</strong> <strong>Manual</strong> – <strong>SMX</strong> Basic <strong>Module</strong>s 29.10.2009 Page 168 of 183
Cause<br />
Remedy<br />
WCS read head has detected a fault<br />
Read out fault types from WCS encoder system<br />
Alarm code<br />
A 4001 / A 4002<br />
Alarm message<br />
Cause<br />
Remedy<br />
CCW and CW rotation monitoring SDI1 activated at <strong>the</strong> same time<br />
Multiple activation<br />
In programming make sure that only one "Enable" is activated<br />
Alarm code<br />
A 4003 / A 4004<br />
Alarm message<br />
Cause<br />
Remedy<br />
CCW and CW rotation monitoring SDI2 activated at <strong>the</strong> same time<br />
Multiple activation<br />
In programming make sure that only one "Enable" is activated at a<br />
time<br />
Alarm code A 4601 / A 4602<br />
Alarm message<br />
Cause<br />
Remedy<br />
Monitoring range left and right of SLP1 activated at <strong>the</strong> same time<br />
Multiple activation<br />
In programming make sure that only one "Enable" is activated at a<br />
time<br />
Alarm code A 4603 / A 4604<br />
Alarm message<br />
Cause<br />
Remedy<br />
Monitoring range left and right of SLP2 activated at <strong>the</strong> same time<br />
Multiple activation<br />
In programming make sure that only one "Enable" is activated at a<br />
time<br />
Alarm code A 4605 / A 4606<br />
Alarm message<br />
Cause<br />
Remedy<br />
SLP1 Teach In status fault<br />
SET and QUIT input have a faulty switching sequence<br />
Check input configuration<br />
Check switching sequence<br />
Alarm code A 4607 / A 4608<br />
Alarm message<br />
Cause<br />
Remedy<br />
SLP 2 Teach In status fault<br />
SET and QUIT input have a faulty switching sequence<br />
Check configuration<br />
Check switching sequence<br />
Alarm code A 4609 / A 4610<br />
Alarm message<br />
Cause<br />
Remedy<br />
SLP1 Teach In position fault<br />
Teach In position outside measuring range<br />
Check transfer position<br />
<strong>Programming</strong> <strong>Manual</strong> – <strong>SMX</strong> Basic <strong>Module</strong>s 29.10.2009 Page 169 of 183
Alarm code A 4611 / A 4612<br />
Alarm message<br />
Cause<br />
Remedy<br />
SLP2 Teach In position fault<br />
Teach In position outside measuring range<br />
Check transfer position<br />
Alarm code A 4613 / A 4614<br />
Alarm message<br />
Cause<br />
Remedy<br />
SLP1 Teach In SOS activation fault<br />
The drive moved during Teach In (SOS fault)<br />
The drive must be stopped when using <strong>the</strong> Teach In function<br />
Check whe<strong>the</strong>r SOS has already triggered<br />
Alarm code A 4615 / A 4616<br />
Alarm message<br />
Cause<br />
Remedy<br />
SLP 2 Teach In SOS activation fault<br />
The drive moved during Teach In (SOS fault)<br />
The drive must be stopped when using <strong>the</strong> Teach In function<br />
Check whe<strong>the</strong>r SOS has already triggered<br />
Alarm code<br />
A 4901 / A 4902<br />
Alarm message<br />
Cause<br />
Remedy<br />
CCW and CW rotation monitoring SLI1 activated at <strong>the</strong> same time<br />
Multiple activation<br />
In programming make sure that only one "Enable" is activated at a<br />
time<br />
Alarm code<br />
A 4903 / A 4904<br />
Alarm message<br />
Cause<br />
Remedy<br />
CCW and CW rotation monitoring SLI2 activated at <strong>the</strong> same time<br />
Multiple activation<br />
In programming make sure that only one "Enable" is activated at a<br />
time<br />
Alarm code A 5001 / A 5002<br />
Alarm message<br />
Cause<br />
Remedy<br />
Test deactivation of digital inputs 1...14 faulty<br />
Inputs are still active after deactivation<br />
Check wiring of digital inputs<br />
Alarm code<br />
A 6701 / A 6702<br />
Alarm message<br />
Cause<br />
Remedy<br />
Timeout fault MET<br />
Input element with time monitoring is faulty<br />
Check wiring of input element<br />
Input element faulty<br />
<strong>Programming</strong> <strong>Manual</strong> – <strong>SMX</strong> Basic <strong>Module</strong>s 29.10.2009 Page 170 of 183
Alarm code A 6703 / A 6704<br />
Alarm message<br />
Cause<br />
Remedy<br />
Timeout fault MEZ<br />
Two-hand control element with time monitoring is faulty<br />
Check wiring of input element<br />
Input element faulty<br />
<strong>Programming</strong> <strong>Manual</strong> – <strong>SMX</strong> Basic <strong>Module</strong>s 29.10.2009 Page 171 of 183
Fatal Error list <strong>SMX</strong><br />
Fatal Error Code F 1001<br />
Fault message<br />
Cause<br />
Remedy<br />
Fatal Error Code F 1003<br />
Fault message<br />
Cause<br />
Remedy<br />
Fatal Error Code F 1007<br />
Fault message<br />
Cause<br />
Remedy<br />
Fatal Error Code F 1307<br />
Fault message<br />
Configuration data were incorrectly loaded into <strong>the</strong> monitoring<br />
device<br />
Disturbed connection when loading <strong>the</strong> program into <strong>the</strong><br />
monitoring device.<br />
Reload <strong>the</strong> configuration data, <strong>the</strong>n switch module off/on.<br />
Configuration data invalid <strong>for</strong> software version of module!<br />
<strong>Module</strong> configured with incorrect software version of <strong>the</strong><br />
programming desktop.<br />
Parameterize <strong>the</strong> module with <strong>the</strong> approved version of <strong>the</strong><br />
programming desktop, <strong>the</strong> switch <strong>the</strong> module off/on.<br />
Device not programmed with <strong>the</strong> correct programming desktop<br />
Program or configuration data transferred to <strong>the</strong> device using <strong>the</strong><br />
wrong programming desktop<br />
Check <strong>the</strong> module design and parameterize again with a valid<br />
programming desktop. Then switch device off/on.<br />
Error when deleting configuration data from <strong>the</strong> Flash Memory<br />
Fatal Error Code<br />
Fault message<br />
F 1311 / F1312<br />
Internal error – please contact <strong>the</strong> manufacturer!<br />
Fatal Error Code F 1330<br />
Fault message<br />
Internal error – please contact <strong>the</strong> manufacturer!<br />
Fatal Error Code F 1401 / F 1402<br />
Fault message<br />
Internal error – please contact <strong>the</strong> manufacturer!<br />
Fatal Error Code F 1403 / F 1404<br />
Fault message<br />
Cause<br />
Remedy<br />
CRC of configuration data invalid!<br />
Configuration data were incorrectly transferred<br />
Transfer <strong>the</strong> configuration data again<br />
<strong>Programming</strong> <strong>Manual</strong> – <strong>SMX</strong> Basic <strong>Module</strong>s 29.10.2009 Page 172 of 183
Fatal Error Code F 1406<br />
Fault message<br />
Internal error – please contact <strong>the</strong> manufacturer!<br />
Fatal Error Code F 1407 / F 1408<br />
Fault message<br />
Internal error – please contact <strong>the</strong> manufacturer!<br />
Fatal Error Code F 1501 / F 1502<br />
Fault message<br />
Internal error – please contact <strong>the</strong> manufacturer!<br />
Fatal Error Code F 1503 / F 1504<br />
Fault message<br />
Internal error – please contact <strong>the</strong> manufacturer!<br />
Fatal Error Code F 1505 / F 1506<br />
Fault message<br />
Internal error – please contact <strong>the</strong> manufacturer!<br />
Fatal Error Code F 1601 / F 1602<br />
Fault message<br />
Range test of device description is faulty.<br />
Fatal Error Code F 1603 / F 1604<br />
Fault message<br />
Range test of Access Data faulty<br />
Fatal Error Code F 1605 / F 1606<br />
Fault message<br />
Range test of EMU faulty<br />
Fatal Error Code F 1607 / F 1608<br />
Fault message<br />
Range test SCA faulty<br />
Fatal Error Code F 1609 / F 1610<br />
Fault message<br />
Range test SSX faulty<br />
Fatal Error Code F 1611 / F 1612<br />
Fault message<br />
Range test SEL faulty<br />
Fatal Error Code F 1613 / F 1614<br />
Fault message<br />
Range test SLP faulty<br />
Fatal Error Code F 1615 / F 1616<br />
Fault message<br />
Range test SOS faulty<br />
<strong>Programming</strong> <strong>Manual</strong> – <strong>SMX</strong> Basic <strong>Module</strong>s 29.10.2009 Page 173 of 183
Fatal Error Code F 1617 / F 1618<br />
Fault message<br />
Range test SLS faulty<br />
Fatal Error Code F 1619 / F 1620<br />
Fault message<br />
Range test SDI faulty<br />
Fatal Error Code F 1621 / F 1622<br />
Fault message<br />
Range test SLI faulty<br />
Fatal Error Code F 1623 / F 1624<br />
Fault message<br />
Range test of PLC faulty<br />
Fatal Error Code F 1625 / F 1626<br />
Fault message<br />
Range test of shut-down channel faulty<br />
Fatal Error Code F 1627 / F 1628<br />
Fault message<br />
Range test of outputs faulty<br />
Fatal Error Code F 1629 / F 1630<br />
Fault message<br />
Range test of digital inputs faulty.<br />
Fatal Error Code F 1631 / F 1632<br />
Fault message<br />
Range test of analog input<br />
Fatal Error Code F 1633 / F 1634<br />
Fault message<br />
Range test of encoder type faulty<br />
Fatal Error Code F 1635 / F 1636<br />
Fault message<br />
Range test of encoder processing faulty<br />
Fatal Error Code F 1637 / F 1638<br />
Fault message<br />
Range test of encoder position faulty<br />
Fatal Error Code F 1639 / F 1640<br />
Fault message<br />
Range test of PDM faulty.<br />
Fatal Error Code F 1641 / F 1642<br />
Fault message<br />
Range test of adder circuitry faulty<br />
<strong>Programming</strong> <strong>Manual</strong> – <strong>SMX</strong> Basic <strong>Module</strong>s 29.10.2009 Page 174 of 183
Fatal Error Code F 1645 / F 1646<br />
Fault message<br />
Range test of axis management faulty<br />
Fatal Error Code F 1647 / F 1648<br />
Fault message<br />
Range test of expansion modules faulty<br />
Fatal Error Code F 1649 / F 1650<br />
Fault message<br />
Range test of PLC timer faulty<br />
Fatal Error Code F 1651 / F 1652<br />
Fault message<br />
Range test of system faulty<br />
Fatal Error Code F 1653 / F 1654<br />
Fault message<br />
Range test connection table faulty<br />
Fatal Error Code F 1655 / F 1656<br />
Fault message<br />
Range test SAC faulty<br />
Fatal Error Code F 1657 / F 1658<br />
Fault message<br />
Range test of diagnose faulty<br />
Fatal Error Code F 2001 / F 2002<br />
Fault message<br />
Internal error – please contact <strong>the</strong> manufacturer!<br />
Fatal Error Code F 2003 / F 2004<br />
Fault message<br />
Fatal Error Code F 2005<br />
Fault message<br />
Fatal Error Code F 2007<br />
Fault message<br />
Fatal Error Code F 2009<br />
Fault message<br />
Fatal Error Code F 2011<br />
Fault message<br />
Timeout when transmitting configuration and firmware data<br />
Internal error – please contact <strong>the</strong> manufacturer!<br />
Internal error – please contact <strong>the</strong> manufacturer!<br />
Internal error – please contact <strong>the</strong> manufacturer!<br />
Internal error – please contact <strong>the</strong> manufacturer!<br />
<strong>Programming</strong> <strong>Manual</strong> – <strong>SMX</strong> Basic <strong>Module</strong>s 29.10.2009 Page 175 of 183
Fatal Error Code F 2013 / F 2014<br />
Fault message<br />
Internal error – please contact <strong>the</strong> manufacturer!<br />
Fatal Error Code F 3001 / F 3002<br />
Fault message<br />
Internal error – please contact <strong>the</strong> manufacturer!<br />
Fatal Error Code F 3201 / F 3202<br />
Fault message<br />
Cause<br />
Remedy<br />
Fatal Error Code F 3203<br />
Fault message<br />
Cause<br />
Remedy<br />
Fatal Error Code F 3204<br />
Fault message<br />
Cause<br />
Remedy<br />
Processor voltage 2.5V outside defined range<br />
Supply voltage <strong>for</strong> module not correct!<br />
Component fault in module<br />
Check device supply voltage!<br />
Switch device off/on.<br />
Supply voltage 24V module faulty.<br />
Supply voltage <strong>for</strong> module not correct!<br />
Component fault in module<br />
Check device supply voltage!<br />
Switch device off/on.<br />
Internal supply voltage 5.7V faulty<br />
Supply voltage <strong>for</strong> module not correct!<br />
Component fault in module<br />
Check device supply voltage!<br />
Switch device off/on.<br />
Fatal Error Code F 3217 / F 3218<br />
Fault message<br />
Cause<br />
Remedy<br />
Fatal Error Code F 3306<br />
Internal supply voltage 5V faulty<br />
Supply voltage <strong>for</strong> module not correct!<br />
Component fault in module<br />
Check device supply voltage!<br />
Switch device off/on.<br />
Alarm message Plausibility fault position switching axis 1<br />
During position switching SOS, SLI or SDI is permanently<br />
Cause<br />
activated.<br />
Check activation of SOS<br />
Remedy<br />
Check activation of SLI<br />
Activation of SDI (only <strong>for</strong> monitoring via position)<br />
Fatal Error Code F 3316<br />
Fault message Fault in encoder alignment axis 1<br />
Cause<br />
Incorrect position triggering by system A<br />
Remedy<br />
Check encoder configuration<br />
Switch device off/on.<br />
<strong>Programming</strong> <strong>Manual</strong> – <strong>SMX</strong> Basic <strong>Module</strong>s 29.10.2009 Page 176 of 183
Fatal Error Code F 3326<br />
Fault message Plausibility fault position switching axis 2<br />
During position switching SOS, SLI or SDI is permanently<br />
Cause<br />
activated.<br />
Check activation of SOS<br />
Remedy<br />
Check activation of SLI<br />
Activation of SDI (only <strong>for</strong> monitoring via position)<br />
Fatal Error Code F 3336<br />
Fault message Fault in encoder alignment axis 2<br />
Cause<br />
Incorrect position triggering by system A<br />
Remedy<br />
Check encoder configuration<br />
Switch device off/on.<br />
Fatal Error Code F 3603 / F 3604<br />
Fault message<br />
Cause<br />
Remedy<br />
Faulty switching of relay K1<br />
Internal triggering of relay faulty<br />
Switch device off/on<br />
Fatal Error Code F 3605 / F 3606<br />
Fault message<br />
Cause<br />
Remedy<br />
Fatal Error Code F 3609<br />
Fault message<br />
Cause<br />
Remedy<br />
Fatal Error Code F 3610<br />
Fault message<br />
Cause<br />
Remedy<br />
Fatal Error Code F 3611<br />
Fault message<br />
Cause<br />
Remedy<br />
Fatal Error Code F 3612<br />
Fault message<br />
Cause<br />
Remedy<br />
Faulty switching of relay K2<br />
Internal triggering of relay faulty<br />
Switch device off/on<br />
Faulty switching of "0V" driver DO1_L<br />
Switching state of output faulty<br />
Switch device off/on<br />
Faulty switching of "24V" driver DO1_H<br />
Switching state of output faulty<br />
Switch device off/on<br />
Faulty switching of "0V" driver DO2_L<br />
Switching state of output faulty<br />
Switch device off/on<br />
Faulty switching of "24V" driver DO2_H<br />
Switching state of output faulty<br />
Switch device off/on<br />
<strong>Programming</strong> <strong>Manual</strong> – <strong>SMX</strong> Basic <strong>Module</strong>s 29.10.2009 Page 177 of 183
Fatal Error Code F 3613<br />
Fault message<br />
Cause<br />
Remedy<br />
Fatal Error Code F 3614<br />
Fault message<br />
Cause<br />
Remedy<br />
Fatal Error Code F 3615<br />
Fault message<br />
Cause<br />
Remedy<br />
Fatal Error Code F 3616<br />
Fault message<br />
Cause<br />
Remedy<br />
Fatal Error Code F 3617<br />
Fault message<br />
Fatal Error Code F 3618<br />
Fault message<br />
Fatal Error Code F 3619<br />
Fault message<br />
Fatal Error Code F 3620<br />
Fault message<br />
Fatal Error Code F 3621<br />
Fault message<br />
Fatal Error Code F 3622<br />
Fault message<br />
Faulty switching of "0V" driver DO1_L<br />
Short-circuit of outPort with "0V"<br />
Switch device off/on<br />
Faulty testing of "24V" driver DO1_H<br />
Short-circuit of outPort with "24V"<br />
Switch device off/on<br />
Faulty testing of "0V" driver DO2_L<br />
Short-circuit of outPort with "0V"<br />
Switch device off/on<br />
Faulty testing of "24V" driver DO2_H<br />
Short-circuit of outPort with "24V"<br />
Switch device off/on<br />
Internal error – please contact <strong>the</strong> manufacturer!<br />
Internal error – please contact <strong>the</strong> manufacturer!<br />
Internal error – please contact <strong>the</strong> manufacturer!<br />
Internal error – please contact <strong>the</strong> manufacturer!<br />
Internal error – please contact <strong>the</strong> manufacturer!<br />
Internal error – please contact <strong>the</strong> manufacturer!<br />
Fatal Error Code F 3701 / F 3702<br />
Fault message<br />
Internal error – please contact <strong>the</strong> manufacturer!<br />
<strong>Programming</strong> <strong>Manual</strong> – <strong>SMX</strong> Basic <strong>Module</strong>s 29.10.2009 Page 178 of 183
Fatal Error Code F 3821<br />
Fault message<br />
Cause<br />
Remedy<br />
Fatal Error Code F 3823<br />
Fault message<br />
Cause<br />
Remedy<br />
Fatal Error Code F 3825<br />
Fault message<br />
Cause<br />
Remedy<br />
Fatal Error Code F 3827<br />
Fault message<br />
Cause<br />
Remedy<br />
Fatal Error Code F 3829<br />
Fault message<br />
Cause<br />
Remedy<br />
Fatal Error Code F 3831<br />
Fault message<br />
Cause<br />
Remedy<br />
Fatal Error Code F 3833<br />
Fault message<br />
Cause<br />
Remedy<br />
Fatal Error Code F 3835<br />
Fault message<br />
Cause<br />
Remedy<br />
Fatal Error Code F 3837<br />
Fault message<br />
Cause<br />
Remedy<br />
Faulty switching of output EAAx.1<br />
Short-circuit of outPort with "24V" or "0V"<br />
Switch device off/on<br />
Faulty switching of output EAAx.2<br />
Short-circuit of outPort with "24V" or "0V"<br />
Switch device off/on<br />
Faulty switching of output EAAx.3<br />
Short-circuit of outPort with "24V" or "0V"<br />
Switch device off/on<br />
Faulty switching of output EAAx.4<br />
Short-circuit of outPort with "24V" or "0V"<br />
Switch device off/on<br />
Faulty switching of output EAAx.5<br />
Short-circuit of outPort with "24V" or "0V"<br />
Switch device off/on<br />
Faulty switching of output EAAx.6<br />
Short-circuit of outPort with "24V" or "0V"<br />
Switch device off/on<br />
Faulty switching of output EAAx.7<br />
Short-circuit of outPort with "24V" or "0V"<br />
Switch device off/on<br />
Faulty switching of output EAAx.8<br />
Short-circuit of outPort with "24V" or "0V"<br />
Switch device off/on<br />
Faulty switching of output EAAx.9<br />
Short-circuit of outPort with "24V" or "0V"<br />
Switch device off/on<br />
<strong>Programming</strong> <strong>Manual</strong> – <strong>SMX</strong> Basic <strong>Module</strong>s 29.10.2009 Page 179 of 183
Fatal Error Code F 3839<br />
Fault message<br />
Cause<br />
Remedy<br />
Faulty switching of output EAAx.10<br />
Short-circuit of outPort with "24V" or "0V"<br />
Switch device off/on<br />
Fatal Error Code F 3841 / F 3842<br />
Fault message<br />
Cause<br />
Remedy<br />
Faulty testing of output EAAx.1<br />
Short-circuit of outPort with "24V" or "0V"<br />
Switch device off/on<br />
Fatal Error Code F 3843 / F 3844<br />
Fault message<br />
Cause<br />
Remedy<br />
Faulty testing of output EAAx.2<br />
Short-circuit of outPort with "24V" or "0V"<br />
Switch device off/on<br />
Fatal Error Code F 3845 / F 3846<br />
Fault message<br />
Cause<br />
Remedy<br />
Faulty testing of output EAAx.3<br />
Short-circuit of outPort with "24V" or "0V"<br />
Switch device off/on<br />
Fatal Error Code F 3847 / F 3848<br />
Fault message<br />
Cause<br />
Remedy<br />
Faulty testing of output EAAx.4<br />
Short-circuit of outPort with "24V" or "0V"<br />
Switch device off/on<br />
Fatal Error Code F 3849 / F 3850<br />
Fault message<br />
Cause<br />
Remedy<br />
Faulty testing of output EAAx.5<br />
Short-circuit of outPort with "24V" or "0V"<br />
Switch device off/on<br />
Fatal Error Code F 3851 / F 3852<br />
Fault message<br />
Cause<br />
Remedy<br />
Faulty testing of output EAAx.6<br />
Short-circuit of outPort with "24V" or "0V"<br />
Switch device off/on<br />
Fatal Error Code F 3853 / F 3854<br />
Fault message<br />
Cause<br />
Remedy<br />
Faulty testing of output EAAx.7<br />
Short-circuit of outPort with "24V" or "0V"<br />
Switch device off/on<br />
Fatal Error Code F 3855 / F 3856<br />
Fault message<br />
Cause<br />
Remedy<br />
Faulty testing of output EAAx.8<br />
Short-circuit of outPort with "24V" or "0V"<br />
Switch device off/on<br />
<strong>Programming</strong> <strong>Manual</strong> – <strong>SMX</strong> Basic <strong>Module</strong>s 29.10.2009 Page 180 of 183
Fatal Error Code F 3857 / F 3858<br />
Fault message<br />
Cause<br />
Remedy<br />
Faulty testing of output EAAx.9<br />
Short-circuit of outPort with "24V" or "0V"<br />
Switch device off/on<br />
Fatal Error Code F 3859 / F 3860<br />
Fault message<br />
Cause<br />
Remedy<br />
Fatal Error Code F 3872<br />
Fault message<br />
Fatal Error Code F 3874<br />
Fault message<br />
Fatal Error Code F 3892<br />
Fault message<br />
Fatal Error Code F 3894<br />
Fault message<br />
Faulty testing of output EAAx.10<br />
Short-circuit of outPort with "24V" or "0V"<br />
Switch device off/on<br />
Internal error – please contact <strong>the</strong> manufacturer!<br />
Internal error – please contact <strong>the</strong> manufacturer!<br />
Internal error – please contact <strong>the</strong> manufacturer!<br />
Internal error – please contact <strong>the</strong> manufacturer!<br />
Fatal Error Code F 4503 / F 4504<br />
Alarm message<br />
Cause<br />
Remedy<br />
Faulty calculation of SSX limit curve<br />
Faulty calculation of SSX limit curve<br />
Check configuration<br />
Consult <strong>the</strong> manufacturer<br />
Fatal Error Code F 4501 / F 4502<br />
Alarm message<br />
Cause<br />
Remedy<br />
Faulty calculation of SSX brake ramp<br />
Faulty configuration<br />
Check SSX configuration<br />
Consult <strong>the</strong> manufacturer<br />
Fatal Error Code F 6801 / F 6802<br />
Fault message<br />
Internal error – please contact <strong>the</strong> manufacturer!<br />
Fatal Error Code F 6803 / F 6804<br />
Fault message<br />
Internal error – please contact <strong>the</strong> manufacturer!<br />
Fatal Error Code F 6805 / F 6806<br />
Fault message<br />
Internal error – please contact <strong>the</strong> manufacturer!<br />
<strong>Programming</strong> <strong>Manual</strong> – <strong>SMX</strong> Basic <strong>Module</strong>s 29.10.2009 Page 181 of 183
Fatal Error Code F 6807 / F 6808<br />
Fault message<br />
Internal error – please contact <strong>the</strong> manufacturer!<br />
Fatal Error Code F 6809 / F 6810<br />
Fault message<br />
Internal error – please contact <strong>the</strong> manufacturer!<br />
Fatal Error Code F 6811 / F 6812<br />
Fault message<br />
Internal error – please contact <strong>the</strong> manufacturer!<br />
Fatal Error Code F 6813 / F 6814<br />
Fault message<br />
Internal error – please contact <strong>the</strong> manufacturer!<br />
Fatal Error Code F 8205 / F 8206<br />
Fault message<br />
Internal error – please contact <strong>the</strong> manufacturer!<br />
Fatal Error Code F 8207 / F 8208<br />
Fault message<br />
Internal error – please contact <strong>the</strong> manufacturer!<br />
Fatal Error Code F 8213 / F 8214<br />
Fault message<br />
Fatal Error Code F 8220<br />
Fault message<br />
Internal error – please contact <strong>the</strong> manufacturer!<br />
Internal error – please contact <strong>the</strong> manufacturer!<br />
Fatal Error Code F 8221 / F 8222<br />
Fault message<br />
Internal error – please contact <strong>the</strong> manufacturer!<br />
Fatal Error Code F 8223 / F 8224<br />
Fault message<br />
Fatal Error Code F 8225<br />
Fault message<br />
Fatal Error Code F 8227<br />
Fault message<br />
Fatal Error Code F 8228<br />
Fault message<br />
Internal error – please contact <strong>the</strong> manufacturer!<br />
Internal error – please contact <strong>the</strong> manufacturer!<br />
Internal error – please contact <strong>the</strong> manufacturer!<br />
Internal error – please contact <strong>the</strong> manufacturer!<br />
<strong>Programming</strong> <strong>Manual</strong> – <strong>SMX</strong> Basic <strong>Module</strong>s 29.10.2009 Page 182 of 183
Fatal Error Code F 9001 / F 9002<br />
Fault message<br />
Internal error – please contact <strong>the</strong> manufacturer!<br />
Fatal Error Code F 9007 / F 9008<br />
Fault message<br />
Internal error – please contact <strong>the</strong> manufacturer!<br />
Fatal Error Code F 9009 / F 9010<br />
Fault message<br />
Internal error – please contact <strong>the</strong> manufacturer!<br />
Fatal Error Code F 9011 / F 9012<br />
Fault message<br />
Internal error – please contact <strong>the</strong> manufacturer!<br />
Fatal Error Code F 9013 / F 9014<br />
Fault message<br />
Internal error – please contact <strong>the</strong> manufacturer!<br />
Fatal Error Code F 9015 / F 9016<br />
Fault message<br />
Internal error – please contact <strong>the</strong> manufacturer!<br />
Fatal Error Code F 9017 / F 9018<br />
Fault message<br />
Internal error – please contact <strong>the</strong> manufacturer!<br />
<strong>Programming</strong> <strong>Manual</strong> – <strong>SMX</strong> Basic <strong>Module</strong>s 29.10.2009 Page 183 of 183